Showing 569 Result(s)
Breakfast

Chicken Alfredo Bread Boat
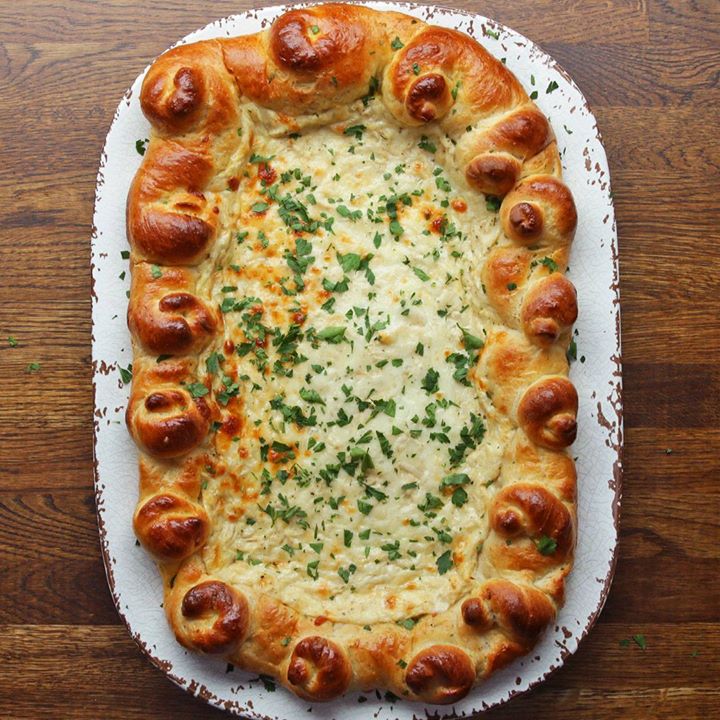
Chicken Alfredo Bread Boat
Author:
Cuisine: American
Recipe type: Breakfast
Ingredients
DOUGH
  • 1 cup (240 mL) water
  • ½ cup (120 mL) whole milk
  • 2 ½ cups (310 g) all-purpose flour, plus 3 tablespoons, divided
  • 1 tablespoon sugar
  • 1 teaspoon salt
  • 1 tablespoon garlic powder
  • ½ cup (55 g) grated parmesan cheese
  • 1 teaspoon yeast
  • 2 tablespoons olive oil, plus more as needed
CHICKEN ALFREDO
  • 2 ½ cups (310 g) chicken, cooked, shredded
  • 2 ½ cups (250 g) shredded mozzarella cheese, divided
  • ½ cup (55 g) grated parmesan cheese
  • 1 tablespoon garlic powder
  • ½ teaspoon pepper
  • 2 cups (520 g) alfredo sauce
  • 1 egg, beaten
  • 3 tablespoons fresh parsley
Instructions
  1. Preheat the oven to 450˚F (230˚C).
  2. In a microwave-proof liquid measuring cup, combine the water and the milk. Microwave on high for 45 seconds.
  3. In a large bowl, combine the flour, sugar, salt, garlic powder, Parmesan, and yeast. Mix thoroughly. Pour the milk mixture over the dry ingredients. Stir to combine. Knead the dough on a clean surface for 5 minutes until smooth, if the dough is sticking to the surface add olive oil 1 teaspoon at a time, then form into a tight ball.
  4. Drizzle 2 tablespoons olive oil in a large bowl. Place the dough in the bowl and cover with plastic wrap. Let rise for 1 hour.
  5. In a separate large bowl, combine the chicken, 2 cups (200 g) mozzarella, Parmesan, garlic powder, pepper, and alfredo sauce. Mix thoroughly.
  6. Place the risen dough onto a floured surface. Roll out the dough so it is twice as long as it is wide and about ¼ inch (½ cm) thick.
  7. Transfer the dough to a parchment-lined baking sheet. Roll up all of the sides of the dough to create an oval shape. Pinch the dough and pull it while twisting, wrapping the dough into little spirals and placing it onto the rolled edge of the dough. Continue all the way around until you have several little spirals of dough.
  8. Pour the chicken alfredo mixture over the dough and spread it until it reaches the edges of the dough. Brush the sides of the dough with egg wash. Sprinkle the rest of the mozzarella on top of the chicken alfredo mixture.
  9. Bake for 30 minutes, until the crust is golden brown.
  10. Sprinkle with parsley. Serve immediately.
  11. Enjoy!

Watch the recipe video here:

Chicken Alfredo Party Boat

Your beloved chicken alfredo gets an upgrade… ?!!FULL RECIPE: https://tasty.co/recipe/chicken-alfredo-bread-boat

Posted by Tasty on Wednesday, April 18, 2018
Breakfast

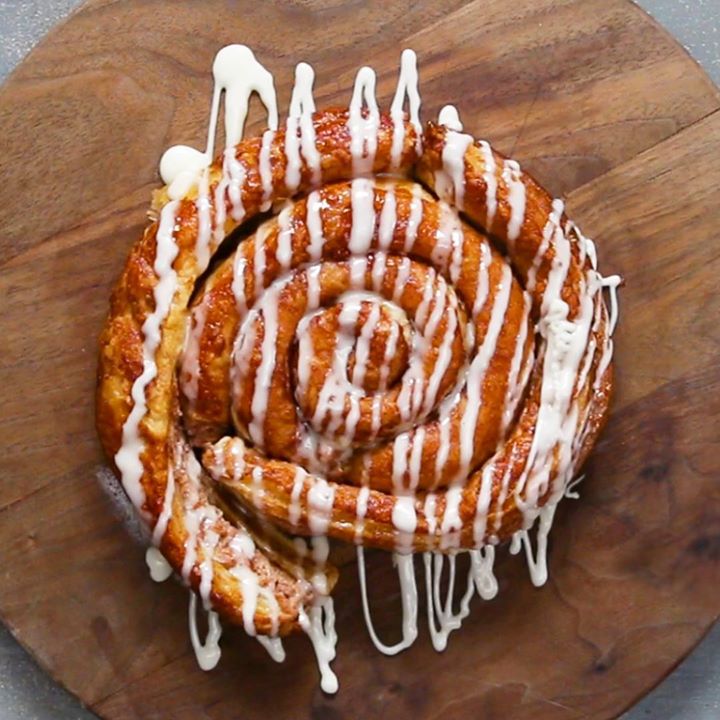
Cinnamon Swirl Danish

Cinnamon Swirl Danish
Author:
Cuisine: American
Recipe type: Breakfast
Ingredients
  • nonstick cooking spray
  • 8 oz (225 g) cream cheese, softened
  • ¼ cup (50 g) granulated sugar, plus 1 tablespoon, divided
  • 2 teaspoons cinnamon, divided
  • 1 teaspoon vanilla extract
  • 17.5 oz (495 g) puff pastry, 1 sheet
  • 2 tablespoons unsalted butter, melted
GLAZE
  • ½ cup (80 g) powdered sugar
  • 2 tablespoons milk, or heavy cream
Instructions
  1. Preheat the oven 350°F (180°C) to and grease an 8-inch (20-cm) round cake pan with nonstick spray.
  2. In a medium bowl, mix the cream cheese, ¼ cup (50 G) of sugar, 1 teaspoon of cinnamon, and the vanilla until smooth.
  3. Transfer the cream cheese mixture into a piping bag or plastic bag with a large round tip.
  4. Roll out the puff pastry until it’s ⅛-inch (½-cm) thick.
  5. Pipe the cream cheese mixture along one short edge of the pastry sheet, then roll up until just sealed.
  6. Use a knife to cut along the edge to create one roll.
  7. Repeat three more times, or until all the puff pastry is used.
  8. Begin to twist the first roll to create a swirl.
  9. Connect the next piece of dough by pinching to seal the edge to the end of the first piece.
  10. Continue to wrap and seal all pieces until finished.
  11. Using a spatula transfer the dough to the cake pan.
  12. In a small bowl, combine the melted butter with the remaining tablespoon of sugar and teaspoon of cinnamon.
  13. Brush the butter mixture over the dough.
  14. Bake for 35-40 minutes, or until the puff pastry is golden brown and cooked through.
  15. In a liquid measuring cup or bowl, mix the powdered sugar and milk until smooth.
  16. Pour the glaze over the danish swirl.
  17. Enjoy!

Watch the recipe video here:

Cinnamon Swirl Danish

A cinnamon swirl Danish? YES, PLEASE! ??FULL RECIPE: https://tasty.co/recipe/cinnamon-swirl-danish

Posted by Tasty on Monday, April 16, 2018

Dessert

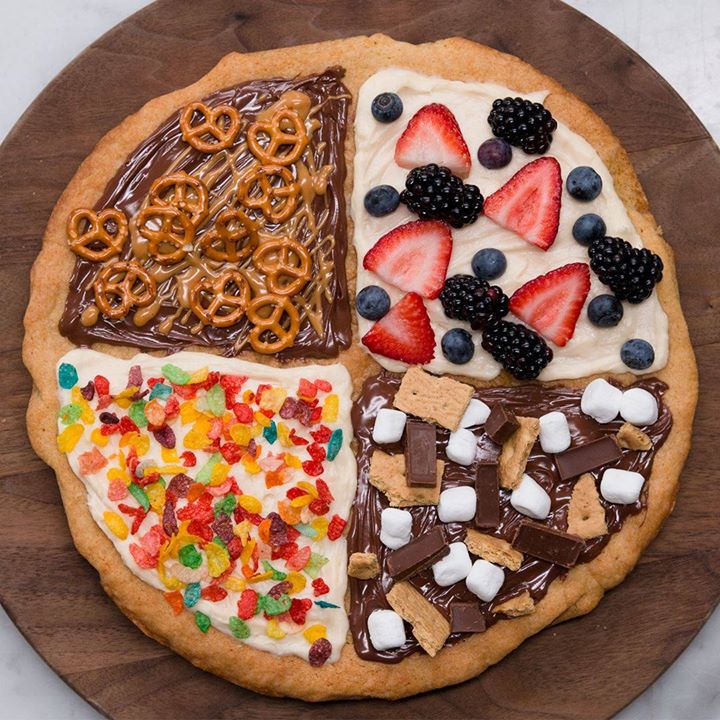
Sugar Cookie “Pizza”

Sugar Cookie “Pizza”
Author:
Cuisine: American
Recipe type: Dessert
Ingredients
  • ½ cup (115 g) unsalted butter, 1 stick, softened
  • 1 ½ teaspoons vanilla extract, divided
  • ½ cup (100 g) granulated sugar
  • 3 tablespoons light brown sugar
  • 1 large egg, room temperature
  • 1 ½ cups (60 g) all-purpose flour
  • 1 teaspoon cream of tartar
  • ½ teaspoon baking soda
  • 1 pinch salt
  • 6 oz (170 g) cream cheese, room temperature
  • ⅓ cup (50 g) powdered sugar
  • ⅓ cup (95 g) chocolate hazelnut spread
OPTIONAL TOPPINGS
  • fresh berries
  • peanut butter
  • mini pretzel
  • fruit cereal
  • mini marshmallows
  • graham cracker, chopped
  • chocolate chunk
Instructions
  1. Preheat the oven to 350˚F (180˚C). Line a 10-inch (25-cm) cast iron pan with parchment paper.
  2. In a large bowl, mix the butter with 1 teaspoon of vanilla extract until light and fluffy.
  3. Add the granulated sugar, then the brown sugar, and mix until well incorporated.
  4. Add the egg and stir until thoroughly incorporated.
  5. Using a fine mesh sieve, sift the flour, cream of tartar, baking soda, and salt into the dough. Combine with a spatula until evenly mixed.
  6. Spread the cookie dough in an even layer in the prepared pan. Chill in the fridge for 30 minutes, then bake for 15-18 minutes until lightly golden. Let cool.
  7. In a medium bowl, combine the cream cheese, powdered sugar, and remaining ½ teaspoon of vanilla extract until well incorporated.
  8. Spread half of the frosting onto a quarter of the cooled cookie and the other half on the diagonally opposite corner.
  9. Frost the other quarters with the chocolate hazelnut spread.
  10. Decorate with your favorite toppings.
  11. Enjoy!

Watch the recipe video here:

Sugar Cookie "Pizza"

How would you top your sugar cookie "pizza"?! ❤️FULL RECIPE: https://tasty.co/recipe/sugar-cookie-pizza

Posted by Tasty on Tuesday, April 17, 2018

Breakfast

The Ultimate Grilled Cheese And Tomato Soup Bowl

The Ultimate Grilled Cheese And Tomato Soup Bowl
Author:
Cuisine: American
Recipe type: Breakfast
Ingredients
TOMATO SOUP
  • 3 tablespoons unsalted butter
  • 1 large yellow onion, chopped
  • 2 cloves garlic, minced
  • 14 oz (395 g) crushed tomato, 1 can
  • 2 cups (480 mL) chicken broth
  • ¼ cup (60 mL) heavy cream
  • 2 teaspoons salt
  • 1 teaspoon pepper
GRILLED CHEESE BOWL
  • 11 slices white bread
  • 2 tablespoons butter, melted, plus more for greasing bowl
  • 2 cloves garlic, minced
  • 1 large egg, beaten
  • 7 slices cheddar cheese
CROUTON FRIES
  • 1 tablespoon olive oil
  • 2 teaspoons dried oregano
  • ½ teaspoon pepper
  • 1 teaspoon salt
Instructions
  1. Make the tomato soup: melt the butter in a large pot over medium-high heat. Add the onion and stir for 6-8 minutes, until the onions just start to brown.
  2. Add the garlic and stir for another minute. Stir in the crushed tomatoes, chicken broth, heavy cream, salt, and pepper.
  3. Bring the soup to a boil, then reduce the heat to low, cover, and simmer for 15 minutes.
  4. Remove the soup from heat and transfer to a blender. Remove vent so that steam can escape. Blend for 2 minutes, until the soup is smooth and thick. Alternatively, leave the soup in the pot and use an immersion blender.
  5. Make the grilled cheese bowl: cut the crusts off the bread and set aside in a medium bowl.
  6. Arrange the bread slices into 3 lines: a line of 5, a line of 4, and a line of 2.
  7. In a small bowl, combine the melted butter and garlic and use a brush to spread the mixture over each piece of bread.
  8. Preheat the oven to 400°F (200°C).
  9. Brush the bottom of each slice in egg wash and then dab the bottom of each piece of bread in the line of 5 and the line of 4. Dab all four sides of the bread in the group of 2. Overlap the edges of the 5 pieces of bread, then press the edges together to adhere. Repeat with the line of 4.
  10. In a greased medium oven-safe bowl, place one of the single slices of bread. Then, take the line of 5 slices and make it into a circle on the inside of the bowl. Press down the edges to adhere to the piece of bread at the bottom of the bowl.
  11. Cover the bread with 6 slices of cheese. Lay the remaining single slice of bread over the cheese, then make a circle with the line of 4 slices of bread, pressing to seal the edges and adhere to the bread below. Lay the remaining slice of cheese on the bottom.
  12. Using a small bowl, press down on the bread bowl to compress slightly.
  13. Bake for 15 minutes, until the bread is golden brown.
  14. Make the crouton fries: Add the olive oil, oregano, pepper, and salt to the bowl with the crusts. Toss until thoroughly coated. Transfer the crusts to a large baking sheet.
  15. Bake for 5 minutes, until the crusts are golden brown.
  16. Remove the bowl and crouton fries from oven. Use tongs to move the bread bowl from the bowl to a serving dish. Fill with tomato soup.
  17. Enjoy!

Watch the recipe video here:

The Ultimate Grilled Cheese And Tomato Soup Bowl

The ultimate comfort food: grilled cheese and tomato soup bowl ?!FULL RECIPE: https://tasty.co/recipe/the-ultimate-grilled-cheese-and-tomato-soup-bowl

Posted by Tasty on Monday, April 16, 2018

Main dish

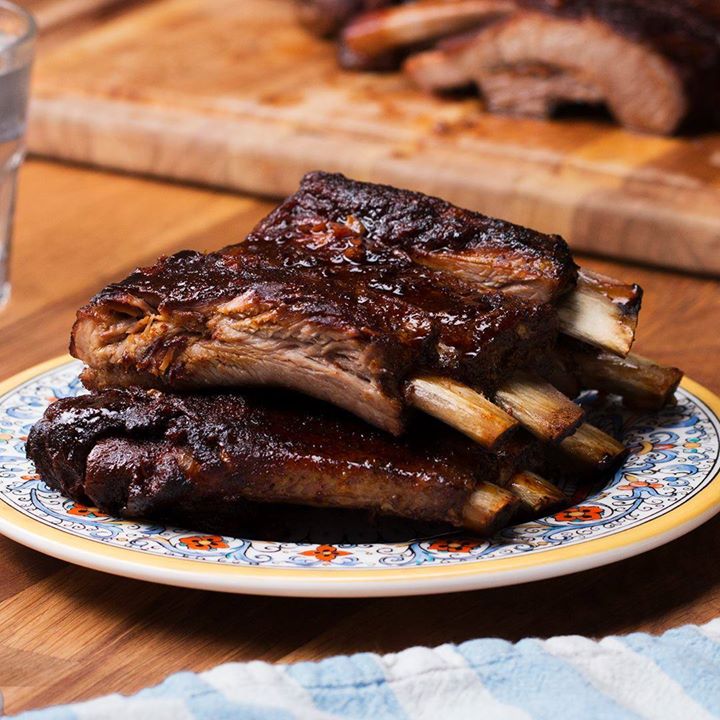
Honey Garlic Slow Cooker Ribs

Honey Garlic Slow Cooker Ribs
Author:
Cuisine: American
Recipe type: Main dish
Ingredients
  • 2 ½ lb (1 kg) rack of pork rib, halved
  • 1 tablespoon salt
  • 1 tablespoon pepper
  • 1 tablespoon paprika
  • 1 tablespoon chili powder
  • 1 cup (340 g) honey
  • ½ cup (120 mL) soy sauce
  • 10 garlic cloves, minced
Instructions
  1. Season ribs evenly with salt, pepper, paprika, and chili powder. Rub in on all sides.
  2. Add honey, soy sauce, and garlic to a large slow cooker.
  3. Transfer the ribs to slow cooker and turn them over in sauce until coated. Position the ribs so they are standing up, with the meatier side down, and so the meat side is against the walls of the slow cooker, with the bone sides facing in.
  4. Cover and cook on high for 4 hours, or low for 7 - 8 hours. Check after the allotted time, you want to make sure the meat is cooked through and tender.
  5. Remove the ribs and transfer to cutting board.
  6. Cut between the bones to separate into individual ribs.
  7. Serve with additional sauce from the slow cooker, as needed.
  8. Enjoy!

Watch the recipe video here:

Easy Honey Garlic Slow Cooker Ribs

These slow cooker ribs are mouth-watering! ?FULL RECIPE: https://tasty.co/recipe/honey-garlic-slow-cooker-ribs

Posted by Tasty on Friday, April 13, 2018

Dessert

Meatball-Stuffed Onion Ring Cone

Meatball-Stuffed Onion Ring Cone
Author:
Cuisine: American
Recipe type: Dessert
Ingredients
  • ONION RINGS
  • 2 large white onions
  • 1 cup (125 g) all-purpose flour
  • 6 large eggs, beaten
  • 3 cups (150 g) panko breadcrumbs
  • MEATBALLS
  • 1 lb (455 g) ground beef
  • 1 small yellow onion, finely chopped
  • 1 clove garlic, minced
  • ½ cup (55 g) grated parmesan cheese
  • ½ cup (25 g) panko breadcrumbs
  • ¼ cup (10 g) fresh flat-leaf parsley, finely chopped
  • 1 tablespoon worcestershire sauce
  • 1 large egg
  • 1 teaspoon salt
  • ½ teaspoon black pepper
  • oil, for frying
  • marinara sauce, for serving
  • grated parmesan cheese, for serving
  • fresh basil, chopped
Instructions
  1. On a cutting board, peel the onions, and cut into ½-inch (1 ¼-cm) rings. Separate the rings.
  2. Sort the onion rings into four cones, starting with a big ring and going up to a small one.
  3. Place the flour, eggs, and panko in 3 separate medium bowls.
  4. Dip an onion ring into the flour, shaking off any excess. Dip it into the eggs, then the panko, then back into the eggs, and into the panko again.
  5. Place the onion ring on a greased, parchment-lined baking sheet. Repeat with remaining onion rings, creating four stacked cones on the tray. Freeze the onions ring cones for 1-3 hours.
  6. Preheat the oven to 400˚F (200˚C).
  7. In a medium bowl, mix the ground beef, onion, garlic, Parmesan, panko, parsley, Worcestershire, egg, salt, and pepper with your hands until fully combined.
  8. Take a baseball-size handful of the meat mixture and roll it into a ball. Transfer to a parchment-lined baking sheet. Repeat with the remaining meat mixture, creating four meatballs total.
  9. Bake for 18 minutes.
  10. Heat the oil in a large pot over medium heat until it reaches 350˚F (180˚C).
  11. Gently lower one frozen onion ring cone into the oil. Fry until golden brown all over, 2-4 minutes.
  12. Remove the cone with a slotted spoon and transfer to a wire rack set over paper towels to drain. Repeat with the remaining onion ring cones.
  13. Add 1 meatball to each onion ring cone. Top with marinara sauce, grated Parmesan cheese, and basil.
  14. Enjoy!

Watch the recipe video here:

Meatball-Stuffed Onion Ring Cones

We transformed onion rings into the most delicious vessel… ? ?FULL RECIPE: https://tasty.co/recipe/meatball-stuffed-onion-ring-cone

Posted by Tasty on Saturday, April 14, 2018

Breakfast

Cheesesteak-Stuffed Peppers

Cheesesteak-Stuffed Peppers
Author:
Cuisine: American
Recipe type: Breakfast
Ingredients
  • 1 lb (455 g) flank steak
  • 1 tablespoon olive oil
  • 1 tablespoon paprika
  • 1 tablespoon garlic powder
  • 1 teaspoon pepper, divided
  • 2 teaspoons salt, divided
  • 2 tablespoons worcestershire sauce
  • 2 tablespoons unsalted butter
  • 3 large white onions, sliced
  • 3 green bell peppers, sliced
  • 6 red bell peppers
  • 15 slices provolone cheese
  • 2 tablespoons fresh parsley, chopped, for garnish
Instructions
  1. Preheat the oven to 400˚F (200˚C).
  2. Cut the flank steak against the grain into ⅛-inch (3-mm) thick slices.
  3. In a large skillet over medium heat, heat the olive oil, until shimmering. Add the steak, paprika, garlic powder, ½ teaspoon of pepper, 1 teaspoon of salt, and the Worcestershire sauce.
  4. Mix to coat the meat with the spices and cook until the meat is cooked through, about 3 minutes. Transfer the meat a bowl, leaving the juices in the pan. Cover and set aside until ready to use.
  5. Add the butter to the pan with the meat juices. Add the onions and cook until tender and shiny, about 10 minutes. Add the green bell peppers and the remaining ½ teaspoon of pepper and teaspoon of salt, and cook until the onions and peppers are caramelized, about 10 minutes.
  6. Cut the top off of a red bell pepper. Cut around the seed pod, then pull it out of the pepper. Remove any remaining seeds. Repeat with the rest of the peppers.
  7. Cut 9 of the provolone slices in half.
  8. Place the peppers in a 9x13-inch (23x33-cm) baking dish, cut side up. Scoop a bit of steak filling into each pepper, followed by the peppers and onions, then 3 half slices of provolone. Repeat with the rest of the steak, then the rest of the peppers and onions. Place a whole slice of provolone on top of each pepper.
  9. Bake for 30 minutes, until the skin of the peppers is shriveling, and the cheese is golden.
  10. Top with parsley.
  11. Enjoy!

Watch the recipe video here:

Cheesesteak-Stuffed Peppers

These cheesesteak-stuffed peppers are an easy low-carb dinner! ?FULL RECIPE: https://tasty.co/recipe/cheesesteak-stuffed-peppers

Posted by Tasty on Sunday, April 1, 2018

Main dish

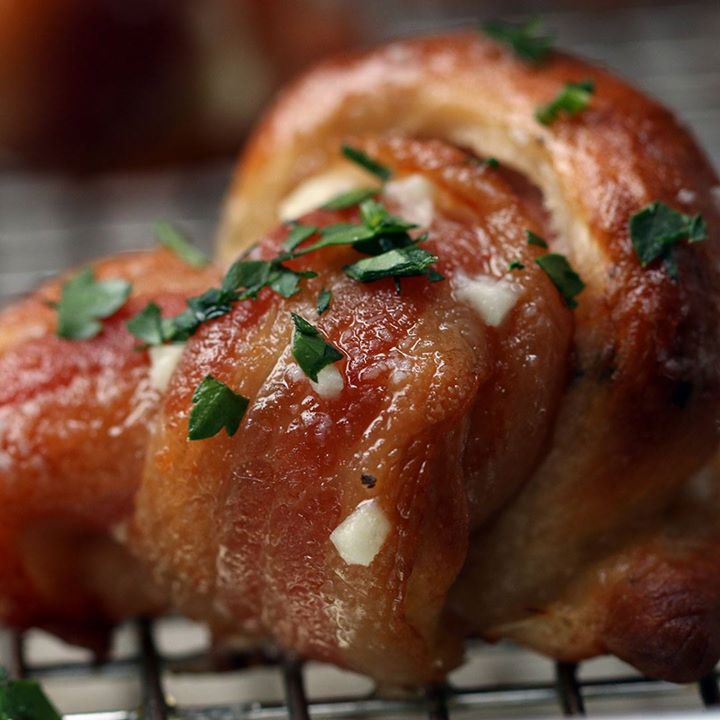
Bacon-Wrapped Parmesan Garlic Knots

Bacon-Wrapped Parmesan Garlic Knots
Author:
Cuisine: American
Recipe type: Main dish
Ingredients
  • 1 ⅓ cups (320 mL) warm water
  • 1 ½ teaspoons active dry yeast
  • 3 ½ cups (435 g) all-purpose flour
  • ¼ cup (30 g) grated parmesan cheese, plus 2 tsp, divided
  • 2 teaspoons sugar
  • 1 teaspoon baking powder
  • 1 teaspoon kosher salt
  • 1 teaspoon dried basil
  • 1 teaspoon dried oregano
  • 3 tablespoons olive oil, divided
  • 30 strips bacon
  • 5 tablespoons unsalted butter, melted
  • 4 cloves garlic, minced
  • 1 tablespoon fresh parsley, chopped, for serving
  • marinara sauce, for serving
Instructions
  1. Add the warm water to a medium bowl. Sprinkle the yeast over the water and let sit for 5 minutes, or until mixture is frothy.
  2. In a large bowl, whisk together the flour, Parmesan cheese, sugar, baking powder, salt, basil, and oregano.
  3. Add 2 tablespoons of olive oil and the yeast-water mixture. Mix with a rubber spatula until a ball of dough forms.
  4. Dump the dough out onto a clean surface and knead for about 5 minutes, until the dough is springy.
  5. Grease the large bowl with the remaining tablespoon of olive oil. Place the dough in the bowl, cover with plastic wrap, and let rise in a warm place for 1 hour, or until doubled in size.
  6. Preheat the oven to 425°F (220°C).
  7. Sprinkle a bit of flour over the dough then dump onto a clean surface. Tear the dough into 30 separate pieces, then roll into 6 inch (15-cm) long strips.
  8. Place a strip of bacon over each dough strip. Tie both together to form a knot.
  9. Place the knots on a wire rack placed over a baking sheet.
  10. Bake for 20 minutes, or until bread is golden brown and the bacon is crispy.
  11. In a small bowl, mix together the butter, garlic, and remaining 2 teaspoons of Parmesan cheese.
  12. Brush the knots with the butter mixture and bake for another 5 minutes.
  13. Transfer to a serving plate. Garnish with chopped parsley.
  14. Serve with marinara sauce alongside.
  15. Enjoy!

Watch the recipe video here:

Bacon-Wrapped Parmesan Garlic Knots

We wrapped garlic knots in bacon and we'll probably never go back ?…FULL RECIPE: https://tasty.co/recipe/bacon-wrapped-parmesan-garlic-knots

Posted by Tasty on Sunday, April 8, 2018

Breakfast

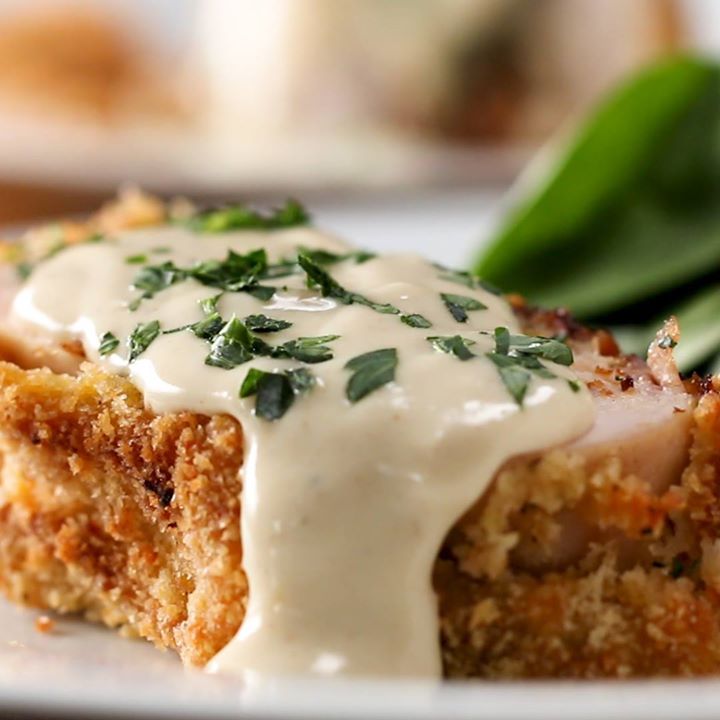
Crispy Baked Chicken Roll

Crispy Baked Chicken Roll
Author:
Cuisine: American
Recipe type: Breakfast
Ingredients
  • 5 strips bacon
  • 1 medium yellow onion, sliced
  • 2 cups (80 g) fresh spinach
  • 5 chicken breasts
  • 2 teaspoons salt
  • 1 teaspoon pepper
  • 10 slices ham
  • 12 slices swiss cheese
  • 3 cups (375 g) all-purpose flour
  • 8 large eggs, beaten
  • 3 cups (150 g) panko breadcrumbs
  • fresh parsley, chopped, for sprinkling
  • CREAMY DIJON SAUCE
  • 3 tablespoons butter
  • 2 cloves garlic, minced
  • 3 tablespoons flour
  • 2 cups (470 mL) milk
  • ¼ cup (60 g) dijon mustard
  • salt, to taste
  • pepper, to taste
  • 1 cup (100 g) shredded parmesan cheese
Instructions
  1. In a medium cast iron skillet or pan, cook the bacon until almost brown, about 5 minutes.
  2. Add the onions and cook, stirring, until caramelized, about 10 minutes.
  3. Add the spinach and cook until wilted, about 3 minutes. Remove the pan from the heat.
  4. Place a chicken breast on a piece of plastic wrap. Cover with more plastic wrap and pound until thin. Repeat with remaining chicken breasts.
  5. Lay out a large piece of plastic wrap and layer the chicken on the plastic so the edges are overlapping slightly.
  6. Season with salt and pepper.
  7. Layer the ham, Swiss cheese, and bacon-carmelized onion mixture over the chicken.
  8. Roll the chicken into a log tightly wrap in plastic, twisting the ends to seal.
  9. Refrigerate for 1 hour to set.
  10. Add the flour, eggs, and panko to 3 separate baking sheets or other wide, shallow dishes. Roll the chicken in the flour, then in the egg, and finally in the panko. Coat once more in the egg, then panko.
  11. Transfer the chicken roll to a greased baking sheet and bake at 375° (190 celsius) for 40 minutes, until golden brown.
  12. Make the creamy Dijon sauce: in a small pot over medium heat, melt the butter. Add the garlic and cook until aromatic. Add the flour and cook until starting to brown. Whisk in the milk, then add the mustard and season with salt and pepper. Add the Parmesan and cook until the sauce is thickened.
  13. Slice the chicken roll and serve with the sauce and fresh parsley.
  14. Enjoy!

Watch the recipe video here:

Crispy Baked Chicken Roll

It's crispy, it's stuffed, and it's DELICIOUS ?!FULL RECIPE: https://tasty.co/recipe/crispy-baked-chicken-roll

Posted by Tasty on Monday, April 9, 2018

Breakfast

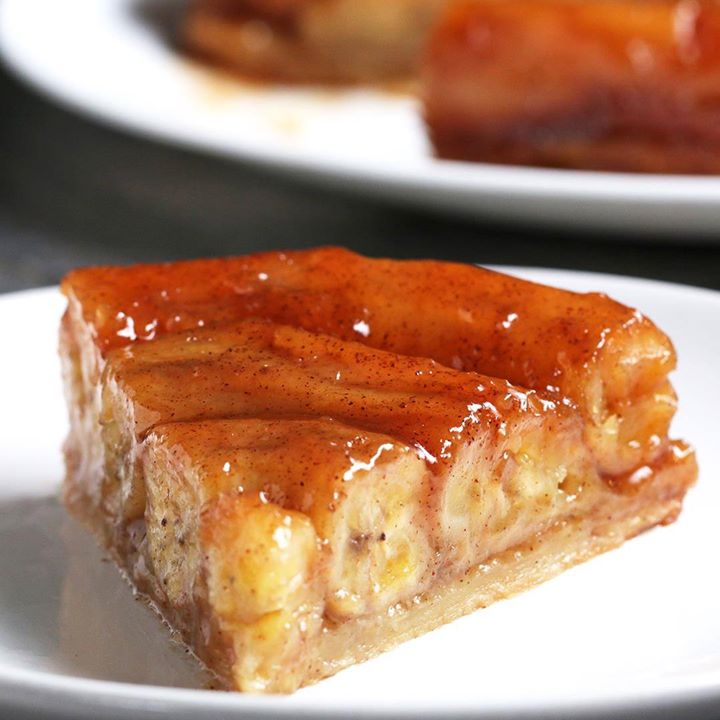
Upside-Down Banana Tart

Upside-Down Banana Tart
Author:
Cuisine: American
Recipe type: Breakfast
Ingredients
  • 1 sheet puff pastry, 9x9 in (23x23 cm)
  • 6 bananas
  • 8 tablespoons unsalted butter, 1 stick
  • 1 cup (220 g) brown sugar
  • 1 teaspoon vanilla
  • 1 teaspoon cinnamon
  • vanilla ice cream, for serving
Instructions
  1. Preheat the oven to 375˚F (190˚C).
  2. Using an 8-inch (20-cm) round cake pan, cut a circle out from the puff pastry. Using a fork, poke holes all over the pastry to provide ventilation. Set aside.
  3. Cut the tops and bottoms off of the bananas, then halve 2 of the bananas crosswise and set aside.
  4. In a large saucepan over medium heat, melt the butter, then add the brown sugar and cook until fully incorporated and the sauce appears amber in color, about 5 minutes.
  5. Add the vanilla and cinnamon. Stir until combined.
  6. Add the bananas to the pan and cook until softened, about 2 minutes.
  7. Turn the bananas to fully coat them with the caramel, then remove from the pan. Reserve the caramel.
  8. Grease the cake pan. Arrange the bananas on the bottom of the pan. Pour over the caramel sauce.
  9. Cover the bananas with the circle of puff pastry and ensure the edges are tucked into the pan.
  10. Bake for 30 minutes, or until the pastry is puffed and golden.
  11. Let cool at room temperature for at least 30 minutes before inverting onto a serving plate.
  12. Slice and serve with vanilla ice cream.
  13. Enjoy!

Watch the recipe video here:

Upside-Down Banana Tart

This upside-down banana tart has the most beautiful glazed top ? ?!FULL RECIPE: https://tasty.co/recipe/upside-down-banana-tart

Posted by Tasty on Saturday, April 7, 2018