Showing 349 Result(s)
Dessert

Mama Pat’s Chocolate Brownie Pie
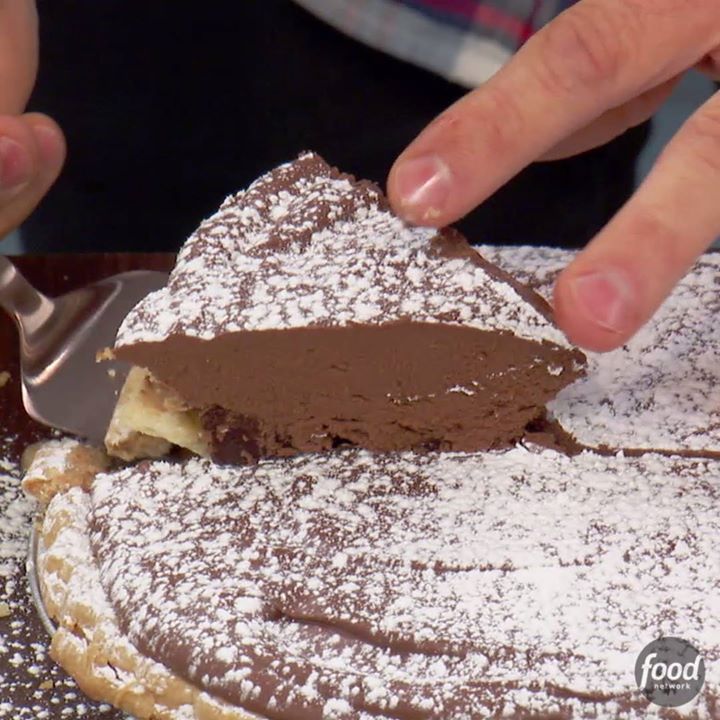
Mama Pat's Chocolate Brownie Pie
This Brownie Pie is a chocolate-lover's dream ??
Author:
Cuisine: American
Recipe type: Dessert
Ingredients
  • 1 (9-inch) frozen unbaked piecrust shell
  • Ryan's Quick Chocolate Ganache, recipe follows
  • 1 cup store-bought brownies, cut into ½-inch cubes (2 to 3 brownies)
  • ½ cup store-bought caramel sauce
  • 1 cup heavy cream
  • 2 teaspoons instant espresso
  • Confectioners' sugar, for dusting
Ryan's Quick Chocolate Ganache:
  • 2½ cups semisweet chocolate chips
  • 1 cup heavy cream
  • 1 tablespoon light corn syrup
  • 1 teaspoon vanilla extract
  • ⅛ teaspoon kosher salt
Instructions
  1. Preheat the oven to 375 degrees F. Line the piecrust shell with parchment paper, and fill it with pie weights, dried beans, or uncooked rice. Bake for 15 minutes. Remove the pie weights and parchment paper. Return the pie crust to the oven, and bake until lightly browned, about 5 minutes more. Remove to a wire rack, and cool for 30 minutes.
  2. Meanwhile, let the prepared ganache stand at room temperature 30 minutes.
  3. Sprinkle the brownie cubes on the bottom of the pie crust; top with the caramel sauce, drizzling it evenly. Beat the ganache, heavy cream, and espresso with an electric mixer on medium-high speed until fluffy. Using a spatula, spread the ganache mixture evenly over the top of the pie.
  4. Chill the pie, uncovered, for 2 hours. Dust with the confectioners' sugar just before serving.
Ryan's Quick Chocolate Ganache:
  1. Put the chocolate chips in a heatproof mixing bowl. Stir together the cream, corn syrup, vanilla, and salt in a small saucepan; bring to a boil over medium-high. Pour the hot cream mixture over the chocolate chips, making sure all the chips are submerged. (Do not stir or touch the chocolate mixture.) Cover the bowl with plastic wrap, and let it stand for 5 minutes.
  2. Using a spatula and starting from the bottom of the bowl, gently move the mixture from side to side to begin combining the chocolate with the cream mixture. Gradually and slowly stir from the middle until smooth and blended, 2 to 3 minutes.

Watch the recipe video here:

How To Make Mama Pat's Chocolate Brownie Pie

This Brownie Pie is a chocolate-lover's dream ??

Posted by Food Network on Friday, October 6, 2017
Cake Dessert

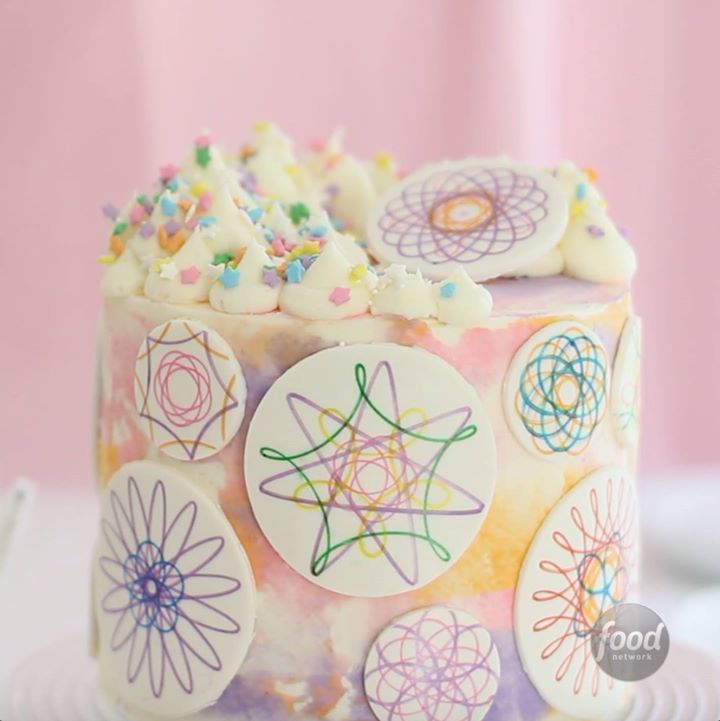
Spirograph Cake

Spirograph Cake
This colorful cake will make you feel like a kid again--and you'll have as much fun now experimenting with different designs as you did back then.
Author:
Cuisine: American
Recipe type: Cake
Ingredients
Spirograph® Decor:
  • 8 ounces white fondant
  • Confectioners' sugar, if needed
  • Fine-tipped food color markers in assorted colors
Chocolate Cake:
  • Flour-based cooking spray, for the baking pans
  • 6 ounces (1½ sticks) unsalted butter, softened
  • 1⅓ cups granulated sugar
  • 2 tablespoons vegetable oil
  • 2 large eggs
  • ¾ cup unsweetened dark cocoa powder
  • 1½ cups all-purpose flour
  • 1 teaspoon baking soda
  • ½ teaspoon salt
  • ½ cup sour cream
  • 1 cup hot brewed coffee
Buttercream Frosting:
  • 1 pound (4 sticks) unsalted butter, softened
  • 2 pounds confectioners' sugar
  • 1 tablespoon clear vanilla extract
  • ⅓ to ⅔ cup heavy cream
  • Pink, orange and lavender gel food color
  • Assorted sprinkles and nonpareils
Instructions
  1. Special equipment: Spirograph® drawing tools, graduated round cookie cutters, three 6-inch round or two 8-inch round baking pans, a cake leveler (optional), a large piping bag, an offset spatula and a bench scraper
  2. For the Spirograph® decor: Knead the fondant until smooth and pliable. If the fondant is sticky, knead in a little confectioners' sugar until the fondant is elastic and does not cling to your hands. Roll out the fondant between 2 sheets of parchment paper to ¼-inch thickness using a rolling pin. Remove the top sheet of parchment paper and allow the fondant to stand until the surface is firm and dry. This can take 2 to 4 hours (and up to overnight), depending on the surrounding humidity of the room in which you're working. The fondant can be tested for readiness by attempting a Spirograph® design. Place the Spirograph® tools on top of the fondant and begin to draw using light pressure with a food color marker. If the tip of the pen sinks into the fondant, it is not dry enough to use and needs to stand longer. If the pen glides across the surface, then it's ready to use.
  3. Use the Spirograph® tools to practice drawing on a piece of copy paper before you begin drawing on the fondant. Choose your favorite designs to replicate on the fondant.
  4. Place the Spirograph® tools on the dry fondant and use the food color pens to draw designs onto its surface. Make various sizes and patterns. You'll need about 14 designs to cover the entire cake. Allow the drawings to dry for 10 minutes, then use the cookie cutters to stamp out the designs. Store the stamped-out circles in a single layer between 2 pieces of plastic wrap.
  5. For the chocolate cake: Preheat the oven to 350 degrees F. Spray three 6-inch round baking pans (or two 8-inch pans) with flour-based baking spray.
  6. Beat the butter and granulated sugar together in the bowl of an electric mixer. Add the oil; beat in the eggs 1 at a time, mixing well after each addition.
  7. Whisk together the cocoa powder, flour, baking soda and salt in a large mixing bowl. Add the flour mixture to the creamed butter mixture alternately with the sour cream, beginning and ending with the flour mixture. Add the hot coffee at the end and mix on low speed until just combined. Use a spatula to scrape down the bowl and mix again on low until the batter is smooth.
  8. Divide the batter evenly among the prepared pans, filling each pan no more than three-quarters full. Bake for 30 to 35 minutes, or until the cakes spring back when pressed in their centers. Turn the cakes out onto wire racks to cool. When the cakes are completely cool, level the tops using a large serrated knife or cake leveler
  9. For the buttercream frosting: Cream together the butter and confectioners' sugar on low speed in the bowl of an electric mixer. When the mixture is combined, increase the speed to high and whip until light in color, about 3 minutes. Turn the mixer off and add the vanilla extract and ⅓ cup heavy cream. Beat again until the frosting is light and fluffy, about another 3 minutes. Add additional heavy cream if the mixture is too thick to spread or pipe.
  10. Place 1 cup of buttercream in a medium bowl. Drape a damp towel across the bowl to prevent the frosting from drying. Set aside.
  11. Place the remaining frosting in a large piping bag. Use the buttercream to fill the cake layers and to apply a thin crumb coat to the outside of the cake. Use an offset spatula or bench scraper to even the frosting. Place the cake in the refrigerator to chill until the frosting is firm, about 30 minutes. Meanwhile, divide the reserved 1 cup of frosting into 3 parts in separate bowls and tint each portion with one of the 3 gel food colors.
  12. When the crumb coat layer is well chilled, apply a second layer of white frosting and even the edges of the cake with a bench scraper. Use an offset spatula to randomly place dabs of pink, orange and lavender tinted buttercream over the edges and top of the cake. Carefully scrape away some of the tinted frosting using a single motion with a bench scraper. The colors will smear and blend together, creating a watercolor effect. Add more color dabs of frosting and repeat the process as desired. Transfer the cake to the refrigerator to chill.
  13. When the cake is well chilled, apply the fondant Spirograph® designs to the sides of the cake using buttercream as an adhesive. Use leftover white buttercream to pipe small mounds of frosting on top of the cake; cover the buttercream with assorted sprinkles and nonpareils. Place 1 fondant Spirograph® design on top of the cake if desired.

Watch the recipe video here:

How to Make Spirograph Cake

Your inner child is gonna flip for this SPIROGRAPH CAKE! Amazing job, SprinkleBakes!

Posted by Food Network on Sunday, October 8, 2017

Main dish

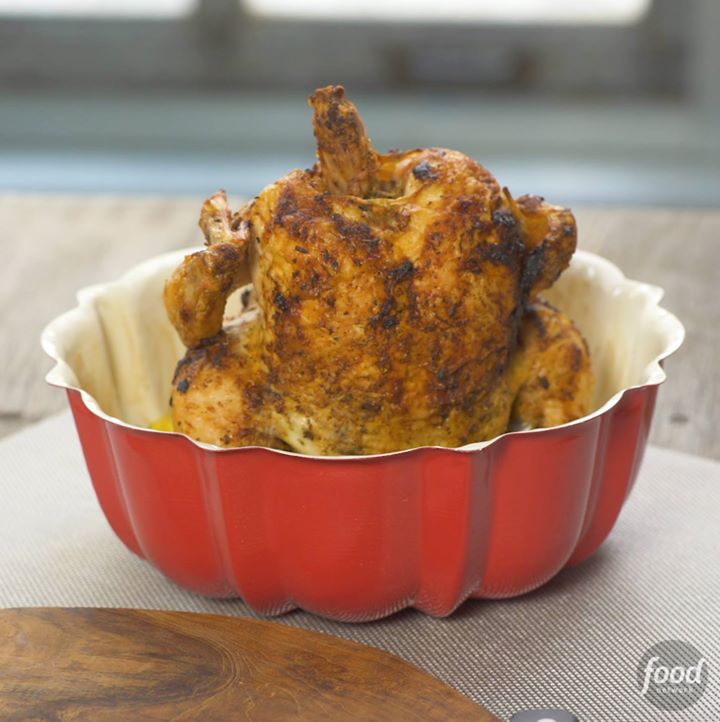
Bundt Pan Roast Chicken with Potatoes

Bundt Pan Roast Chicken with Potatoes
Get double duty out of your Bundt pan by using it as a stand for roasting chicken and a pan for potatoes. The juices from the chicken slowly infuse flavor into the spuds while they cook.
Author:
Cuisine: American
Recipe type: Main dish
Ingredients
  • 1 whole chicken (3½ to 4 pounds)
  • 2 teaspoons herbes de Provence (see Cook's Note)
  • Kosher salt and freshly ground black pepper
  • 5 tablespoons unsalted butter, 4 at room temperature and 1 melted, plus more melted for the pan
  • 1½ pounds Yukon Gold potatoes, cut into ½-inch cubes
  • 4 cloves garlic, 3 smashed and 1 finely grated
  • Zest of 1 lemon and juice of half
  • ½ teaspoon paprika
  • 1 tablespoon roughly chopped fresh Italian flat-leaf parsley leaves
Instructions
  1. Special equipment: a 10-cup nonstick Bundt pan
  2. Rub the chicken all over, including the cavity with 1 teaspoon herbes de Provence, 1 tablespoon salt and ¼ teaspoon pepper. Refrigerate for at least 2 hours or up to overnight; bring the chicken to room temperature 30 minutes before cooking.
  3. Arrange the rack to the lower third of the oven and preheat to 425 degrees F.
  4. Butter the sides and the bottom of a 10-cup Bundt pan. Cover the tube hole in the middle of the pan with a 6-inch piece of foil. Put the potatoes in the pan along with the 3 smashed garlic cloves, ½ teaspoon salt and a few grinds of pepper. Toss with 1 tablespoon melted butter. Roast for 20 minutes.
  5. Meanwhile, mix together the lemon zest, paprika, remaining 4 tablespoons butter, 1 teaspoon herbes de Provence and grated garlic in a small bowl. Pat the chicken dry and spread a little of the butter mixture under the skin of the breasts and thighs. Rub the rest all over the chicken. Sprinkle with a little more salt and pepper and place the chicken cavity on the foil-covered tube over the foil so that the chicken is sitting upright on top of the potatoes.
  6. Cook until an instant-read thermometer inserted in the thickest part of the thigh (avoiding the bone) reads at least 165 degrees F, 50 to 55 minutes. Transfer the chicken to a cutting board and let rest 10 minutes before carving.
  7. Transfer the potatoes with a slotted spoon to a serving dish. Strain the liquid in the bottom of the pan into a small saucepan and heat until just warmed through. Squeeze in the lemon juice and stir in the parsley. Pour the cooking liquid over the carved chicken and serve with the potatoes on the side.

Watch the recipe video here:

How to Make Bundt Pan Roast Chicken with Potatoes

?? Brilliant kitchen hack: Roast chicken and potatoes all in one bundt pan!

Posted by Food Network on Monday, October 9, 2017

Dessert

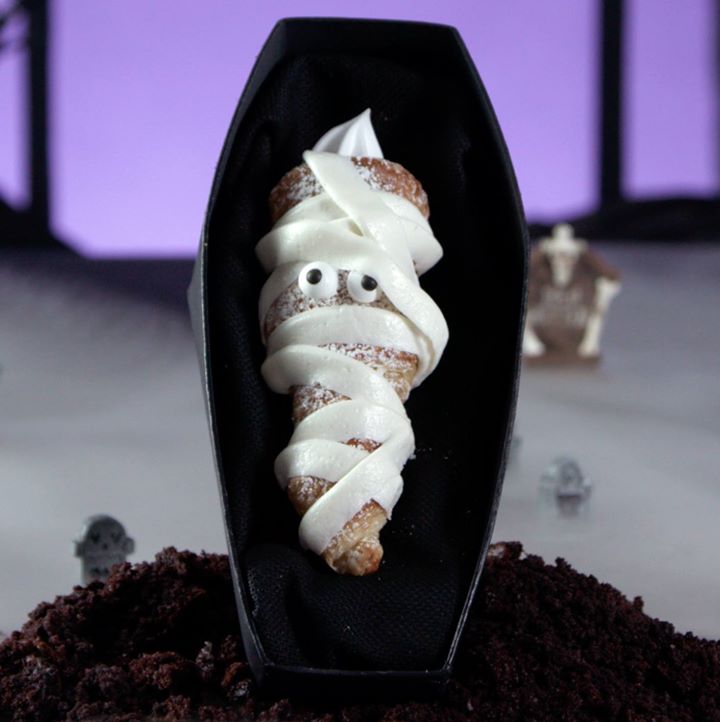
Mummy Cream Horns

Mummy Cream Horns
Simple, sweet and just a little spooky, these Halloween-inspired mummies are a scary-good party treat.
Author:
Cuisine: American
Recipe type: Dessert
Ingredients
Horns:
  • Nonstick cooking spray, for spraying the cones
  • 1 sheet frozen puff pastry, thawed
  • 1 large egg, lightly beaten
Filling:
  • 1 cup heavy cream
  • ¼ cup confectioners' sugar
Icing:
  • 1¼ cups confectioners' sugar, plus more for dusting
  • 4 tablespoons (1/2 stick) unsalted butter, melted
  • 3 tablespoons milk
  • Pinch fine salt
  • 16 candy eyes
Instructions
  1. Special equipment: 8 metal cream horn cones or sugar ice cream cones wrapped in foil, a pastry brush and 2 pastry bags
  2. For the horns: Preheat the oven to 400 degrees F. Line a baking sheet with parchment.
  3. Spray 8 metal cream horn cones or sugar cones wrapped in foil with nonstick cooking spray. Cut the puff pastry into 8 even strips. Starting at the point of each cone, wind a pastry strip around the cone, overlapping the layers slightly to cover the cone with a spiral of pastry. Lightly brush the pastry with the egg wash and place the cones seam-side down on the prepared baking sheet. Bake until golden brown, about 20 minutes. Cool the pastry on the cones, then remove.
  4. For the filling: Whip the cream and confectioners' sugar with an electric mixer in a medium bowl until stiff peaks form. Transfer to a pastry bag and refrigerate until ready to use.
  5. For the icing: Combine the confectioners' sugar, butter, milk and salt in a small bowl and whisk until smooth. Transfer to a second pastry bag.
  6. To assemble: Pipe the whipped cream into each horn to fill. Dust with confectioners' sugar to coat. Dab some icing on the back of each eye and affix 2 eyes to each horn. Pipe the icing back and forth over each horn to resemble a mummy.

Watch the recipe video here:

How to Make Mummy Cream Horns

This Halloween, mummy's the word ?#HalloweenWars < tonight 9|8c

Posted by Food Network on Sunday, October 8, 2017

Dessert

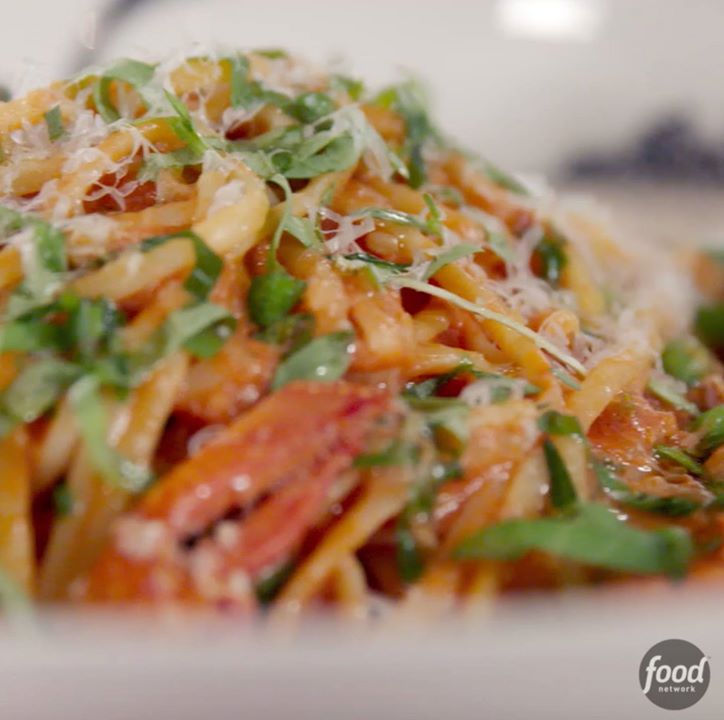
Creamy Lobster Linguine

Creamy Lobster Linguine
Creamy Lobster Linguine...trust us, you're going to want to try this.
Author:
Cuisine: American
Recipe type: Main dish
Ingredients
  • 3 tablespoons extra-virgin olive oil
  • 2 slices bacon, chopped
  • 3 shallots, minced
  • 2 cloves garlic, chopped
  • ¼ teaspoon red pepper flakes
  • ½ teaspoon salt
  • 2 cups tomato puree
  • ¼ cup cream
  • 1 pound linguine
  • ¼ cup freshly grated Parmesan, plus more for serving
  • 1 cup baby arugula, roughly chopped
  • ½ cup fresh basil leaves, roughly chopped
  • ¼ cup fresh tarragon leaves, roughly chopped
  • 1 cup frozen peas, thawed
  • Two 1½-pound lobsters, steamed, meat removed
Instructions
  1. Heat a large straight-sided skillet over medium heat. Add the olive oil and bacon and cook until the bacon is beginning to crisp, 8 minutes. Add the shallots, garlic and red pepper flakes and cook for an additional 3 minutes, until fragrant. Add the salt, tomato puree and cream; stir to combine. Reduce the heat to low and simmer for 5 minutes.
  2. Bring a large pot of salted water to a boil. Cook the linguine for 1 minute less than the package instructions, about 10 minutes. Using tongs, remove the pasta from the water and add it directly to the pan with the sauce. Sprinkle the cheese directly on the naked pasta and toss to coat in sauce. Add up to 1 cup of the pasta water to loosen the sauce as needed. Stir in the arugula, basil, tarragon, peas and lobster meat; simmer until everything is heated through, 1 minute. Serve with additional Parmesan if desired.

Watch the recipe video here:

How To Make Giada's Creamy Lobster Linguine

Creamy Lobster Linguine…trust us, you're going to want to try this. (via Giada De Laurentiis)

Posted by Food Network on Sunday, October 8, 2017

Roll

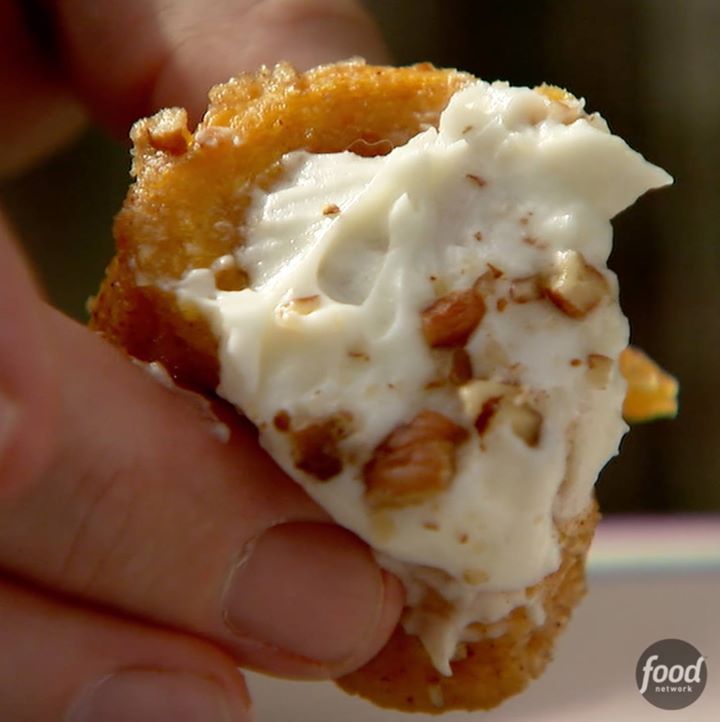
Pumpkin Cinnamon Rolls

Pumpkin Cinnamon Rolls
⚠️ Warning: These Pumpkin Cinnamon Rolls will 100% make you drool ?
Author:
Cuisine: Japan
Recipe type: Rolls
Ingredients
Dough:
  • 1½ cups whole milk
  • ½ cup vegetable oil
  • ½ cup granulated sugar
  • 1 package (2¼ teaspoons) active dry yeast
  • 1 cup pumpkin puree
  • 4½ cups all-purpose flour, plus more for flouring, sprinkling and rolling
  • ½ teaspoon ground cinnamon
  • ¼ teaspoon ground ginger
  • ¼ teaspoon ground nutmeg
  • ½ teaspoon (heaping) baking powder
  • ½ teaspoon baking soda
  • ½ teaspoon salt
  • Melted butter, for buttering pans
Filling:
  • 1 stick (1/2 cup) butter, melted
  • ½ cup brown sugar
  • ½ cup granulated sugar
  • ½ teaspoon cinnamon
  • ½ teaspoon ground ginger
  • ¼ teaspoon ground nutmeg
  • 1 cup finely chopped pecans
Frosting:
  • 8 ounces cream cheese, softened
  • 1¾ cups to 2 cups powdered sugar
  • ¼ cup whole milk, plus more if needed
  • 2 tablespoons butter, melted
  • Dash of salt
Instructions
  1. For the dough: In a large saucepan, combine the milk, vegetable oil and granulated sugar. Heat until hot but not boiling, then remove the pan from the stove and allow it to cool until the mixture is warm to the touch but not too hot. Sprinkle the yeast over the surface of the liquid and allow it to sit for 5 minutes. Stir in the pumpkin puree until combined.
  2. Combine 4 cups of the flour with the cinnamon, ginger and nutmeg. Sprinkle it into the saucepan and stir until it just comes together. Cover the saucepan with a dish towel and set in a warm, draft-free place for 1 hour.
  3. After 1 hour, the mixture should be very puffy and at least doubled in size. Stir in the baking powder, baking soda, salt and remaining ½ cup flour until totally combined.
  4. Preheat the oven to 375 degrees F. Drizzle butter into 3 pie pans (or a larger baking dish) and smear it all over the bottom of the pans.
  5. Turn out the dough onto a floured surface and press it into a rectangular shape. If it is overly sticky, sprinkle generously with flour until easier to handle. Flour a rolling pin and roll the dough into a large rectangle about 18 inches by 24 inches.
  6. For the filling: Drizzle the melted butter over the dough and smear it all over the surface with your fingers. Mix together the brown sugar, granulated sugar, cinnamon, ginger and nutmeg in a medium bowl. Sprinkle this mixture all over the surface of the dough, covering all the melted butter. Sprinkle with ½ cup to ¾ cup chopped pecans.
  7. Starting at the top, roll the dough toward you into a large log, moving back and forth down the line of dough (in a "typewriter" motion) and always rolling toward you. Roll it tightly as you go so the rolls with be nice and neat. When it's all rolled, pinch the seam closed and turn the roll over so that the seam is facing down. Slice into ½- to ¾-inch slices and place the slices in the buttered pan(s). Allow to rise for 20 minutes.
  8. Bake until the rolls are nice and golden brown around the edges, 15 to 18 minutes.
  9. For the frosting: While the rolls are baking, make the frosting by combining the cream cheese, powdered sugar, milk, butter and salt in the bowl of an electric mixer. Beat until fluffy, adding more milk if you'd like a thinner frosting.
  10. Frost the rolls the second they come out of the oven. Sprinkle the extra pecans over the frosting, then allow them to sit for 15 minutes before serving.

Watch the recipe video here:

The Pioneer Woman's Pumpkin Cinnamon Rolls

⚠️ Warning: These Pumpkin Cinnamon Rolls will 100% make you drool ? (via The Pioneer Woman – Ree Drummond)

Posted by Food Network on Friday, October 6, 2017
Cake

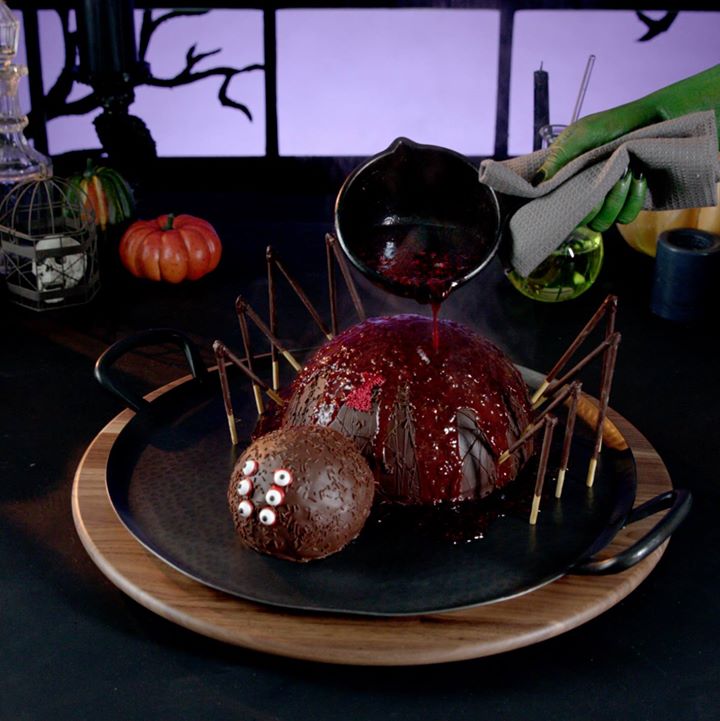
Hidden Horror Black Widow Cake

Hidden Horror Black Widow Cake
You will certainly get the award for the most twisted dessert. Luckily, it's also delicious.
Author:
Cuisine: American
Recipe type: Cake
Ingredients
  • One 15.25-ounce box chocolate cake mix (plus required ingredients)
  • Nonstick cooking spray, for the bowl and parchment
  • 16 ounces bittersweet chocolate, finely chopped
  • 16 chocolate cream-covered biscuit sticks, such as Pocky
  • 1 tablespoon coconut oil
  • ⅓ cup chocolate or vanilla frosting
  • 6 candy eyes
  • 1 tube store-bought red decorating icing
  • Red sanding sugar, for decorating
  • 3 cups mini marshmallows
  • 2 tablespoons chocolate sprinkles
  • One 11.75-ounce jar strawberry ice cream topping
Instructions
  1. Special equipment: a pastry brush, small round piping tip (1S or 2)
  2. Prepare the chocolate cake according to the package directions in two 8-inch cake pans and let cool completely.
  3. Spray an 8-inch bowl with cooking spray. Line it with plastic wrap as neatly as possible and spray the wrap with cooking spray. Put in the freezer until very cold.
  4. Line a baking sheet with parchment and spray with cooking spray. Microwave the chocolate in a medium microwave-safe bowl in 30-second intervals, stirring in between each, until melted, about 3 minutes. Let cool for 5 minutes.
  5. Cut off 1 inch from the chocolate ends of 8 biscuit sticks, so you have 8 short and 8 regular-size sticks total. In same-length pairs, dip the chocolate ends into the melted chocolate and lay them on the prepared baking sheet so that they overlap slightly in the shape of a V. Refrigerate until set.
  6. Stir the coconut oil into the remaining chocolate.
  7. Remove the prepared bowl from the freezer and brush the inside with ¼ cup of the chocolate, then refreeze until firm, about 10 minutes. Repeat 4 more times, each time making sure the chocolate goes all the way to the rim of the bowl and doesn't pool in the bottom. Freeze until solid, about 30 minutes.
  8. Put one cake layer in the bowl of a food processor and pulse to fine crumbs. Add the frosting and pulse until it just comes together. Form into a ball that is slightly flattened on the bottom where it will sit on the platter, and freeze for 30 minutes. Remove from the freezer and brush to coat with the chocolate mixture. Refreeze for 15 minutes, then repeat 2 more times. On the final time, affix the eyes to the ball in the shape of a horseshoe. Attach a small round piping tip (1S or 2) to the tube of red decorating icing, and outline each eye with icing.
  9. Fill the chocolate-lined bowl with the marshmallows. Top with the remaining cake layer and then flip it out onto a large serving platter. Remove the plastic wrap from the chocolate dome. Arrange the head so it touches the chocolate dome body. Drizzle the body with the remaining chocolate mixture and sprinkle with the chocolate sprinkles. Make a black widow marking by piping a red hourglass on the upper third of the body close to the head. Sprinkle it with red sanding sugar. Position 4 biscuit stick legs on each side of the body, making sure the 2 shorter ones go in the middle; gently push the legs into the dome about 1 inch.
  10. When ready to serve, heat the strawberry topping in a small saucepan over medium heat until it boils. Slowly pour it over the spider's body to reveal all the eggs inside. Then run, screaming for your life.

Watch the recipe video here:

Melting Surprise Spider Cake

Just wait until you see this spider's surprise at 1:12! ?#HalloweenWars < premieres tonight @ 9|8c

Posted by Food Network on Sunday, October 1, 2017

Dessert

Black and White Cupcakes

Black and White Cupcakes
Chocolate, say hello to vanilla. Vanilla, say hello to chocolate.
Author:
Cuisine: American
Recipe type: Dessert
Ingredients
  • One 15.25-ounce box vanilla cake mix
  • 3 large eggs, at room temperature
  • ½ cup low-fat Greek yogurt, such as Fage
  • 2 tablespoons all-purpose flour
  • ¾ cup unsweetened cocoa powder
  • 4 sticks (1 pound) unsalted butter, softened
  • 6 cups confectioners' sugar
  • 2 teaspoon pure vanilla extract
  • 1 teaspoon kosher salt
  • 72 M&M's
Instructions
  1. Preheat the oven to 350 degrees F. Line 24 muffin cups with cupcake liners.
  2. To a medium bowl, add the cake mix, eggs, yogurt, flour and 1 cup water. Using a hand-held mixer, beat the mixture until completely smooth and fluffy, about 2 minutes. Remove half of the batter to a separate bowl. To one of the bowls of batter, add ¼ cup of the cocoa powder and continue to mix until combined, about a minute more.
  3. Using a 1-tablespoon ice cream scoop, scoop 1 heaping tablespoon of the vanilla batter onto one side of all of the muffin cups. Scoop a heaping tablespoon of the chocolate batter right next to the vanilla scoop so it is half chocolate, half vanilla. Bake until a toothpick inserted in the middle of a cupcake comes out clean, about 15 minutes. Cool for 5 minutes in the tin and then remove the cupcakes to a wire rack to cool completely.
  4. Meanwhile, place the butter, confectioners' sugar, vanilla and salt in a large bowl. Using a hand-held mixer, beat the mixture on medium-high speed for 3 minutes. Remove half of the frosting from the bowl and reserve as vanilla. Fold the remaining ½ cup cocoa powder into the remaining half of the frosting.
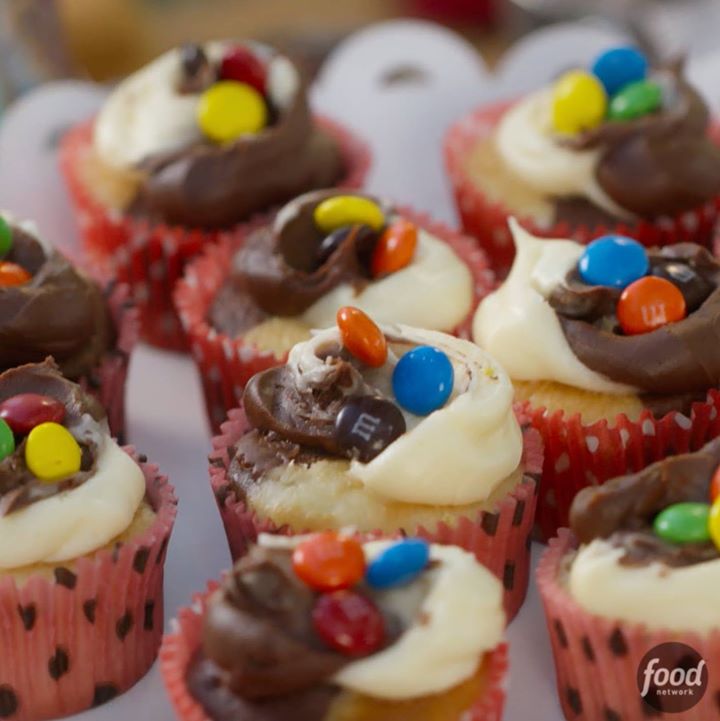
  5. Using a rubber spatula, spoon the vanilla frosting into a resealable plastic baggie or a pastry bag. Spoon the chocolate into a separate bag. Snip the tips of the bags and pipe the frosting in two spirals on top of the cooled cupcakes. Swirl the tops with a spoon. You should get a little of each flavor on each cupcake! Top each cupcake with 3 M&M's. Store, covered, at room temperature.

Watch the recipe video here:

How To Make Giada's Black and White Cupcakes

Chocolate, say hello to vanilla. Vanilla, say hello to chocolate. (via Giada De Laurentiis)Save the recipe: https://foodtv.com/2UMUy8W!

Posted by Food Network on Sunday, September 17, 2017

Main dish

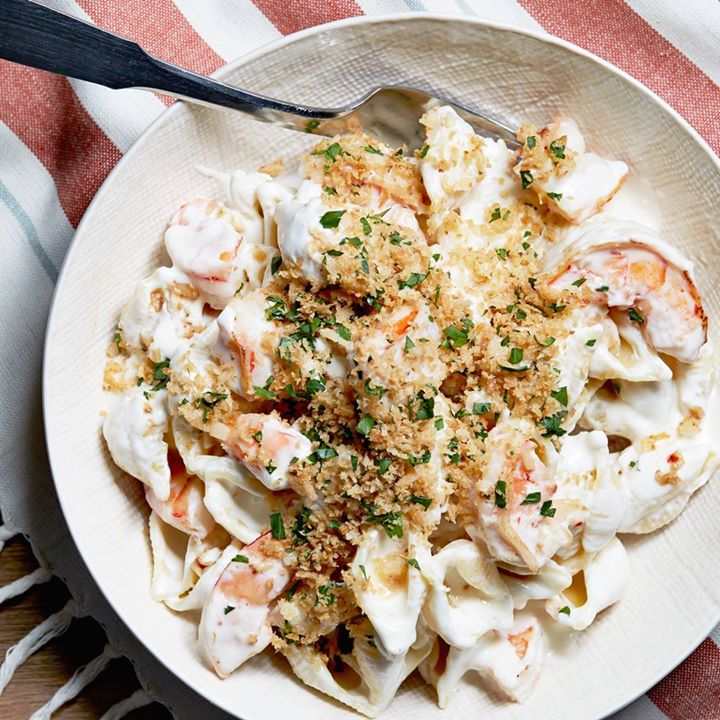
Shrimp Scampi Mac and Cheese

Shrimp Scampi Mac and Cheese
This mash-up of macaroni 'n' cheese and your favorite garlicky shrimp dish is deeply cheesy and satisfying.
Author:
Cuisine: American
Recipe type: Main dish
Ingredients
  • 6 tablespoons unsalted butter
  • ½ cup panko breadcrumbs
  • ½ teaspoon crushed red pepper flakes
  • Kosher salt
  • 2 tablespoons chopped fresh parsley
  • 1 pound medium pasta shells
  • 2½ cups half-and-half
  • 8 ounces cream cheese, at room temperature
  • 8 ounces shredded Italian cheese blend (about 2 cups)
  • 4 cloves garlic, minced
  • 2 tablespoons dry white wine
  • 1 pound large shrimp, peeled, deveined and cut into 1-inch pieces
  • Finely grated zest of 1 lemon
Instructions
  1. Melt 2 tablespoons butter in a small skillet over medium heat until foamy but not brown. Stir in the panko, ¼ teaspoon crushed red pepper flakes and a pinch of salt and continue to cook, stirring frequently, until the panko is golden brown, about 5 minutes. Remove from the heat and stir in the parsley; set aside.
  2. Bring a large pot of salted water to a boil. Add the pasta and cook according to the package instructions. Strain, reserving 1 cup of the pasta water. Set aside.
  3. Heat the half-and-half in a large saucepan over medium heat until it just comes to a simmer. Continue simmering until the half-and-half is reduced to 2 cups, about 5 minutes. Add the cream cheese and cook, stirring, until melted. Whisk in the Italian cheese blend until all the cheese is melted and the sauce is smooth. Turn off the heat and keep warm.
  4. Meanwhile, melt the remaining 4 tablespoons butter in a large saute pan over medium heat. Stir in the garlic and the remaining ¼ teaspoon crushed red pepper flakes and cook until fragrant, about 2 minutes. Pour in the wine and reduce until the alcohol smell is no longer present and the sauce is a nice golden color, about 2 minutes. Stir in the shrimp and lemon zest and cook, stirring, until the shrimp are pink and just cooked through, about 2 minutes; sprinkle with ½ teaspoon salt and set aside.
  5. Add the pasta and shrimp mixture to the cheese sauce and stir to combine. Stir in some of the reserved pasta water to thin the sauce if needed. Season to taste with salt if needed. Spoon the hot mac and cheese into bowls and sprinkle with the parsley panko.

Watch the recipe video here:

How To Make Shrimp Scampi Mac and Cheese

Recipe of the Day: Shrimp Scampi Mac and Cheese

Posted by Food Network on Tuesday, September 26, 2017

Cake Dessert

Chocolate-Butterscotch Swirl Cheesecake

Chocolate-Butterscotch Swirl Cheesecake
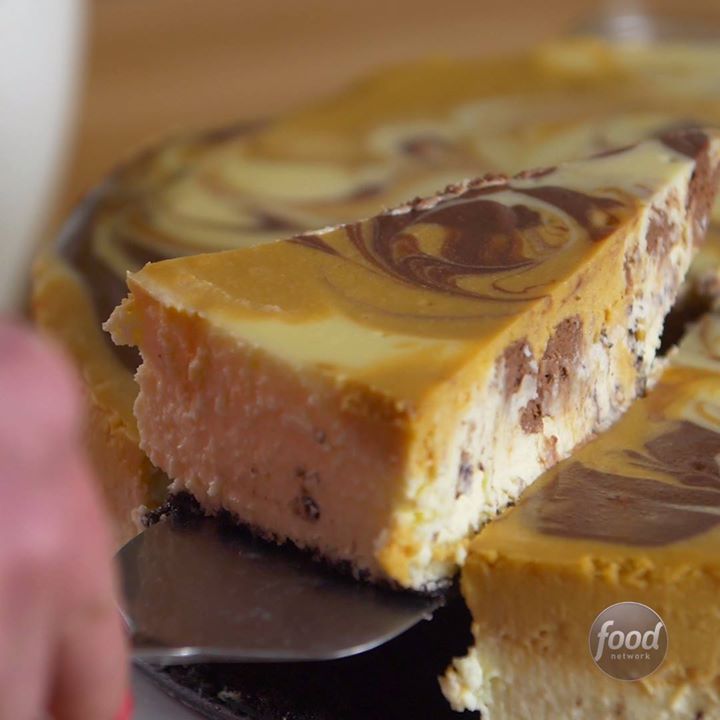
Blondie lovers, take note -- you're going to flip for this cheesecake. The impressive-looking chocolate and butterscotch swirls are easy to make with a wooden skewer.
Author:
Cuisine: American
Recipe type: Cake
Ingredients
Crust:
  • 2 cups chocolate wafer cookie crumbs (from about 40 whole cookies)
  • 1 stick (8 tablespoons) unsalted butter, melted
  • 2 tablespoons sugar
  • Pinch fine salt
Filling:
  • Three 11.5-ounce containers whipped cream cheese
  • 1¼ cups sugar
  • One 16-ounce container sour cream, at room temperature
  • 1 cup heavy cream
  • 4 large eggs, at room temperature
  • 4 ounces bittersweet chocolate chips
  • 6 ounces butterscotch chips
  • 1 teaspoon pure vanilla extract
Instructions
  1. Special equipment: a 10-inch springform pan and a wooden skewer
  2. Position a rack in the middle of the oven and preheat to 325 degrees F.
  3. For the crust: Toss together the cookie crumbs, butter, sugar and salt in a medium bowl. Press into the bottom of a 10-inch springform pan. Bake until golden brown, 15 to 18 minutes. Cool completely. Wrap the bottom and sides of the pan with a large piece of foil and put in a large roasting pan.
  4. For the filling: Beat together the cream cheese and sugar in a large bowl with an electric mixer on medium speed for 1 minute. Add the sour cream and beat until just combined. Add the heavy cream and beat until just combined. Mix in the eggs by hand, 1 at time. Mix in the vanilla by hand until just combined. (Take care not to overmix, or the cheesecake will turn into a souffle!).
  5. Put the chocolate and butterscotch chips in 2 separate small microwave-safe bowls. Microwave until melted, stirring every 30 seconds, about 1 minute 30 seconds.
  6. Ladle 2 cups of cheesecake batter into a medium bowl and 2 cups into a second medium bowl. Fold the melted butterscotch into one of the bowls until completely combined. Fold the melted chocolate into the other bowl until completely combined. Leave the remaining batter white.
  7. Use an ice cream scoop or large spoon and drop scoopfuls of the batter onto the crust, alternating between the different flavors until all the batter is gone. Use a long wooden skewer and drag it through the batter, making sure the skewer reaches down to the bottom of the pan to marble the colors for a tie-dye effect. Add enough hot water to the roasting pan to come about halfway up the side of the springform pan.
  8. Bake until the outside of the cake is set, but the center is still slightly loose, about 1 hour 20 minutes. Turn the oven off and leave the cheesecake in the oven for another hour. Remove the cheesecake from the roasting pan to a cooling rack. Run a knife around the edge and cool to room temperature. Cover and refrigerate at least 8 hours.
  9. Run a knife around the edge of the pan one more time, unmold the cheesecake and transfer to a serving plate or cake stand. Smooth the edges of the cake with a knife just before serving.

Watch the recipe video here:

How To Make Chocolate-Butterscotch Swirl Cheesecake

Recipe of the Day: Chocolate-Butterscotch Swirl Cheesecake

Posted by Food Network on Thursday, September 28, 2017