Main dish

Disappearing Marshmallow Puffs

Disappearing Marshmallow Puffs
Kids love making these tasty treats for Sunday breakfast. While baking, the marshmallows melt and blend with the cinnamon-sugar.
Author:
Cuisine: American
Recipe type: Main dish
Ingredients
  • 2 tubes (8 ounces each) refrigerated crescent rolls
  • ¼ cup sugar
  • 1 teaspoon ground cinnamon
  • 16 large marshmallows
  • ¼ cup butter, melted
GLAZE:
  • ½ cup confectioners' sugar
  • ½ teaspoon vanilla extract
  • 2 to 3 teaspoons milk
  • ¼ cup chopped nuts
Instructions
  1. Separate crescent dough into 16 triangles; set aside. In a shallow bowl, combine sugar and cinnamon. Roll marshmallows in butter, then in cinnamon-sugar.
  2. Place marshmallows at wide end of crescents. Fold corners over marshmallow. Roll up each triangle, beginning at the wide end. Pinch seams to seal. Dip bottom of dough in butter.
  3. Place butter, side down, in ungreased muffin cups. Place muffin pans on baking sheets. Bake at 375° for 10-15 minutes or until golden brown. Immediately remove from pans to wire racks.
  4. For glaze, combine confectioners' sugar and vanilla. Stir in enough milk to achieve desired consistency. Drizzle over puffs. Sprinkle with nuts. Serve warm.

Watch the recipe video here:

Satisfying to watch AND eat!> Get the recipe for Disappearing Marshmallow Puffs: https://trib.al/QuCKLkz

Posted by Taste of Home on Thursday, April 11, 2019
Main dish

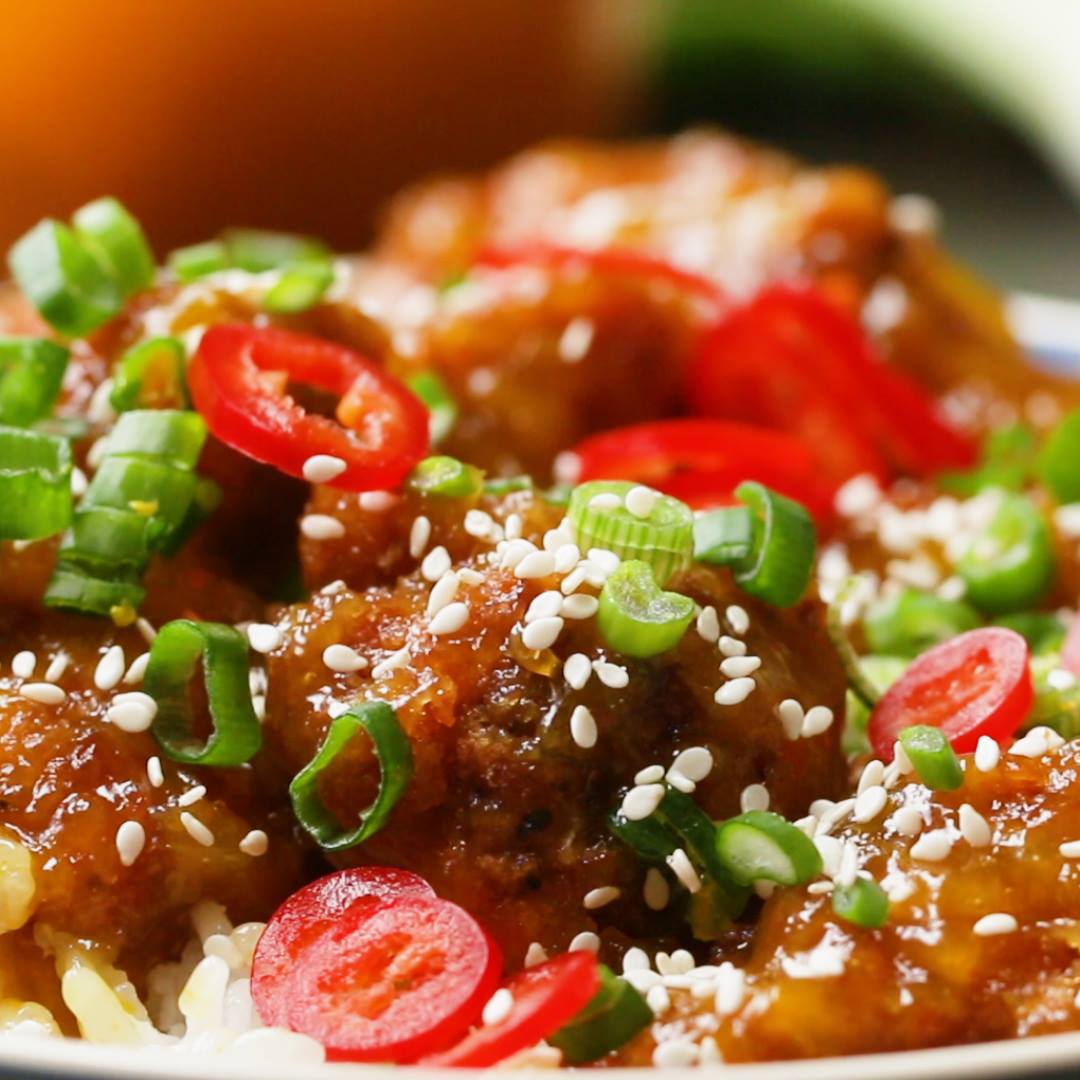
Chinese Takeaway-style Orange Chicken

Chinese Takeaway-style Orange Chicken
Author:
Cuisine: American
Recipe type: Main dish
Ingredients
MARINADE
  • 1 ¼ cups chicken breast, diced (150 g)
  • 1 orange, zested
  • 1 teaspoon garlic, crushed
  • 1 tablespoon soy sauce
  • 1 pinch salt
  • 1 pinch pepper
CHICKEN
  • ½ cup plain flour (50 g)
  • 2 eggs, beaten
  • 1 cup panko breadcrumbs (50 g)
  • 2 cups oil (500 mL)
ORANGE SAUCE
  • ¼ cup chicken stock (50 mL)
  • 1 orange, zested
  • 2 oranges, juiced
  • 4 tablespoons sugar
  • 2 tablespoons water
  • 1 tablespoon corn flour
Instructions
  1. Combine all marinade ingredients with the chicken breast and leave to marinade in the fridge for 20 minutes.
  2. Coat the chicken breast first in flour, then eggs, and finally panko breadcrumbs.
  3. In a medium-sized saucepan heat the oil to 170°C (325˚F).
  4. Deep fry the breaded chicken for about 3-4 minutes until the coating is golden brown and the chicken is cooked through.
  5. In a small frying pan, combine the chicken stock, orange zests, orange juice, and sugar, then stir. Bring the mixture to a boil.
  6. Mix the cornflour with the water, then add the mixture to the pan to thicken the sauce.
  7. Add the chicken to the frying pan and coat with the orange sauce.
  8. Serve on top of rice and add toppings of your choice.
  9. Enjoy!

Watch the recipe video here:

Chinese Takeaway-style Orange Chicken ?FULL RECIPE: https://tasty.co/recipe/chinese-takeaway-style-orange-chicken

Posted by Proper Tasty on Thursday, April 11, 2019

Main dish

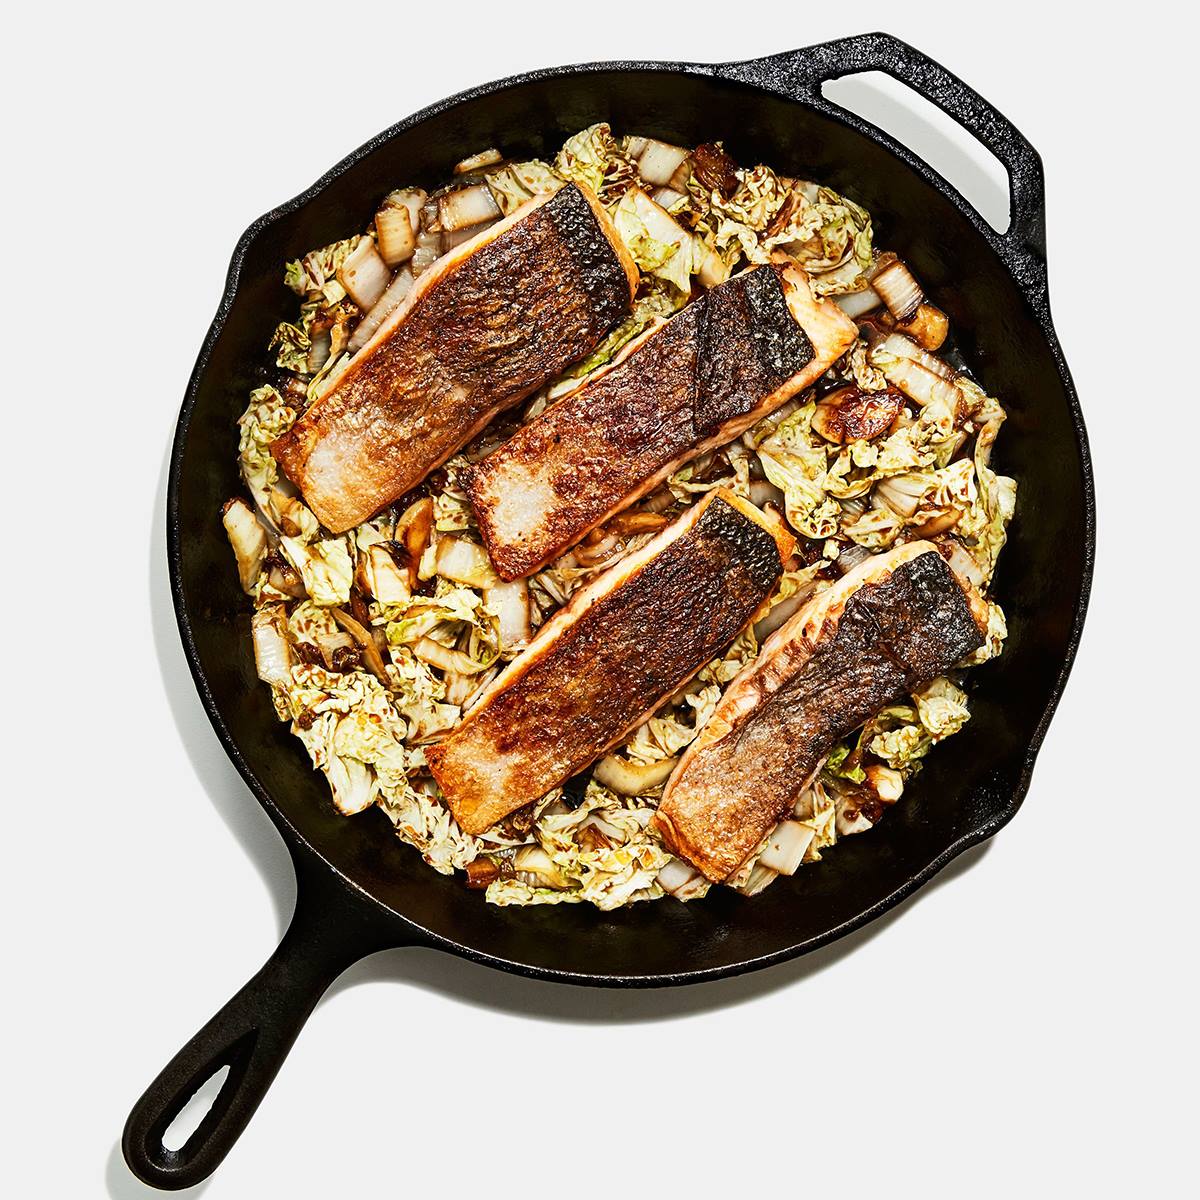
Crispy-Skin Salmon with Napa Cabbage

Crispy-Skin Salmon with Napa Cabbage
Does the thought of cooking fish at home freak you out? We got you. This method guarantees that the salmon comes out perfectly cooked with crispy skin. Use the same technique with any skin-on fish fillets for great results every time.
Author:
Cuisine: American
Recipe type: Main dish
Ingredients
  • 1 small head of Napa cabbage
  • 5 garlic cloves
  • 1 2-inch knob ginger
  • 2 tablespoons rice wine vinegar
  • 2 tablespoons soy sauce
  • 1 tablespoon honey
  • 1½ teaspoons cornstarch
  • 4 6-ounce skin-on salmon fillets
  • Kosher salt
  • Freshly ground black pepper
  • 3 tablespoons vegetable oil, divided
Instructions
  1. Starting at leafy green end of Napa cabbage, slice about one-third of head crosswise into ½”-thick ribbons. Set darker green pieces aside. Thinly slice remaining pale-green and white parts of cabbage crosswise and transfer to a medium bowl (discard cabbage core).
  2. Smash 5 garlic cloves and discard peel.
  3. Scrape down and around ginger with the curved tip of a spoon to remove skin, then thinly slice ginger crosswise.
  4. Stir 2 Tbsp. rice wine vinegar, 2 Tbsp. soy sauce, 1 Tbsp. honey, and 1½ tsp. cornstarch in a small bowl with a spoon until cornstarch is dissolved.
  5. Thoroughly pat dry 4 salmon fillets with paper towels. Season flesh side with salt and pepper.
  6. Drizzle 2 Tbsp. vegetable oil across surface of a large skillet, preferably cast iron. Arrange salmon fillets skin side down in skillet, spacing evenly apart. Heat skillet over medium (yes, you’re starting the cooking from cold).
  7. Cook salmon, occasionally sliding a flexible metal spatula underneath skin to lift fillets and let fresh hot fat flow underneath (if the skin is sticking, let it cook longer until skin releases), until flesh is opaque all the way up the sides of each fillet and only the top of thickest part is still translucent, 5–10 minutes. It will take more or less time depending on thickness of your salmon fillets. As fish is cooking, move pieces around pan to encourage even cooking.
  8. Using spatula and a pair of tongs, carefully turn each fillet so skin side is up. Turn off heat and let heat remaining in skillet gently cook second side. Once fillets have stopped sizzling, carefully transfer to a plate.
  9. Return pan to medium-high heat and add half of cabbage from bowl. Cook, tossing occasionally with tongs, until cabbage is wilted and browned and even charred in some spots, about 5 minutes. Toss in remaining cabbage from bowl and cook, stirring often, until second batch is tender, about 4 minutes.
  10. Scrape cabbage mixture back into bowl and add remaining 1 Tbsp. oil. Add garlic and ginger to pan and cook, tossing often, until garlic is browned all over and ginger is browned around the edges, about 3 minutes.
  11. Stir soy mixture to re-incorporate cornstarch and add to skillet. Stir rapidly until mixture is thickened, which will only take a few seconds, then remove from heat.
  12. Add cooked cabbage and uncooked green cabbage back to skillet and toss well to coat.
  13. Arrange salmon fillets over of cabbage and serve.

Watch the recipe video here:

Because you deserve the crispiest skinned fish. (via Basically) Recipe: http://bonap.it/HyokiDa

Posted by Bon Appétit Magazine on Thursday, April 11, 2019
Main dish

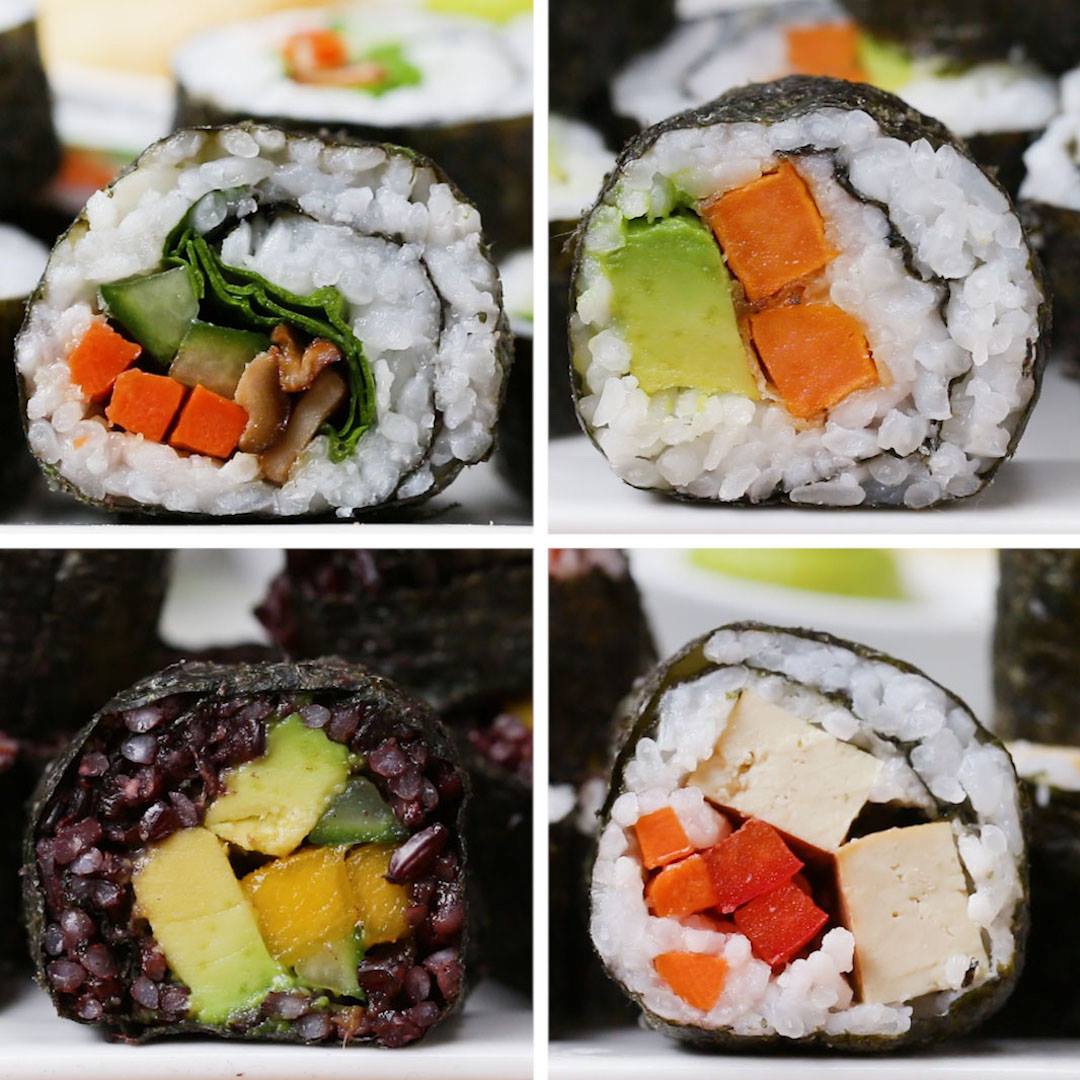
Veggie Sushi 4 Ways

Veggie Sushi 4 Ways
Veggie Sushi 4 Ways recipe.
Author:
Cuisine: American
Recipe type: Main dish
Ingredients
  • 2 ½ tablespoons rice vinegar
  • 1 tablespoon sugar
  • ¾ teaspoon salt
  • 3 cups sushi rice, cooked (600 g)
  • 1 cup black rice, cooked (230 g)
  • 4 sheets roasted nori
SHIITAKE VEGGIE ROLL
  • 1 tablespoon sesame oil
  • 1 cup shiitake mushroom, sliced (75 g)
  • 1 tablespoon soy sauce
  • ¼ teaspoon garlic powder
  • pepper, to taste
  • 8 leaves fresh spinach
  • 4 sticks cucumber
  • 4 sticks carrot
SWEET POTATO TEMPURA ROLL
  • vegetable oil, for frying
  • ½ cup all purpose flour (60 g)
  • 1 teaspoon baking powder
  • ½ teaspoon salt
  • ¼ teaspoon pepper
  • ¾ cup ice water (180 mL)
  • 1 medium sweet potato, cut into sticks
  • 2 slices avocado
AVOCADO CUCUMBER MANGO ROLL
  • 4 slices avocado
  • 4 sticks cucumber
  • 4 sticks mango
TERIYAKI TOFU ROLL
  • 4 strips teriyaki tofu, baked
  • 4 sticks red bell pepper
  • 4 sticks carrot
FOR SERVING
  • wasabi
  • pickled ginger
  • soy sauce
Instructions
  1. In a small pot over medium heat, add the rice vinegar, sugar, and salt and whisk to combine. Bring to a boil and continue whisking until the salt and sugar have dissolved. Remove the pot from the heat.
  2. Add the cooked sushi rice to a large bowl and the cooked black rice to a separate medium bowl. Add ¾ of the rice vinegar mixture to the sushi rice and the remaining ¼ to the forbidden rice. Mix until the vinegar mixture is well distributed.
  3. Make the shiitake veggie roll: Heat the sesame oil in a medium pan over medium heat. Once the oil is simmering, add the shiitake mushrooms, soy sauce, garlic powder, and pepper and cook for 6-8 minutes, until the mushrooms have released their juices and begin to crisp up.
  4. Place 1 sheet of nori over a bamboo sushi mat. Scoop 1 cup (230 g) of sushi rice on top of the nori. Fill a small bowl with water to dip your fingers into--this will prevent them from getting sticky when handling the rice. Using your fingers, spread the rice in an even layer over the nori, leaving a 1-inch (2-cm) border at the top to seal the roll.
  5. Over the bottom quarter of the nori, layer the spinach, cucumber, carrot, and shiitake mushrooms. Use your fingers to hold the vegetables in place while you begin to roll the nori. Squeeze the bamboo mat around the roll as you go to ensure a tight sushi roll. Transfer the sushi roll to a cutting board and cut it in half, then cut each half into quarters for a total of 8 sushi pieces.
  6. Make the sweet potato tempura roll: Heat the vegetable oil in a medium pot until it reaches 375ºF (190ºC).
  7. In a medium bowl, combine the flour, baking powder, salt, and pepper and mix well with a fork. Pour in the ice water and mix until incorporated--some lumps are okay. Drop the sweet potato sticks into the batter and toss with your fingers to ensure they are thoroughly coated.
  8. Transfer a few of the sweet potato sticks at a time to a spider and carefully drop them into the hot oil. Cook for 3-4 minutes, until crispy, then transfer to a paper towel-lined plate.
  9. Place 1 sheet of nori over a bamboo sushi mat. Scoop 1 cup (230 g) of sushi rice on top of the nori. Using your fingers, spread the rice in an even layer over the nori, leaving a 1-inch (2-cm) border at the top to seal the roll.
  10. Over the bottom quarter of the nori, layer the sweet potato tempura and avocado. Use your fingers to hold the vegetables in place while you begin to roll the nori. Squeeze the bamboo mat around the roll as you go to ensure a tight sushi roll. Transfer the sushi roll to a cutting board and cut it in half, then cut each half into quarters for a total of 8 sushi pieces.
  11. Make the avocado cucumber mango roll: Place 1 sheet of nori over a bamboo sushi mat. Scoop the forbidden rice on top of the nori. Using your fingers, spread the rice in an even layer over the nori, leaving a 1-inch (2-cm) border at the top to seal the roll.
  12. Over the bottom quarter of the nori, layer the avocado, cucumber, and mango. Use your fingers to hold the filling in place while you begin to roll the nori. Squeeze the bamboo mat around the roll as you go to ensure a tight sushi roll. Transfer the sushi roll to a cutting board and cut it in half, then cut each half into quarters for a total of 8 sushi pieces.
  13. Make the teriyaki tofu roll: Place 1 sheet of nori over a bamboo sushi mat. Scoop the remaining cup of sushi rice on top of the nori. Using your fingers, spread the rice in an even layer over the nori, leaving a 1-inch (2-cm) border at the top to seal the roll.
  14. Over the bottom quarter of the roll, layer the teriyaki tofu, red bell pepper, and carrot. Use your fingers to hold the filling in place while you begin to roll the nori. Squeeze the bamboo mat around the roll as you go to ensure a tight sushi roll. Transfer the sushi roll to a cutting board and cut it in half, then cut each half into quarters for a total of 8 sushi pieces.
  15. Serve the sushi with wasabi, pickled ginger, and soy sauce.
  16. Enjoy!

Watch the recipe video here:

Sushi is perfect for a date night in ?Get the recipes: https://tasty.co/recipe/veggie-sushi-4-ways

Posted by BuzzFeed Food on Thursday, April 11, 2019
Dessert

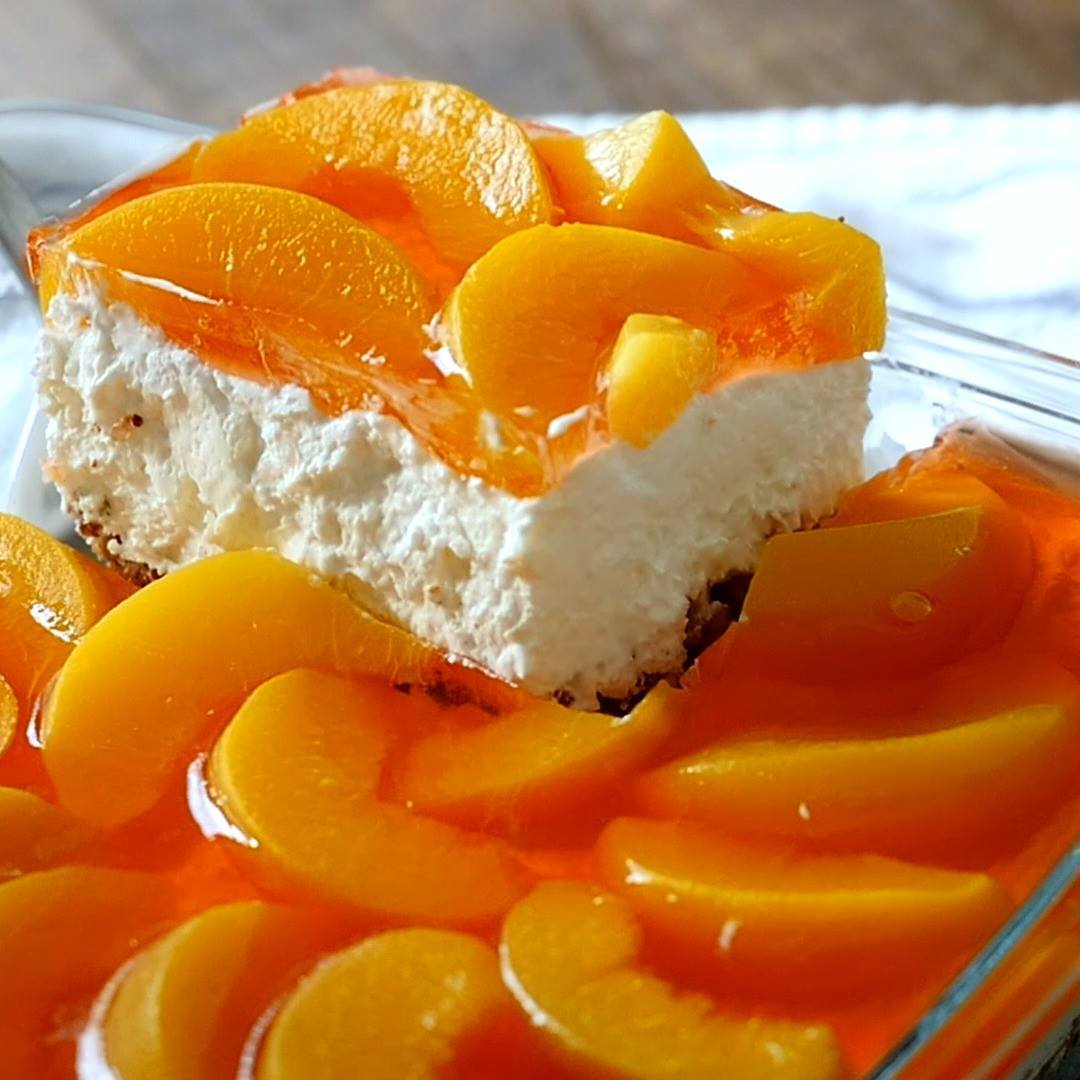
Peach Pretzel Salad

Peach Pretzel Salad
Peach Pretzel Salad recipe.
Author:
Cuisine: American
Recipe type: Dessert
Ingredients
Crust:
  • 2 cups pretzels, crushed
  • ¾ cup (1½ sticks) unsalted butter, melted
  • 2 tablespoons sugar
  • 1 tablespoon cinnamon
  • ¼ teaspoon nutmeg
Filling:
  • 2 cans peaches, drained, peaches pat dry
  • 2 cups water, boiling
  • 1 (8 oz.) container frozen whipped topping
  • 1 (8 oz.) package cream cheese, room temperature
  • 1 (6 oz.) package peach jello
  • ½ cup sugar
Instructions
  1. Preheat oven to 400ºF, and grease a 13x9-inch baking dish with nonstick spray.
  2. In a medium bowl, combine pretzels, sugar, cinnamon and nutmeg. Stir in melted butter, and mix thoroughly.
  3. Transfer pretzel mixture to baking dish, and gently press into an even layer. Bake crust for 8-10 minutes, then set aside to let cool.
  4. In a large bowl, cream together cream cheese and sugar, then gently fold in whipped topping.
  5. Spread mixture over cooled crust, then refrigerate 1 hour, or until set.
  6. In a large bowl, combine jello packet with boiling water and stir thoroughly until completely dissolved. Let cool to room temperature.
  7. Top the cream cheese layer of the cake with peach slices, then gently pour gelatin over cream cheese layer.
  8. Refrigerate until set, 2-3 hours. Serve chilled, and enjoy!

Watch the recipe video here:

Peach Pretzel Jello Salad – just trust us on this one! ? Written recipe: http://po.st/T8T0or

Posted by 12 Tomatoes on Thursday, April 11, 2019
Main dish

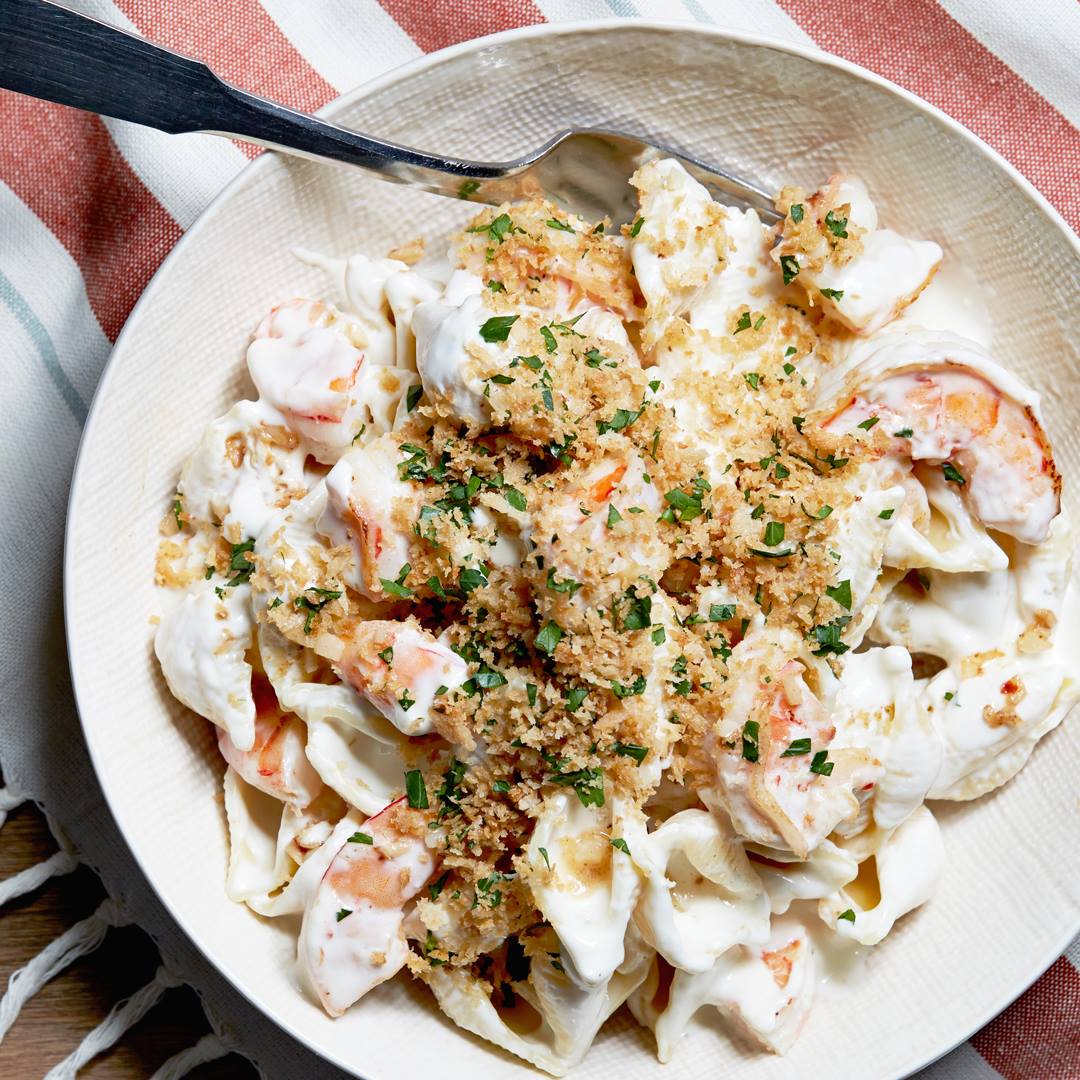
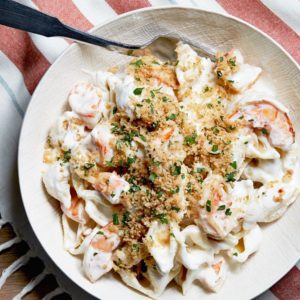
Shrimp Scampi Mac and Cheese

Shrimp Scampi Mac and Cheese
This mash-up of macaroni 'n' cheese and your favorite garlicky shrimp dish is deeply cheesy and satisfying.
Author:
Cuisine: American
Recipe type: Main dish
Ingredients
  • 6 tablespoons unsalted butter
  • ½ cup panko breadcrumbs
  • ½ teaspoon crushed red pepper flakes
  • Kosher salt
  • 2 tablespoons chopped fresh parsley
  • 1 pound medium pasta shells
  • 2½ cups half-and-half
  • 8 ounces cream cheese, at room temperature
  • 8 ounces shredded Italian cheese blend (about 2 cups)
  • 4 cloves garlic, minced
  • 2 tablespoons dry white wine
  • 1 pound large shrimp, peeled, deveined and cut into 1-inch pieces
  • Finely grated zest of 1 lemon
Instructions
  1. Melt 2 tablespoons butter in a small skillet over medium heat until foamy but not brown. Stir in the panko, ¼ teaspoon crushed red pepper flakes and a pinch of salt and continue to cook, stirring frequently, until the panko is golden brown, about 5 minutes. Remove from the heat and stir in the parsley; set aside.
  2. Bring a large pot of salted water to a boil. Add the pasta and cook according to the package instructions. Strain, reserving 1 cup of the pasta water. Set aside.
  3. Heat the half-and-half in a large saucepan over medium heat until it just comes to a simmer. Continue simmering until the half-and-half is reduced to 2 cups, about 5 minutes. Add the cream cheese and cook, stirring, until melted. Whisk in the Italian cheese blend until all the cheese is melted and the sauce is smooth. Turn off the heat and keep warm.
  4. Meanwhile, melt the remaining 4 tablespoons butter in a large saute pan over medium heat. Stir in the garlic and the remaining ¼ teaspoon crushed red pepper flakes and cook until fragrant, about 2 minutes. Pour in the wine and reduce until the alcohol smell is no longer present and the sauce is a nice golden color, about 2 minutes. Stir in the shrimp and lemon zest and cook, stirring, until the shrimp are pink and just cooked through, about 2 minutes; sprinkle with ½ teaspoon salt and set aside.
  5. Add the pasta and shrimp mixture to the cheese sauce and stir to combine. Stir in some of the reserved pasta water to thin the sauce if needed. Season to taste with salt if needed. Spoon the hot mac and cheese into bowls and sprinkle with the parsley panko.

Watch the recipe video here:

Shrimp Scampi met Mac and Cheese and the rest was history ??Save this recipe: https://foodtv.com/2N9ze6r!

Posted by Food Network on Wednesday, April 10, 2019

Main dish

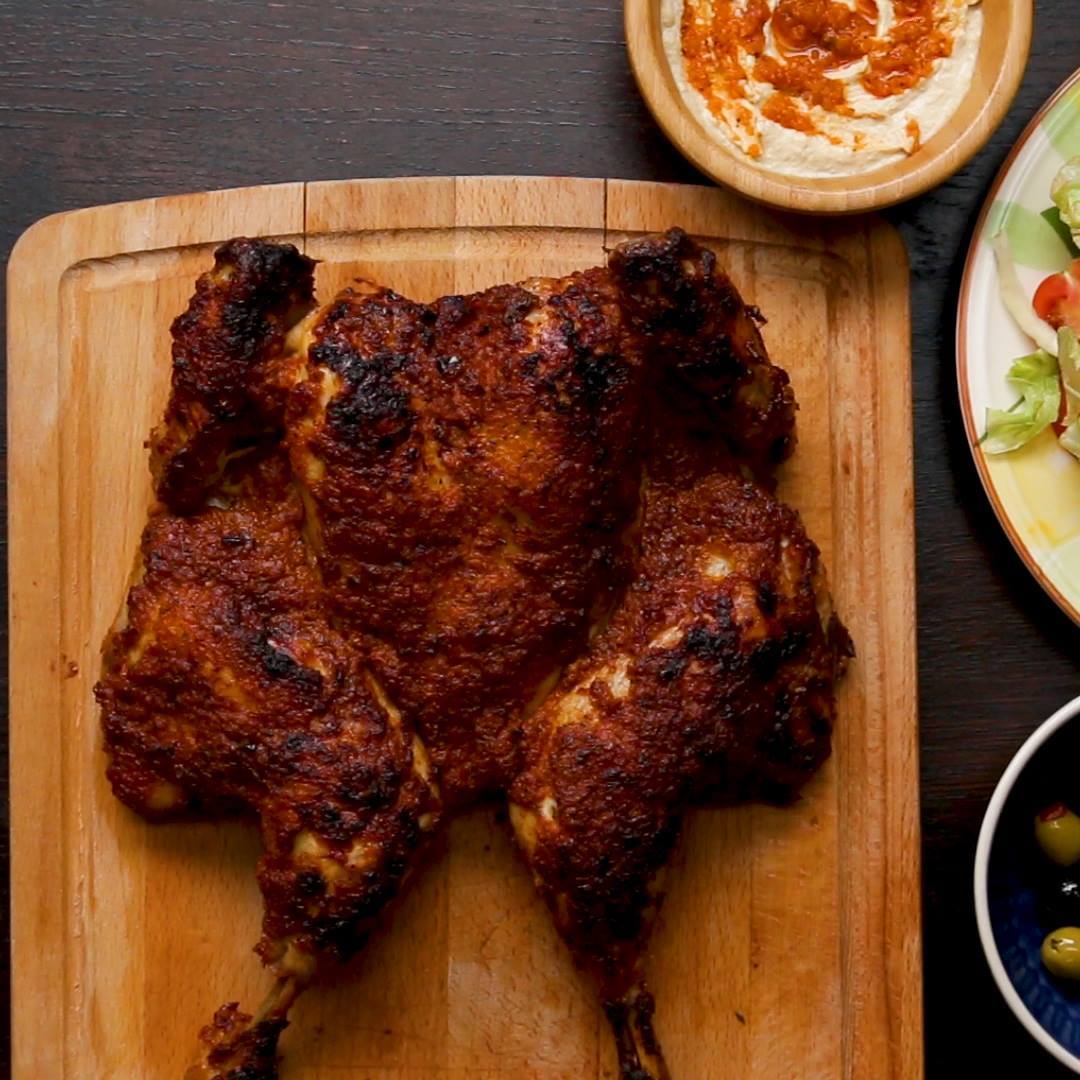
Peri Peri Chicken Feast

Peri Peri Chicken Feast
Peri Peri Chicken Feast recipe.
Author:
Cuisine: American
Recipe type: Main dish
Ingredients
  • 1 chicken
MARINADE
  • 1 cup olive oil (200 mL)
  • ½ cup white vinegar (120 mL)
  • 8 bird-eye chillis
  • 8 cloves garlic
  • 2 medium onions
  • 4 teaspoons dried oregano
  • 4 teaspoons paprika
  • 2 teaspoons sugar
  • 4 teaspoons salt
  • 2 teaspoons pepper
  • 1 roasted pepper
  • 1 lemon, juiced
PERI PERI CHIPS
  • 1 lb chip (500 g)
  • ½ teaspoon smoked paprika
  • ½ teaspoon chili powder
  • ½ teaspoon garlic powder
  • ¼ teaspoon white pepper
  • 1 teaspoon salt
SIDES
  • 2 oz mayonnaise (50 g)
  • 2 oz hummus (50 g)
Instructions
  1. Remove the chicken’s backbone by using a pair of kitchen scissors. Turn it over and flatten it down to spread the chicken out as much as possible.
  2. Blend together all of the marinade ingredients in a food processor and spread half of it over the chicken.
  3. Cover and marinate in the fridge for at least 3 hours or overnight.
  4. Roast in the centre of a preheated oven for 60 minutes at 200°C (400°F), or until the thickest part of the thigh is 75°C. Once the chicken is cooked through, allow to rest for 10 minutes before serving.
  5. Simmer the other half of the marinade for 2-3 minutes to make the Peri Peri sauce.
  6. Use as a dip for your chicken or mix some into mayonnaise or hummus!
  7. To make Peri Peri Chips, just shake some smoked paprika, chili powder, garlic powder and white pepper into your chips!
  8. Enjoy!

Watch the recipe video here:

Dig into this cheeky peri peri chicken feast with your mates this weekend ???RECIPE: https://tasty.co/recipe/peri-peri-chicken-feast

Posted by Proper Tasty on Wednesday, April 10, 2019

Main dish

Crunchy Baked Saffron Rice with Barberries (Tachin)

Crunchy Baked Saffron Rice with Barberries (Tachin)
Also known as tachin, this crispy baked Persian rice is often layered with meat, dried fruit, spices, and presented in a rectangular shape. We omitted the meat to keep things simple and went with a round shape to change things up. Rinse the rice to keep it from getting gummy, and parboil it so it will be soft and tender after baking. The yogurt, eggs, and oil are what create the golden color and crispy texture, which will have you coming back for bite after bite.
Author:
Cuisine: American
Recipe type: Main dish
Ingredients
  • 2 teaspoons kosher salt, plus more
  • 2 cups basmati rice
  • 2 tablespoons unsalted butter
  • ½ cup dried barberries or 1 cup dried tart cherries
  • 1 teaspoon rose water (optional)
  • 1 teaspoon saffron threads, finely ground
  • 3 large egg yolks
  • 1 cup plain whole-milk yogurt (not Greek)
  • ½ cup grapeseed or vegetable oil, plus more for dish
Instructions
  1. Bring a large pot of water to a boil and add 2 large palmfuls of salt (about ½ cup). While you’re waiting for the water to boil, place rice in a strainer or sieve and rinse with lukewarm water, swishing rice around with your hands to get rid of excess starch. Continue to rinse until water from rice runs clear.
  2. Add rice to pot and give it a few stirs to prevent rice from sticking to the bottom. Cook, stirring occasionally, until rice begins to rise to the top and is tender but still has a slight bite to it, 6–8 minutes. Drain and rinse with cold water.
  3. Meanwhile, melt butter in a medium skillet over medium-low heat. Cook barberries, stirring often, until plumped slightly and warmed through, about 2 minutes. Remove from heat and stir in rose water, if using.
  4. Place rack in lower third of oven; preheat to 400°. Combine saffron and 2 Tbsp. hot water in a large bowl. Let sit 10 minutes to allow saffron to steep and draw out as much color as possible. Mix in egg yolks, yogurt, ½ cup oil, and 2 tsp. salt. Scatter rice over yogurt mixture and gently toss to ensure every grain is coated.
  5. Coat a 10"-diameter glass pie dish with oil (glass lets you check on the color from underneath). Add half of rice mixture and use the palms of your hands or a measuring cup to gently pack and compact rice into dish. Scatter half of barberries over and top with remaining rice. Press down again, this time more firmly (this helps with unmolding).
  6. Cover dish tightly with foil and bake until rice on the bottom and around edges is a deep golden brown, 65–80 minutes. Let cool 10 minutes; discard foil. Loosen the rice around the edges using the point of a knife. Place a large plate on top and invert rice onto plate like a cake. Scatter remaining barberries over top.

Watch the recipe video here:

This crunchy baked saffron rice is a total showstopper.Make it: http://bonap.it/tO7zneE

Posted by Bon Appétit Magazine on Wednesday, April 10, 2019

Dessert

Cinnamon Rolls with Brown Sugar Glaze

Cinnamon Rolls with Brown Sugar Glaze
Cinnamon Rolls with Brown Sugar Glaze recipe.
Author:
Cuisine: American
Recipe type: Dessert
Ingredients
Dough Ingredients:
  • 4 egg yolks, room temperature
  • 1 whole egg, room temperature
  • ½ cup sugar
  • 1½ sticks unsalted butter, cut into pieces, room temperature
  • 1 packet rapid rise yeast
  • 4 cup all-purpose flour
  • ½ cup cornstarch
  • 1½ tsp salt

Filling Ingredients:
  • 4 tbsp unsalted butter, softened
  • 1½ cup brown sugar
  • 1½ tbsp ground cinnamon
  • ¼ tsp allspice
  • 1 tsp salt

Glaze Ingredients:
  • 6 tbsp unsalted butter
  • ½ cup brown sugar
  • 2 tbsp heavy cream
  • 1 tsp vanilla
  • 1 tsp flaky salt
Instructions
  1. Combine the buttermilk, egg yolks, egg, sugar, and 1 stick of the butter in a bowl and whisk until combined. (Set the other ½ stick of butter aside, you will use it in the kneading process). In a separate bowl, combine the rapid rise yeast (also known as instant yeast), flour, cornstarch, and salt and mix. Combine the dry ingredients with the wet, using your hands once the mixture starts to form a dough. Work the dough until the sides of the bowl are clean.
  2. Transfer the dough to a lightly floured work surface and knead until it is smooth and elastic. This will take about 15 - 20 minutes by hand (or about 10 - 12 using a stand mixer and dough hook). Next, it’s time incorporate the extra butter that was set aside earlier. To do this by hand, tear the dough apart in large chunks and use your hands to work the softened butter into the dough kneading it until the dough comes back together to form a smooth ball.
  3. Allow the dough to rise for 2 - 3 hours in a buttered bowl covered with plastic wrap. You’ll know it has proofed for long enough when it has doubled in size.
  4. Roll the dough out into an 18” x 12” rectangle and spread the 4 tablespoons of softened butter evenly on the dough. Mix the brown sugar, spices, and salt together and sprinkle on top of the buttered dough. Roll loosely into a log and cut into 12 even slices.
  5. Transfer to two buttered 9 x 13 baking dishes and cover with plastic wrap. If you want to bake both the next day, put both in the refrigerator overnight. If you only wish to bake one pan of rolls, keep the other in the freezer for later use.
  6. You can either move on to this step immediately, or you can refrigerate overnight. In the morning, take the pan out of the refrigerator and remove the plastic wrap. Turn the oven on to 200 F. Once it reaches temperature, turn the oven off and put the cinnamon rolls in. Allow them to rise (and double in size), this will take 30 minutes - 1 hour. Once they’ve doubled, turn the oven back on to 350 F and start a timer for 25 minutes. Cook until they are very lightly browned, about 25 - 30 minutes.
  7. When the rolls have about 15 minutes left in the oven, combine the butter and sugar in a small saucepan on the stovetop. Heat over medium, stirring, until the sugar melts. Add the heavy cream, vanilla and salt and stir to combine. Slowly bring the mixture to a boil and then immediately remove from the heat. Let cool slightly until thickened.
  8. Drizzle the brown sugar glaze over the rolls and serve immediately.
  9. Enjoy!!

Watch the recipe video here:

Your entire house will be smelling delicious with these in the oven! RECIPE: http://bit.ly/2hkEtU0 (via Kin Community)

Posted by Taste of Home on Tuesday, April 9, 2019

Breakfast

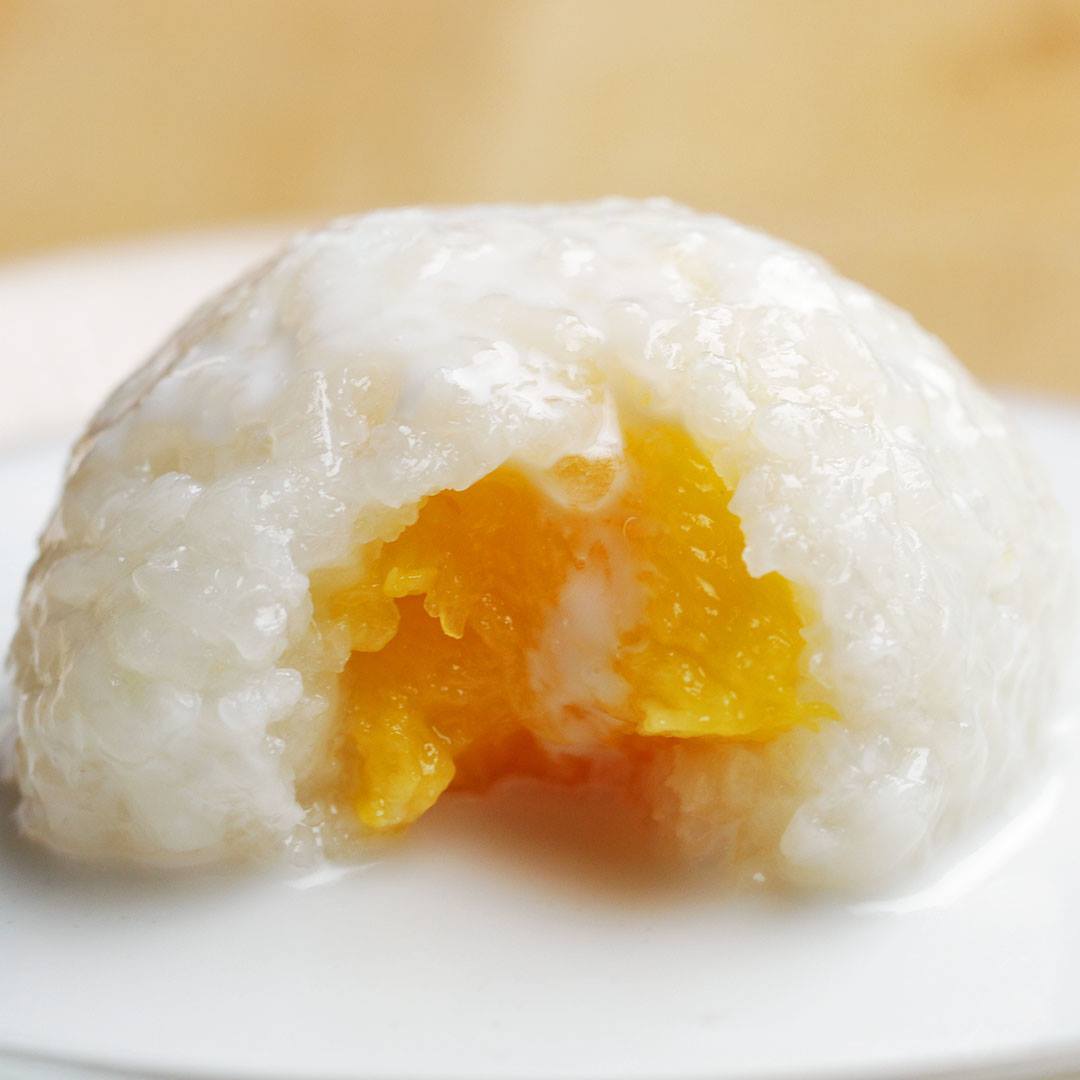
Mango-Stuffed Sticky Rice Balls

Mango-Stuffed Sticky Rice Balls
Mango-stuffed sticky rice balls are a delicious spin on the traditional dessert! ? ?
Author:
Cuisine: American
Recipe type: Breakfast
Ingredients
  • 3 cups sweet glutinous rice, rinsed (600 g)
  • 3 ¾ cups water (900 mL)
  • 3 mangoes
  • 1 ¼ cups coconut cream, unsweetened (300 mL)
  • 4 tablespoons sugar
  • 1 teaspoon salt
Instructions
  1. In a large pot over high heat, combine the rice and water. Cover, bring to a boil, then reduce the heat to low. Stir, re-cover and cook for 20 minutes. Remove the pot from the heat and set aside.
  2. On a cutting board, cut a mango ¼-inch (6-mm) away from the stem on both sides. Take one side of the mango and make 3-4 cuts vertically and horizontally to create a grid. Put pressure on the skin side of the mango so the mango cubes pop out. Cut off all of the cubes of mango. Repeat with the rest of the mangoes. Set aside until ready to use.
  3. In a medium saucepan over high heat, combine the coconut cream, sugar, and salt. Bring to a boil. Reduce the heat to low and cover for 10 minutes. Once sauce has thickened slightly, remove from the heat and set aside.
  4. Line a small bowl with plastic wrap. Scoop about 2 tablespoons of rice onto the plastic wrap. Push the rice against the sides of the bowl to create an even layer. Place 3 cubes of mango inside the rice. Using the plastic wrap, form the rice into a ball and twist the plastic wrap tightly. Unwrap and repeat with the rest of the rice and mango.
  5. Arrange the rice balls in a pile and pour the coconut cream sauce over them. Serve immediately.
  6. Enjoy!

Watch the recipe video here:

Mango-stuffed sticky rice balls are a delicious spin on the traditional dessert! ? ?FULL RECIPE: https://tasty.co/recipe/mango-stuffed-sticky-rice-balls

Posted by Tasty on Wednesday, April 10, 2019