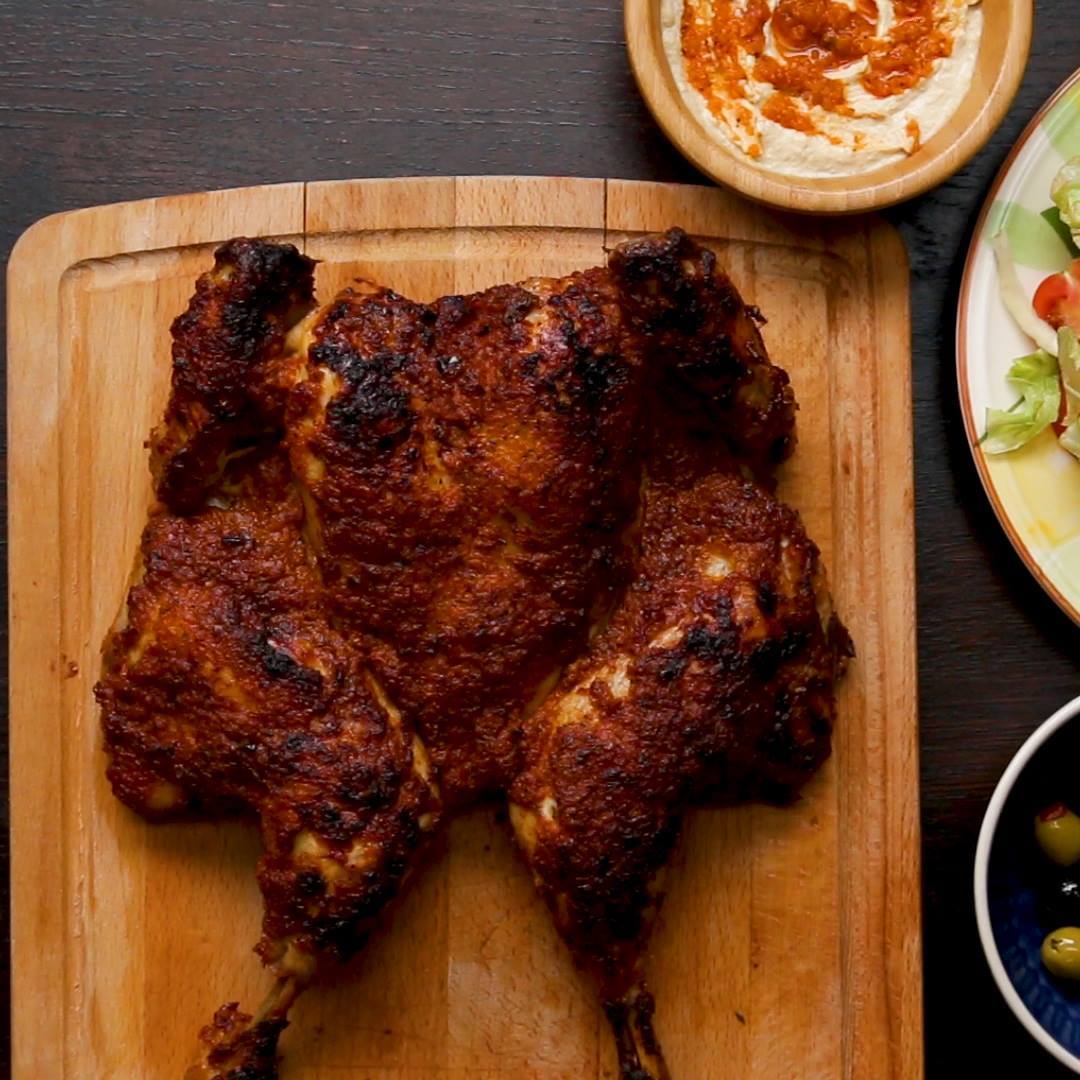
Peri Peri Chicken Feast
Peri Peri Chicken Feast
Peri Peri Chicken Feast recipe.

Author: The Chef
Cuisine: American
Recipe type: Main dish
Ingredients
- 1 chicken
MARINADE
- 1 cup olive oil (200 mL)
- ½ cup white vinegar (120 mL)
- 8 bird-eye chillis
- 8 cloves garlic
- 2 medium onions
- 4 teaspoons dried oregano
- 4 teaspoons paprika
- 2 teaspoons sugar
- 4 teaspoons salt
- 2 teaspoons pepper
- 1 roasted pepper
- 1 lemon, juiced
PERI PERI CHIPS
- 1 lb chip (500 g)
- ½ teaspoon smoked paprika
- ½ teaspoon chili powder
- ½ teaspoon garlic powder
- ¼ teaspoon white pepper
- 1 teaspoon salt
SIDES
- 2 oz mayonnaise (50 g)
- 2 oz hummus (50 g)
Instructions
- Remove the chicken’s backbone by using a pair of kitchen scissors. Turn it over and flatten it down to spread the chicken out as much as possible.
- Blend together all of the marinade ingredients in a food processor and spread half of it over the chicken.
- Cover and marinate in the fridge for at least 3 hours or overnight.
- Roast in the centre of a preheated oven for 60 minutes at 200°C (400°F), or until the thickest part of the thigh is 75°C. Once the chicken is cooked through, allow to rest for 10 minutes before serving.
- Simmer the other half of the marinade for 2-3 minutes to make the Peri Peri sauce.
- Use as a dip for your chicken or mix some into mayonnaise or hummus!
- To make Peri Peri Chips, just shake some smoked paprika, chili powder, garlic powder and white pepper into your chips!
- Enjoy!
Watch the recipe video here:
Dig into this cheeky peri peri chicken feast with your mates this weekend ???RECIPE: https://tasty.co/recipe/peri-peri-chicken-feast
Posted by Proper Tasty on Wednesday, April 10, 2019