Showing 879 Result(s)
Dessert

Chili-Cheese Corn Bread Poke Cake
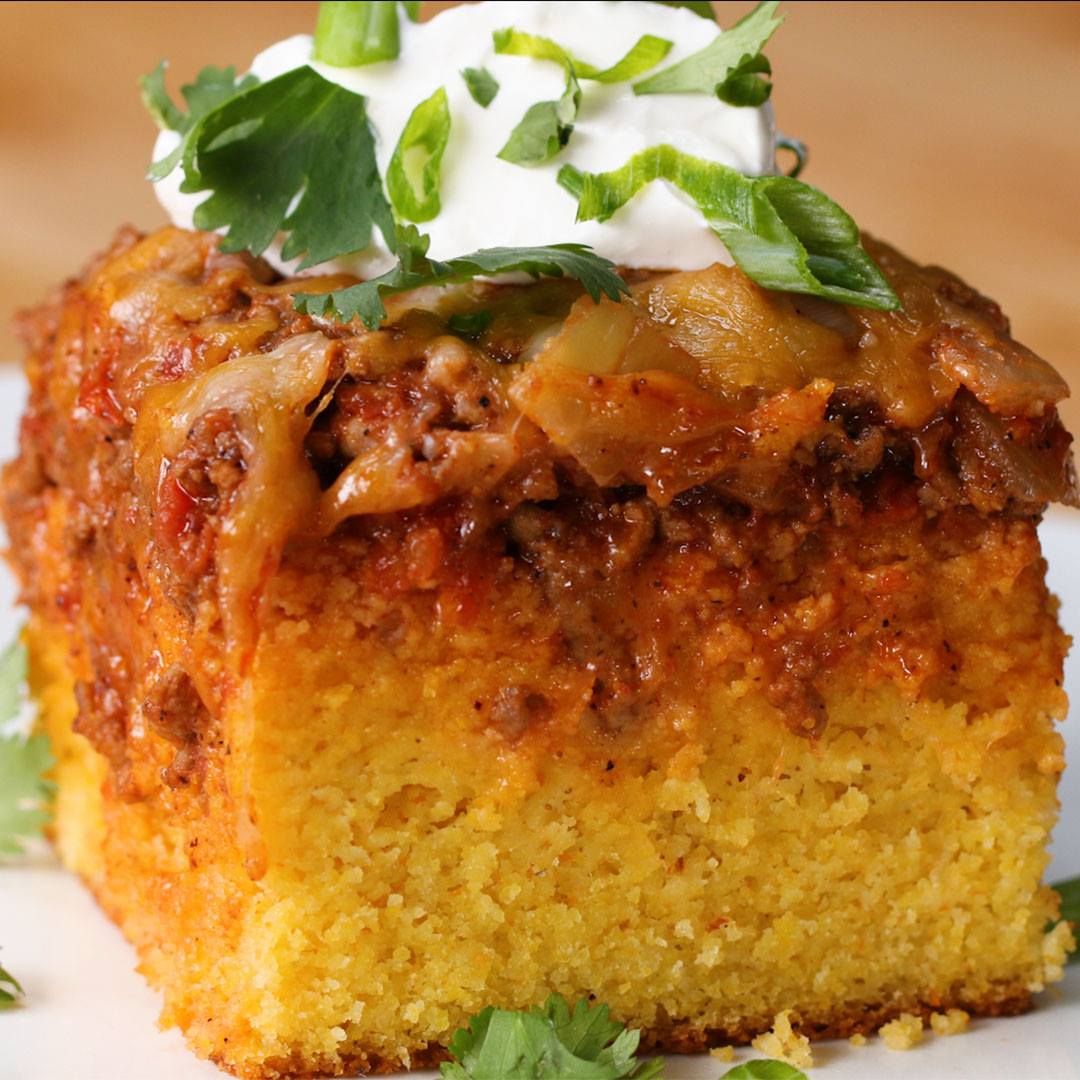
Chili-Cheese Corn Bread Poke Cake
Chili-Cheese Corn Bread Poke Cake recipe.
Author:
Cuisine: American
Recipe type: Dessert
Ingredients
  • 3 cups milk (720 mL)
  • 3 large eggs
  • 2 cups all-purpose flour (250 g)
  • 3 cups yellow cornmeal (450 g)
  • 3 teaspoons salt
  • 3 teaspoons baking powder
  • 1 teaspoon baking soda
  • 10 tablespoons unsalted butter, melted
  • nonstick cooking spray, for greasing
  • 2 tablespoons olive oil
  • 1 large yellow onion, diced
  • 2 lb ground beef (905 g)
  • 1 tablespoon salt
  • 2 teaspoons black pepper
  • 2 teaspoons paprika
  • 2 teaspoons garlic powder
  • 2 teaspoons chili powder
  • 2 teaspoons cumin
  • 28 oz crushed tomato, 1 can (795 g)
  • 1 cup shredded mexican cheese blend (100 g)
  • sour cream, for serving
  • scallion, thinly sliced, for serving
Instructions
  1. Preheat the oven to 400°F (200°C).
  2. In a liquid measuring cup or medium bowl, whisk the eggs and milk until well-combined.
  3. In a large bowl, add the flour, cornmeal, salt, baking powder, and baking soda, and whisk to combine.
  4. Make a well in the center of the dry ingredients, then pour in the wet ingredients and whisk until smooth. Add the melted butter and stir to combine.
  5. Grease a 9x13-inch (23x33-cm) glass baking dish with nonstick spray and line with parchment paper.
  6. Pour the cornbread batter into the pan, smoothing the top with a spatula.
  7. Bake for 25 minutes, or until a toothpick comes out clean. Let cool for about 10 minutes.
  8. In a large pan, heat the olive oil over medium heat. Add the onion and cook until softened, stirring frequently, about 5 minutes.
  9. Add the ground beef and break apart with a wooden spoon into small pieces. Add the salt, pepper, paprika, garlic powder, chili powder, and cumin. Cook, stirring frequently, until the ground beef is cooked through, about 5 minutes.
  10. Add the crushed tomatoes and stir. Simmer for 10 minutes.
  11. Using the bottom of a utensil with a handle that is about 1-inch (2 cm) in diameter, poke multiple holes in the cornbread.
  12. Pour the chili over the cornbread and smooth the top with a spatula. Sprinkle the cheese over the chili.
  13. Bake for 3 minutes, or until the cheese is melted.
  14. Slice and serve with sour cream, scallions, and cilantro.
  15. Enjoy!

Watch the recipe video here:

Chili-Cheese Corn Bread Poke Cake

Totally making this savory poke cake for my next birthday ?Get the recipe: https://tasty.co/recipe/chili-cheese-corn-bread-poke-cake

Posted by Tasty on Saturday, August 25, 2018
Dessert

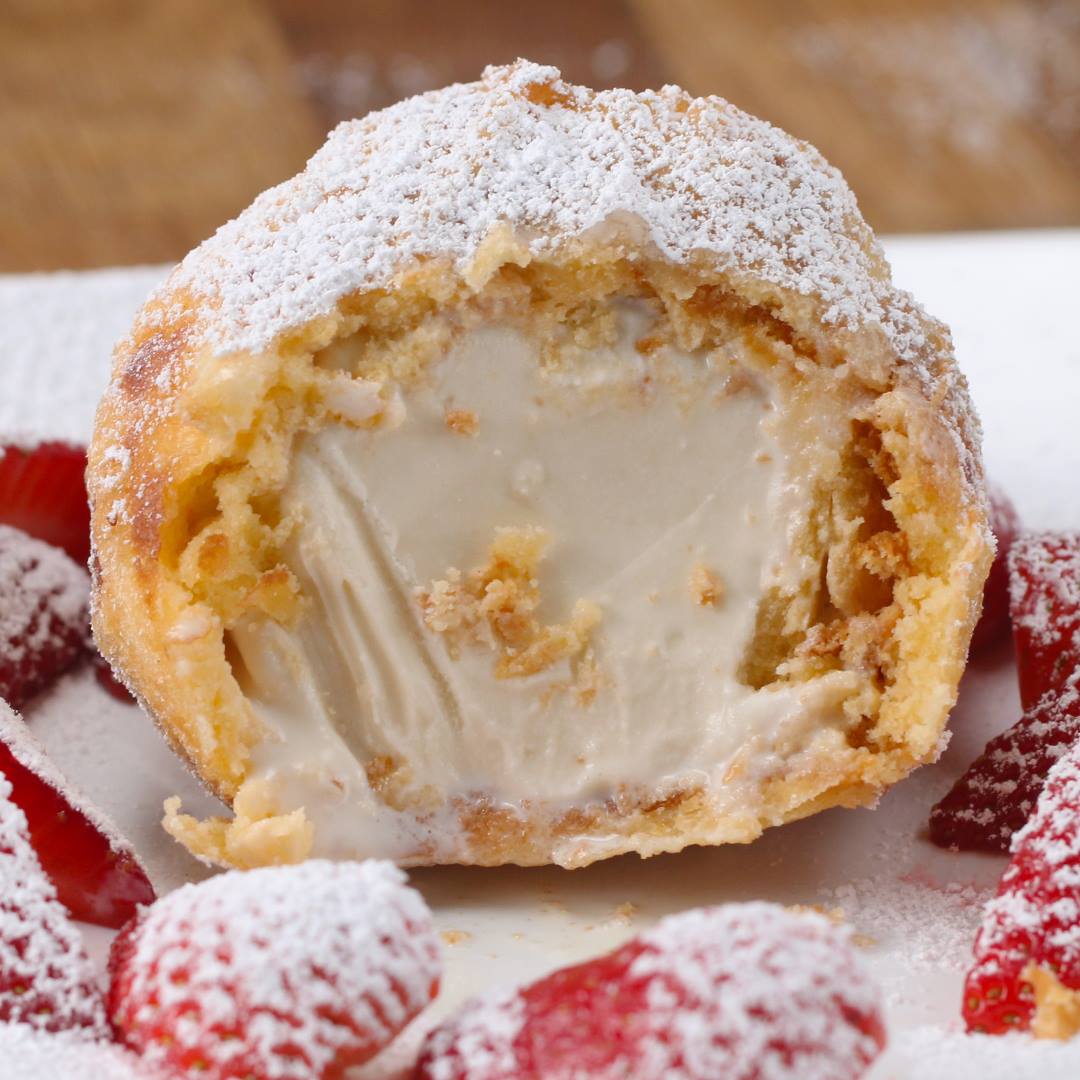
Tempura Fried Ice Cream

Tempura Fried Ice Cream
Fried ice cream = the ultimate summer fair food! But you can make it at home ?
Author:
Cuisine: American
Recipe type: Dessert
Ingredients
  • 2 pt ice cream (690 g)
  • 11 oz pound cake, 2 loaves (310 g)
  • 1 cup all-purpose flour (125 g)
  • 1 egg
  • 1 cup cold water (235 g)
  • oil, for frying
Instructions
  1. Scoop out 6 balls of ice cream onto a parchment paper-lined baking sheet, and freeze for at least an hour, or until firm.
  2. Slice pound cake into 1-2 inch (2 ½-5 cm) slices.
  3. Lay three slices of pound cake on plastic wrap side by side and flatten with a rolling pin.
  4. Wrap frozen ice cream ball in pound cake so it’s fully enclosed. Freeze for at least an hour, or until firm.
  5. Make tempura batter by mixing flour, egg, and water a little at a time.
  6. Heat oil to 400˚F (200˚C).
  7. Coat the wrapped ice cream in tempura batter.
  8. Carefully lower the coated ice cream into the oil and cook until golden brown, 15-30 seconds. Don’t cook for too long or else the ice cream will melt.
  9. Remove excess oil by patting with a paper towel.
  10. Serve immediately with your toppings of choice.
  11. Enjoy!

Watch the recipe video here:

Deep Fried Ice Cream

Fried ice cream = the ultimate summer fair food! But you can make it at home ?FULL RECIPE: https://tasty.co/recipe/tempura-fried-ice-cream

Posted by Tasty on Monday, May 28, 2018

Dessert

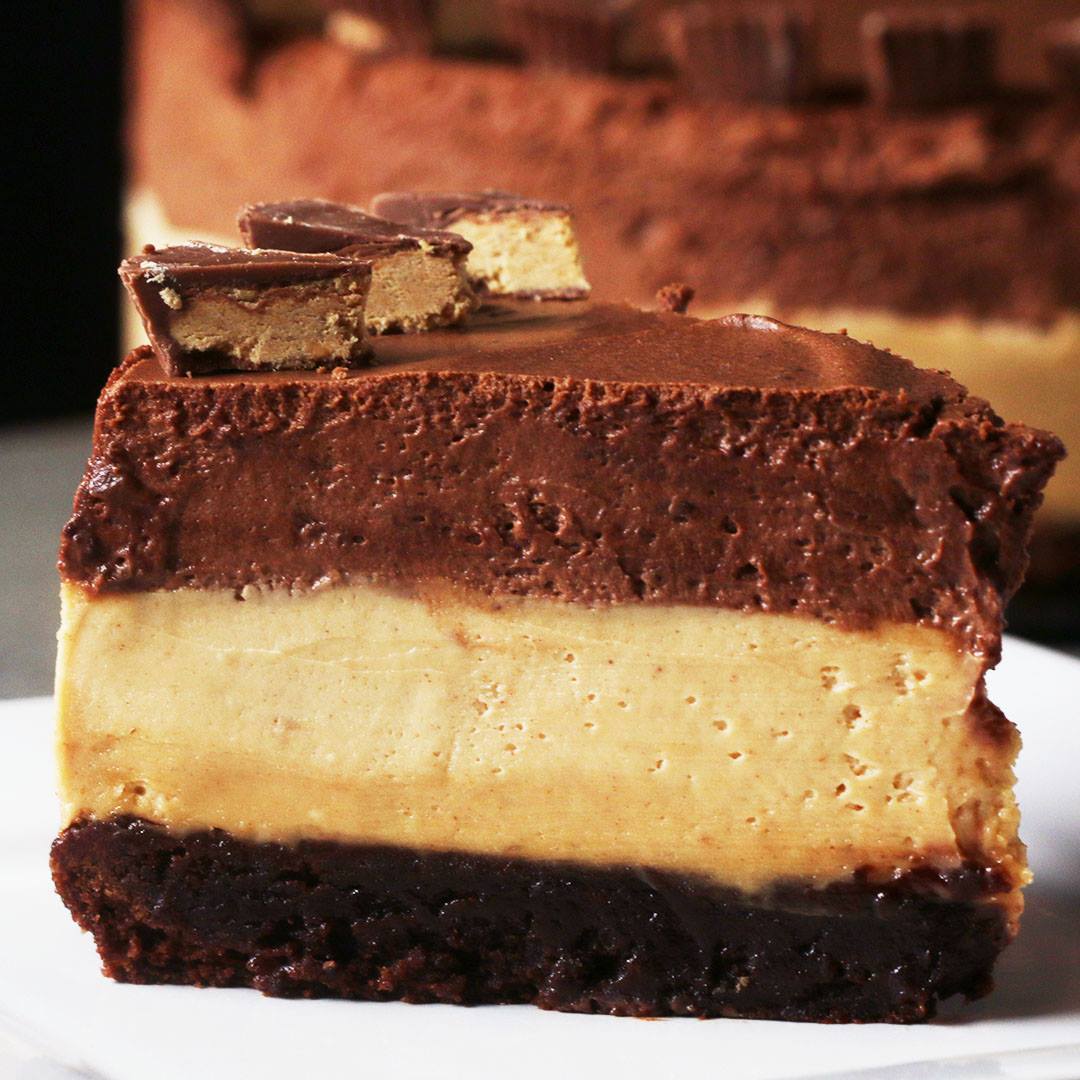
Chocolate Peanut Butter Mousse ‘Box’ Cake

Chocolate Peanut Butter Mousse 'Box' Cake
This chocolate peanut butter mousse cake is so decadent ?
Author:
Cuisine: American
Recipe type: Dessert
Ingredients
BROWNIE LAYER
  • 18 oz brownie mix, 1 package (510 g)
  • 2 large eggs
  • ½ cup vegetable oil (120 mL)
  • 3 tablespoons water
PEANUT BUTTER MOUSSE
  • ½ teaspoon gelatin
  • 1 tablespoon water
  • 1 cup smooth peanut butter (240 g)
  • ½ cup powdered sugar (60 g)
  • 1 ½ cups whipped cream (90 g)
CHOCOLATE MOUSSE
  • ½ teaspoon gelatin
  • 1 tablespoon water
  • 1 ½ cups chocolate chips (260 g)
  • 1 ½ cups heavy cream (360 mL)
  • 1 ½ cups whipped cream (90 g)
  • 6 peanut butter cups, for serving
Instructions
  1. Preheat the oven to 325°F (160°C).
  2. Make the brownie layer: in a large bowl, combine the brownie mix, eggs, vegetable oil, and water. Stir until the batter is smooth and thick.
  3. Pour the batter into an 8-inch (20-cm) springform pan and smooth the top with a spatula or knife.
  4. Bake for 25 minutes. Remove from oven and use a spatula to press down the top. Let cool to room temperature.
  5. Make the peanut butter mousse: in a small bowl combine the gelatin and water, and set aside.
  6. In a large bowl, mix the peanut butter and powdered sugar until smooth and shiny.
  7. Microwave the gelatin mix for 10 seconds, then mix into the peanut butter until thick and lumpy. Gently fold in half the whipped cream. Once incorporated, fold in the remaining whipped cream.
  8. Pour into the springform pan over the brownie base and smooth the top with a spatula or knife. Freeze for 20 minutes.
  9. Make the chocolate mousse: in a small bowl, combine the gelatin and water, and set aside.
  10. In a large bowl, combine the chocolate chips and heavy cream. Microwave in 20-second increments, stirring between each, until melted.
  11. Microwave the gelatin for 10 seconds, then add to chocolate mixture. Gently fold in half of the whipped cream. Once incorporated, fold in the remaining whipped cream.
  12. Pour the batter into the springform pan over the peanut butter layer and smooth with a spatula or knife. Freeze overnight.
  13. Remove cake from the freezer and release the springform. Cut the chocolate peanut butter cups into sixths and evenly place around the rim of the cake, or decorate as desired!
  14. Let the cake thaw for 15 minutes, then serve.
  15. Enjoy!

Watch the recipe video here:

Chocolate Peanut Butter Mousse Cake

This chocolate peanut butter mousse cake is so decadent ?FULL RECIPE: https://tasty.co/recipe/chocolate-peanut-butter-mousse-box-cake

Posted by Proper Tasty on Friday, August 24, 2018

Dessert

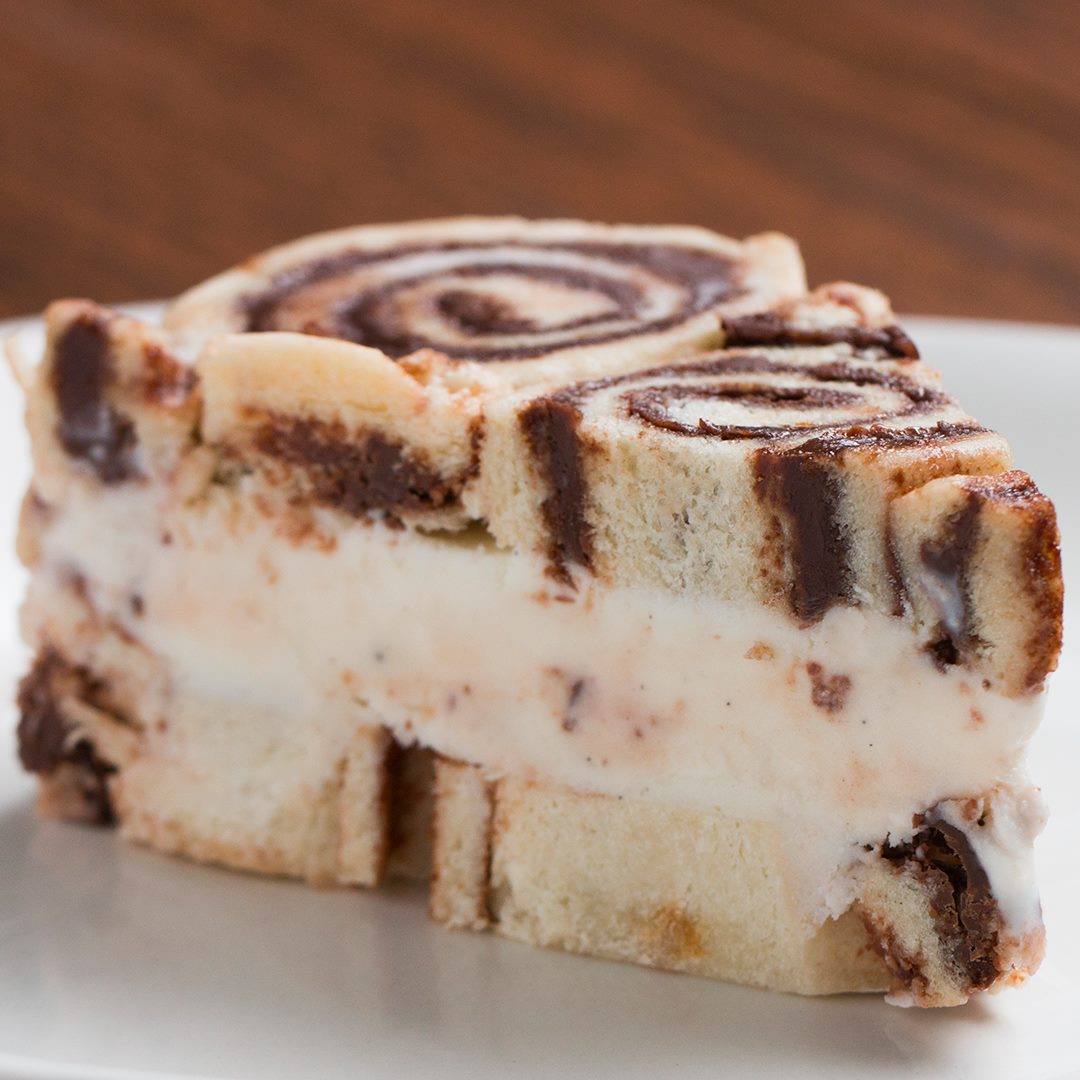
Ice Cream Sandwich Swirl Cake

Ice Cream Sandwich Swirl Cake
Let these ice cream swirl sandwiches take you for a spin! ?
Author:
Cuisine: American
Recipe type: Dessert
Ingredients
  • 18 slices sandwich bread, crusts removed
  • ¼ cup unsalted butter, ½ stick, melted (55 g)
  • 1 cup chocolate hazelnut spread, divided (225 g)
  • 3 cups vanilla ice cream, softened (455 g)
Instructions
  1. On a large cutting board, lay out 9 slices of bread in a 3x3 grid. Brush the melted butter where the bread slices will touch, then overlap the bread pieces until you have one large square of bread.
  2. Cover with another cutting board and a heavy pan to weigh it down and let sit for 10 minutes.
  3. Remove the pan and cutting board and roll the square with a rolling pin to flatten.
  4. Pour half of the hazelnut spread on the sheet of bread and spread evenly, leaving a 1-inch (1 cm) gap around the edges.
  5. Starting at the bottom, carefully roll up the bread to form a log and wrap in plastic wrap.
  6. Using the remaining 9 slices of bread and remaining hazelnut spread, make another log.
  7. Freeze for 20 minutes.
  8. Slice the chilled logs into ½-inch (1 cm) thick rounds. There will be about 18 slices per log.
  9. Place the rolls from 1 log in a parchment-lined 10-inch (25-cm) springform pan. Slice any extra rolls into smaller pieces to fill in the gaps between the whole rolls.
  10. Place a sheet of parchment on top of the rolls and use a smaller cake pan to press the rolls together, creating a compressed layer. Remove the cake pan and parchment and freeze until solid, about 1 hour.
  11. Scoop softened ice cream on top of the rolls and spread evenly. Freeze until solid, about 1 hour.
  12. Add another layer of rolls from the second log on top of the ice cream layer, filling the gaps with smaller pieces of rolls again. Place a sheet of parchment paper on top and use the smaller cake pan to compress the rolls. Remove the pan and parchment and freeze for another hour.
  13. Remove from the springform pan, slice, and serve.
  14. Enjoy!

Watch the recipe video here:

Ice Cream Swirl Sandwiches

Let these ice cream swirl sandwiches take you for a spin! ?Get the recipe: https://tasty.co/recipe/ice-cream-sandwich-swirl-cake

Posted by Tasty on Friday, August 24, 2018

Dessert

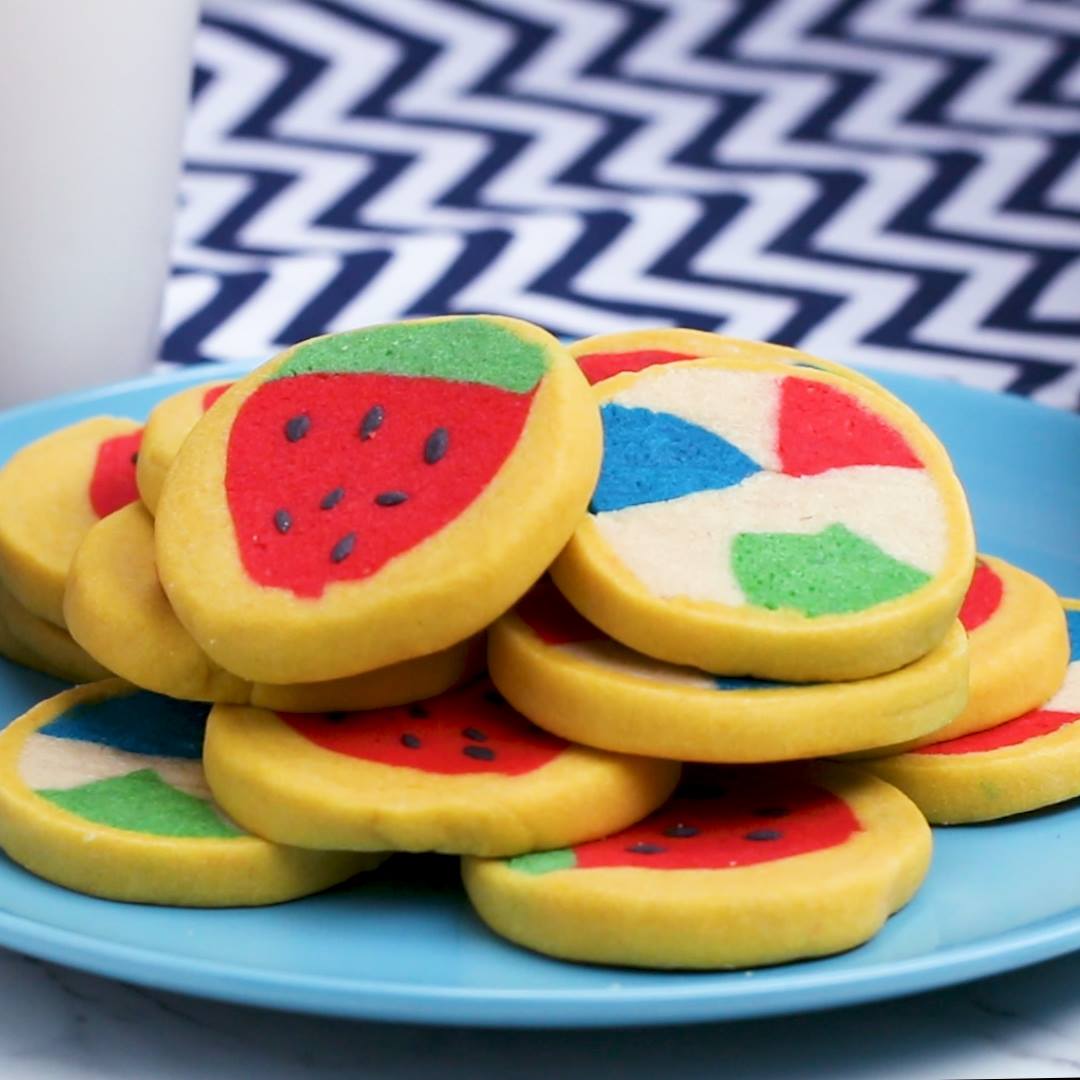
Double-Sided Sugar Cookies

Double-Sided Sugar Cookies
Double-Sided Sugar Cookies recipe.
Author:
Cuisine: American
Recipe type: Dessert
Ingredients
  • 1 ½ cups unsalted butter, 3 sticks, softened (345 g)
  • 3 ¾ cups powdered sugar (450 g)
  • 1 ½ teaspoons vanilla extract
  • 4 large eggs
  • 5 cups all-purpose flour (625 g)
  • ½ teaspoon salt
  • 10 drops yellow food coloring
  • 10 drops red food coloring
  • 10 drops blue food coloring
  • 5 drops black food coloring
  • 10 drops green food coloring
SPECIAL EQUIPMENT
  • electric hand mixer
  • food-safe glove
Instructions
  1. Add the butter, powdered sugar, and vanilla to a large bowl. Beat with an electric hand mixer on low speed until smooth and creamy.
  2. Add the eggs 1 at a time and beat on medium speed to incorporate, scraping down the sides of the bowl with a spatula halfway through.
  3. Add the salt and incorporate the flour in 3 additions, scraping down the sides of the bowl as needed, until a dough forms.
  4. Turn the dough out onto a clean, floured surface and form into a ball. Cut the ball of dough in half. Cut one of the halves in half, and the other half into thirds, so you have 5 pieces total. Take one of the larger pieces and cover the rest with plastic wrap so they don’t dry out.
  5. Wearing gloves, add the yellow food coloring and knead into the dough until fully incorporated. Cover and set aside each piece of dough after working the color in. Dye the other large piece with red food coloring. Set aside one of the smaller pieces to remain plain. Remove a 1-tablespoon chunk from 1 of the 2 remaining pieces and dye with black food coloring. Dye the rest of that piece blue. Dye the remaining piece of dough green.
  6. Roll out 1 tablespoon of the the plain dough into a 6-inch-long (15-cm) rope. Roll the rest into a 6-inch-long (15-cm) log and cut crosswise into thirds. Shape the logs into 6-inch-long (15-cm) triangle wedges.
  7. Roll a third of the red dough into a 6-inch-long (15-cm) triangle wedge.
  8. Roll the blue piece into a 6-inch-long (15-cm) triangle wedge. Roll half of the green dough into a 6-inch-long (15-cm) triangle wedge.
  9. Form a beach ball shape by placing the plain rope in the middle and alternating the plain dough triangle wedges with the colored triangle wedges. Roll together to fuse, then wrap tightly in plastic wrap and chill in the refrigerator for 30 minutes while you assemble the other shape.
  10. Roll the remaining red dough into a 6-inch-long (15-cm) log, then shape into a triangle wedge.
  11. Roll the remaining green dough into a 6-inch-long (15-cm) log, then flatten.
  12. Place the red triangle on top and trim the edges with a bench scraper or knife.
  13. Cut the yellow dough in half. Set aside one half, then cut the other half in half again and roll into 2 6-inch-long (15-cm) logs and flatten slightly. Place the yellow pieces over each exposed side of the red dough, then pinch the yellow and green dough together to completely cover the red. Roll together to fuse, then wrap tightly in plastic wrap and chill in the refrigerator for 30 minutes.
  14. Use a ruler and a knife to score ¼-inch (6 mm) marks across both chilled logs. Cut into slices with a sharp knife, cleaning the knife after each slice, if necessary.
  15. Roll out the rest of the yellow dough to make a 6-inch (15-cm) by 12-inch (30-cm) rectangle.
  16. Build a single dough log by stacking alternating watermelon slices and beach ball slices over the center of the yellow dough. Wrap the yellow dough around the log, roll together to fuse, then wrap tightly in plastic wrap and chill in the refrigerator for 30 minutes.
  17. Preheat the oven to 300˚F (150˚C). Line a baking sheet with parchment paper.
  18. Use a ruler and a knife to score ¼-inch (6 mm) marks across the chilled dough. Cut into slices with a sharp knife, cleaning the knife after each slice, if necessary. Each slice should have a beach ball side and a watermelon side.
  19. Set the cookies on the prepared baking sheet, watermelon-side up. Break off tiny pieces of the black dough, roll into seeds, and press onto the watermelon cookies.
  20. Bake the cookies for 10-12 minutes, or just until they begin to start turning golden brown. Cool on a wire rack for 5-10 minutes before serving.
  21. Enjoy!

Watch the recipe video here:

Double-Sided Slice & Bake Cookies

Whichever side you choose, it's bound to be delicious ?Get the recipe: https://tasty.co/recipe/double-sided-sugar-cookies

Posted by Tasty on Thursday, August 23, 2018

Dessert

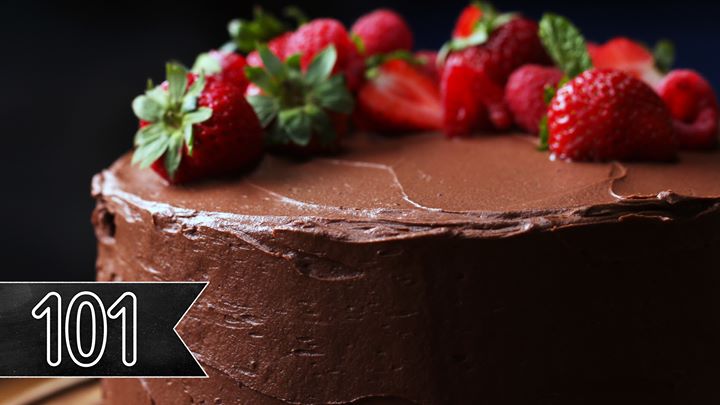
The Best Chocolate Cake

The Best Chocolate Cake
Drool with us over this decadent, rich dessert.
Author:
Cuisine: American
Recipe type: Dessert
Ingredients
CAKE
  • 1 ½ cups flour (185 g)
  • 1 cup dutch processed cocoa powder (120 g)
  • 1 teaspoon salt
  • 1 ½ teaspoons baking soda
  • ½ teaspoon baking powder
  • 1 ½ cups stout (360 mL)
  • 1 tablespoon vanilla extract
  • 1 tablespoon espresso powder
  • 1 cup butter (230 g)
  • 1 ½ cups sugar (300 g)
  • 3 eggs
  • ½ cup mayonnaise (145 g)
  • 4 oz dark chocolate, chopped (115 g)
BUTTERCREAM
  • 1 ½ cups butter, softened (345 g)
  • 1 tablespoon vanilla extract
  • ½ cup dutch processed cocoa powder (60 g)
  • 5 cups powdered sugar (600 g)
  • 5 tablespoons milk
  • fresh fruit, to decorate
Instructions
  1. Grease and line three 8-inch (20 cm) cake tins with parchment paper.
  2. In a large bowl, sift together the flour, cocoa powder, salt, baking soda, and baking powder. Set aside.
  3. In a large glass measuring cup, combine the stout, vanilla, and espresso powder. Set aside.
  4. In a large mixing bowl, cream together the butter and sugar until it is light and fluffy, about 5 minutes, scraping down the sides occasionally to ensure all the ingredients are being evenly creamed together.
  5. Beat in the eggs, one at a time, ensuring each egg is fully incorporated before adding the next.
  6. Add the mayonnaise and beat until the mixture is smooth and creamy.
  7. Preheat oven to 325˚F (160˚C).
  8. Alternate adding the prepared dry and wet ingredients to the batter. Starting with about ⅓ of the dry ingredients, beat until incorporated. Then add ⅓ of the liquid ingredients, mixing until the batter comes together. Continue until all the wet and dry ingredients have been incorporated.
  9. Using a rubber scraper, fold the dark chocolate chunks into the batter.
  10. Distribute the batter evenly between the 3 prepared cake tins.
  11. Bake for about 35 minutes, or until a toothpick inserted into the center of the cake comes out clean.
  12. Place the cakes on a cooling rack and leave to cool for about 10-15 minutes, until the outside of the pan is cool enough to touch.
  13. Once the cakes have cooled, loosen the edges using a butter knife. Then place a large plate over the tin and invert to release the cake from the pan. Remove the parchment paper from the bottom of the cake and slide the cake back onto the cooling rack to cool completely. Repeat for the remaining two layers.
  14. While your cakes are cooling, prepare the buttercream.
  15. In a large bowl, beat together the butter and vanilla.
  16. Gradually add in the cocoa powder, powdered sugar, and milk, continuously beating until all the ingredients have been incorporated and the frosting is light and fluffy.
  17. Frost and decorate to your liking.
  18. Slice and serve.
  19. Enjoy!

Watch the recipe video here:

How To Make The Ultimate Chocolate Cake

Drool with us over this decadent, rich dessert.Here are professional tips for making the ultimate Chocolate Cake.FULL RECIPE: https://tasty.co/recipe/the-ultimate-chocolate-cake

Posted by Tasty on Tuesday, April 10, 2018

Dessert

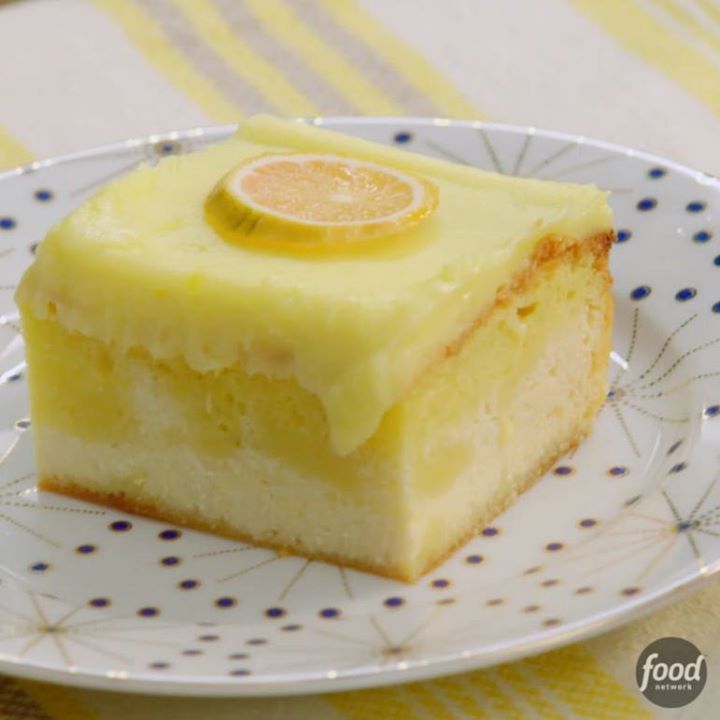
Lemon Love Cake

Lemon Love Cake
Recipe of the Day: Valerie Bertinelli's Lemon Love Cake ?
Author:
Cuisine: American
Recipe type: Dessert
Ingredients
  • Unsalted butter, for greasing
  • All-purpose flour, for dusting
  • One 16.5-ounce package lemon cake mix
  • 1 lemon, zested and juiced
  • One 32-ounce container part-skim ricotta
  • Two 8-ounce containers mascarpone
  • 4 large eggs
  • ¾ cup sugar
  • 1 teaspoon vanilla extract
  • 1 cup whole milk
  • One 3.4-ounce package lemon instant pudding mix, such as Jell-O
Instructions
  1. Preheat the oven to 350 degrees F. Grease a 13-by-9-inch baking pan with butter and dust with flour.
  2. Prepare the cake mix according to package directions, then add 2 tablespoons lemon juice. Pour the batter into the prepared baking pan and set aside.
  3. Beat the ricotta, lemon zest and 4 ounces of the mascarpone with an electric mixer on medium-low speed until smooth. Add the sugar and vanilla; beat until smooth. Add the eggs, one at a time, beating after each addition until just combined. Gently spread the ricotta mixture evenly over the cake batter.
  4. Bake until the cake layer has risen to the top (the ricotta and cake layers switch places) and a wooden pick inserted in the center of the cake comes out clean, 50 to 60 minutes. Let cool completely, about 30 minutes.
  5. Meanwhile, beat the remaining 12 ounces mascarpone with an electric mixer on medium speed until smooth. Gradually add the milk, beating until smooth. Add the pudding mix and beat until smooth. Let stand until thickened, about 5 minutes. Spread the frosting over the cooled cake.

Watch the recipe video here:

How To Make Valerie's Lemon Love Cake

Recipe of the Day: Valerie Bertinelli's Lemon Love Cake ?

Posted by Food Network on Sunday, September 24, 2017

Dessert

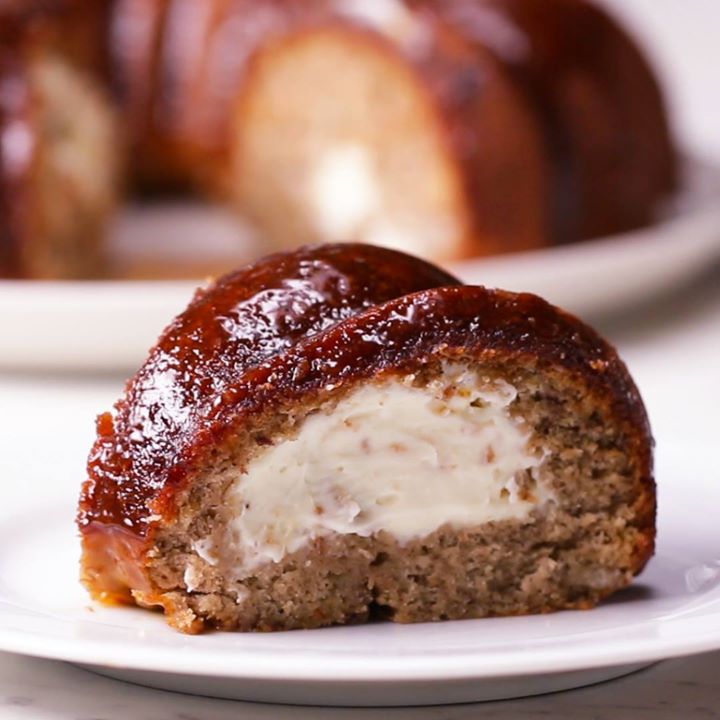
Cheesecake-Stuffed Banana Bread Ring

Cheesecake-Stuffed Banana Bread Ring
This cheesecake-stuffed banana bread ring is everything you've been dreaming of ? ? ✨!
Author:
Cuisine: American
Recipe type: Dessert
Ingredients
  • nonstick cooking spray
CHEESECAKE
  • 16 oz cream cheese, softened (450 g)
  • ½ cup powdered sugar (60 g)
  • 1 teaspoon vanilla extract
BANANA BREAD
  • 4 ripe bananas
  • 1 ½ cups all-purpose flour (190 g)
  • ½ cup granulated sugar (100 g)
  • 1 teaspoon baking powder
  • 4 tablespoons vegetable oil
  • 1 egg
  • 1 teaspoon baking soda
  • ¼ teaspoon salt
  • 1 teaspoon cinnamon
  • 1 teaspoon vanilla extract
CARAMEL
  • 1 cup granulated sugar (200 g)
  • 6 tablespoons butter
  • ½ cup heavy cream, room temperature (120 mL)
Instructions
  1. Preheat the oven to 350°F (180°C). Grease a Bundt pan with nonstick spray.
  2. In a medium bowl, whisk together the cream cheese, powdered sugar, and vanilla, stirring until smooth. Refrigerate.
  3. In a large bowl, mash the bananas with a fork. Add the flour, sugar, baking powder, oil, egg, baking soda, salt, cinnamon, and vanilla. Stir until just combined, without overmixing. Pour half of the batter into the prepared Bundt pan.
  4. With an ice cream scoop, scoop the cream cheese mixture evenly onto the cake batter in the pan, making sure that it does not touch the sides. Pour the rest of the banana bread batter on top and smooth it evenly.
  5. Bake for 30 minutes, or until the banana bread is golden.
  6. To make the caramel glaze, heat the sugar in a medium saucepan over medium-high heat. Once it begins to melt, stir with a wooden spoon or whisk. When it reaches a boil, add the butter and stir until melted. Remove from the heat, add the heavy cream, and immediately stir until incorporated. (Make sure the cream is at room temperature or else it will curdle the sauce.) Allow the caramel cool and thicken.
  7. Invert the banana bread onto a wire rack set over a baking sheet.
  8. Pour the caramel glaze over the cake, letting the excess drip off. Once the glaze has set, slice the cake.
  9. Enjoy!

Watch the recipe video here:

This cheesecake-stuffed banana bread ring is everything you've been dreaming of ? ? ✨!FULL RECIPE: https://tasty.co/recipe/cheesecake-stuffed-banana-bread-ring

Posted by Tasty on Saturday, March 10, 2018

Dessert

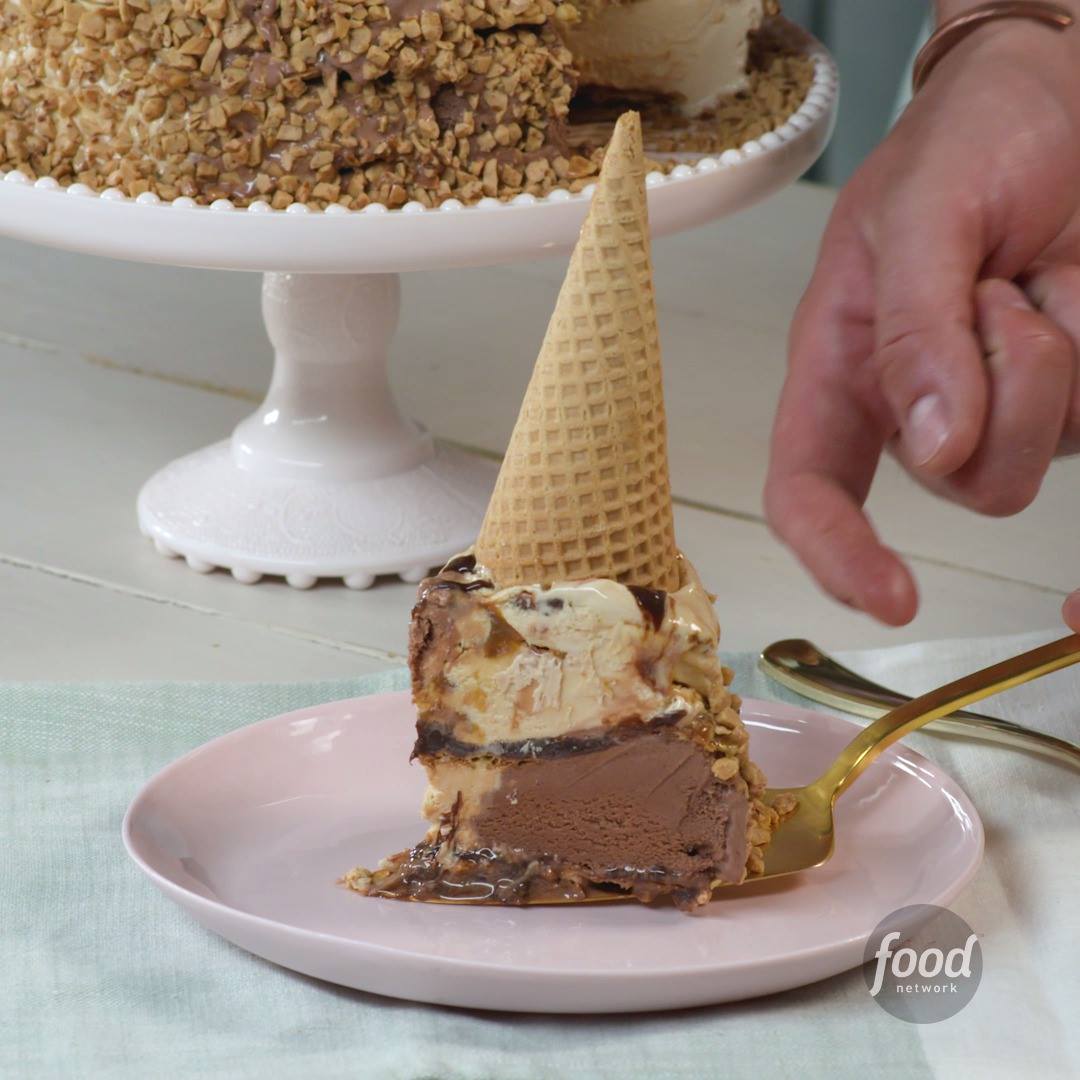
Salted Caramel Ice Cream Cone Cake

Salted Caramel Ice Cream Cone Cake
Salted Caramel Ice Cream Cone Cake recipe.
Author:
Cuisine: American
Recipe type: Dessert
Ingredients
  • Unsalted butter, softened, for the pan
  • 14 pizzelle (thin Italian waffle cookies) or thin butter cookies
  • ¾ cup chocolate fudge sauce
  • 1 quart vanilla-caramel swirl ice cream, slightly softened
  • 1 quart chocolate ice cream, slightly softened
  • ½ cup dulce de leche or caramel sauce
  • ½ teaspoon flaky sea salt
  • 5 sugar cones
  • ¼ cup toffee bits
Instructions
  1. Cut a 24-by-6-inch strip of parchment paper. Butter the side of an 8-inch springform pan, then line the side with the parchment; the paper will extend above the rim of the pan so you can build a tall cake. Cover the bottom of the pan with half of the pizzelle cookies, breaking them into smaller pieces as needed to cover the surface. Spread ¼ cup fudge sauce over the cookies. Pack about half of the vanilla-caramel and chocolate ice cream into the pan, alternating scoops of each flavor, until the bottom is covered. Drizzle with ¼ cup dulce de leche and sprinkle with ¼ teaspoon sea salt. Top with the remaining pizzelle cookies, pressing gently to pack in the ice cream and create an even surface. Spread ¼ cup fudge sauce over the pizzelle cookies. Top with scoops of the remaining vanilla-caramel and chocolate ice cream. Drizzle with the remaining ¼ cup each dulce de leche and fudge sauce and sprinkle with the remaining ¼ teaspoon sea salt. Arrange the ice cream cones, point-side up, on top. Freeze until firm, at least 6 hours or overnight. Remove the side of the springform pan and the parchment. Press the toffee bits into the side of the cake. Serve immediately or freeze for up to 2 days.

Watch the recipe video here:

How To Make Salted Caramel Ice Cream Cone Cake

Recipe of the Day: Salted Caramel Ice Cream Cone Cake ?? Save the recipe: http://bit.ly/2MPfNiA.

Posted by Food Network on Sunday, August 19, 2018

Dessert

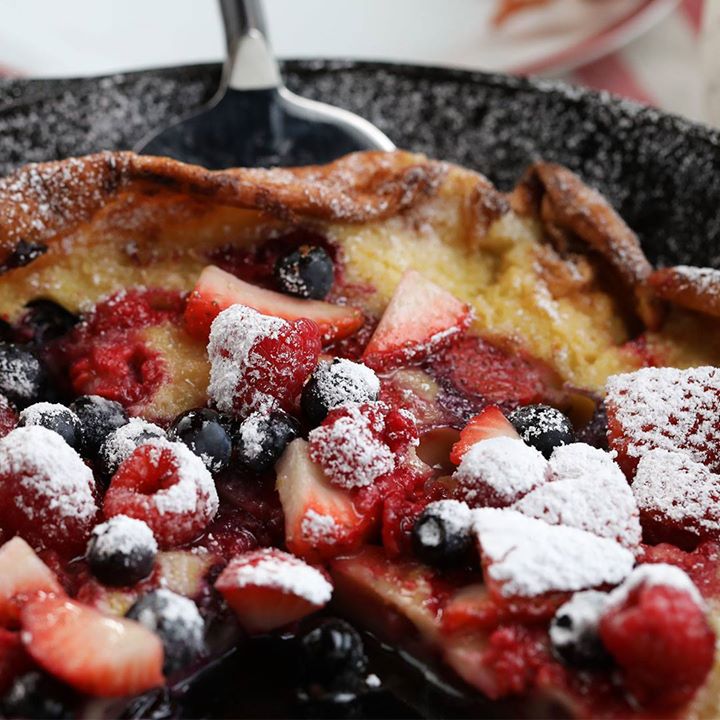
Mixed Berry Skillet Pancake

Mixed Berry Skillet Pancake
This Valentine’s Day, try this perfect brunch for two :strawberry::pancakes::cupid:
Author:
Cuisine: American
Recipe type: Dessert
Ingredients
  • 3 eggs
  • ⅓ cup sugar
  • Pinch of salt
  • ⅔ cup flour
  • ⅔ cup milk
  • 2 tablespoons Land O’Lakes Tub Butter
  • 1 cup berries, plus a ½ cup extra for garnish
  • Powdered sugar, garnish
Lemon Honey Butter
  • ¼ cup Land O’Lakes Tub Butter with Canola Oil, softened
  • Zest of 1 lemon and juice of ½
  • 2 teaspoons honey
Instructions
  1. Preheat oven to 425ºF.
  2. In a bowl, whisk the eggs. Add the sugar and salt and whisk well. Add the flour and milk and whisk until no lumps remain.
  3. Add the butter to an empty 10-inch cast-iron skillet. Place skillet in the oven and wait 1–2 minutes for the butter to melt. Watch carefully to make sure that the butter doesn’t burn.
  4. Remove the skillet from the oven and pour the batter in. Arrange the berries on top of the batter, but leave a 1-inch ring around the edges without berries.
  5. Bake pancake for 12 minutes, until golden brown and puffed.
  6. While pancake is baking, make the butter. In a bowl, whisk lemon zest, lemon juice, and honey into the softened butter until fully incorporated.
  7. Remove pancake from oven. Dust with powdered sugar, garnish with extra berries, and dot pancake with lemon honey butter. Serve!

Watch the recipe video here:

Mixed Berry Skillet Pancake

Mixed Berry Skillet PancakeThis Valentine’s Day, try this perfect brunch for two ? ? ?

Posted by Tasty on Friday, February 9, 2018