Brown Butter and Sage Gnocchi
Delicious homemade gnocchi with a simple brown butter and sage sauce
Full text & video
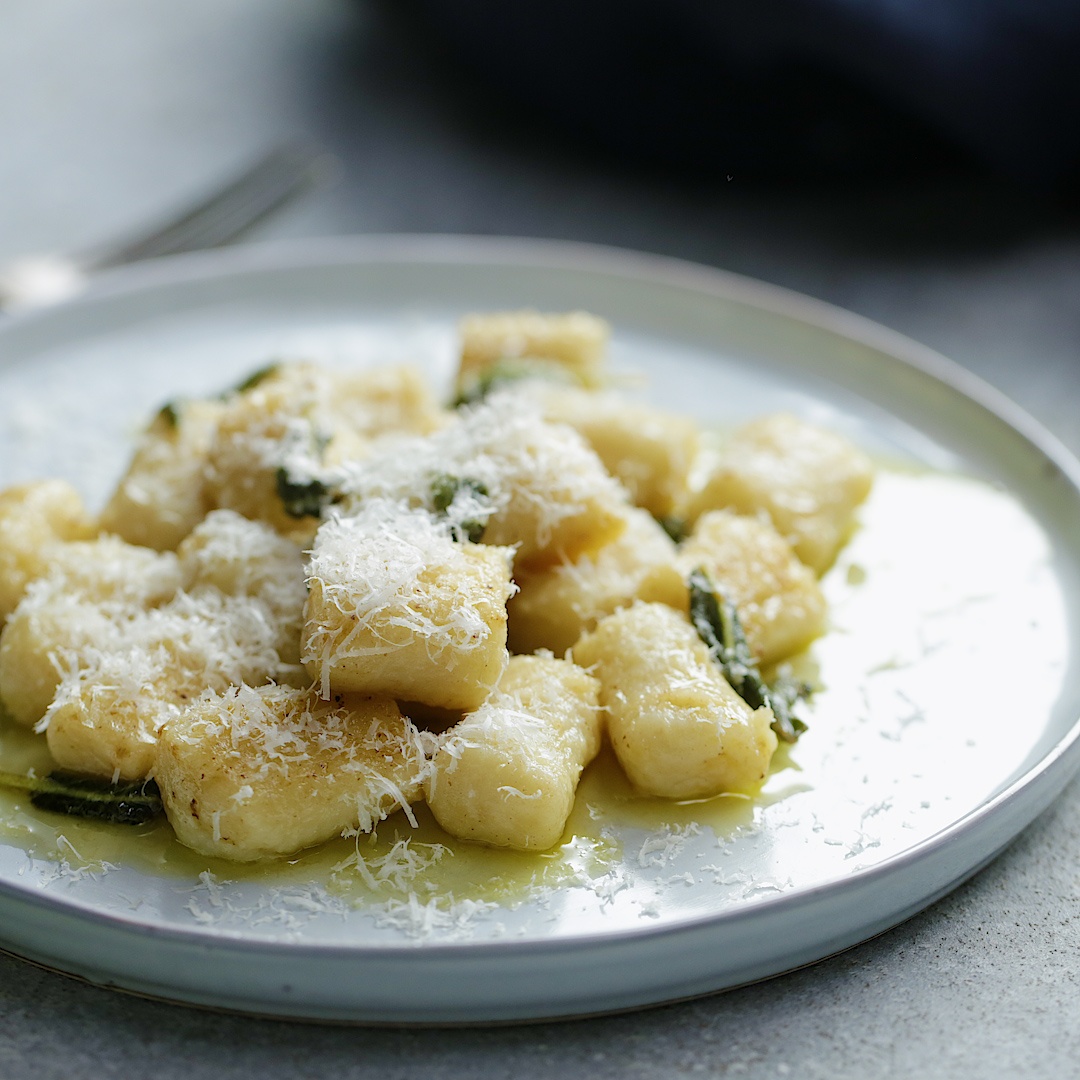
Delicious homemade gnocchi with a simple brown butter and sage sauce
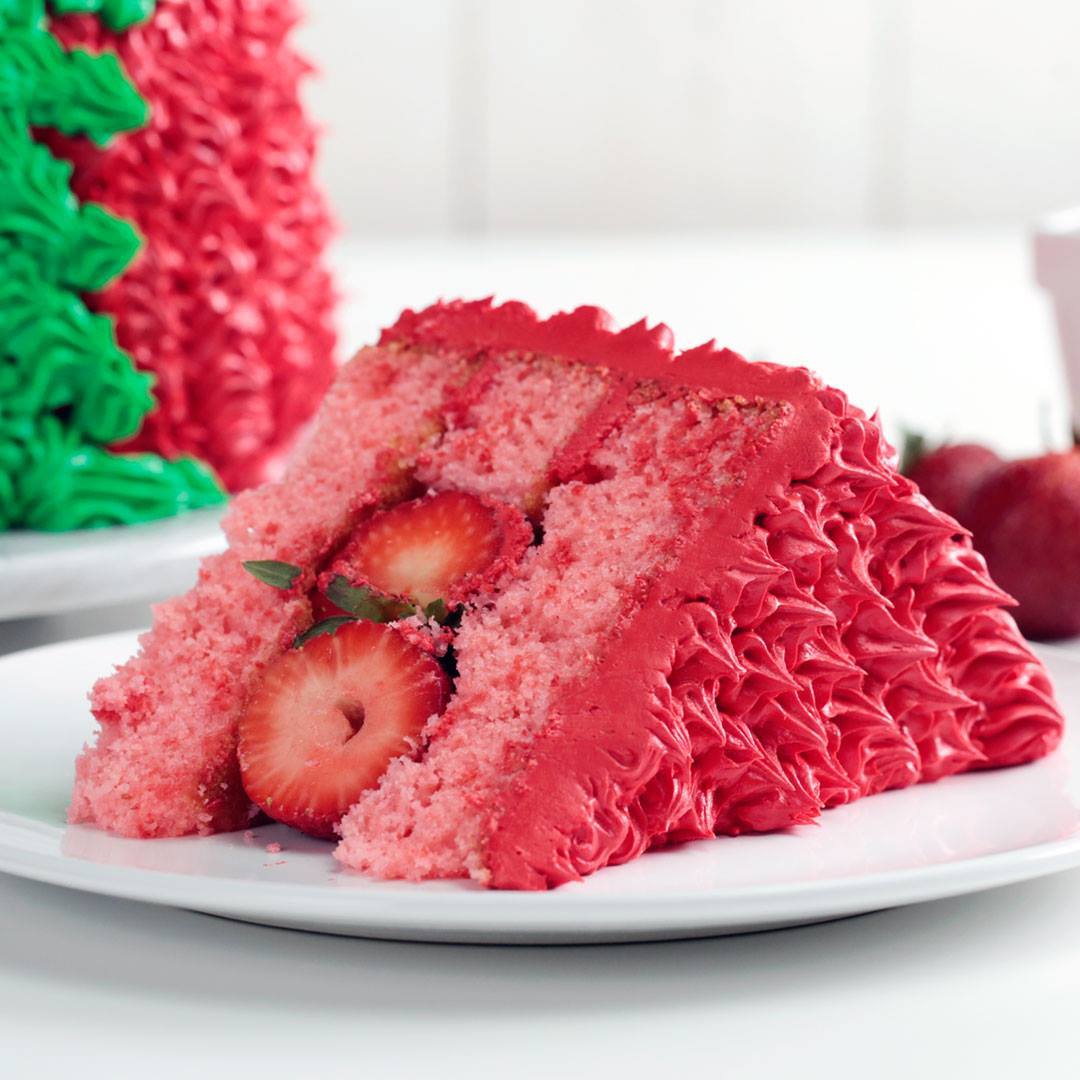
Oh, you love strawberries? Prove it.Taste for Yourself: https://taste.md/2Ljri0t
Posted by Tastemade on Sunday, June 3, 2018
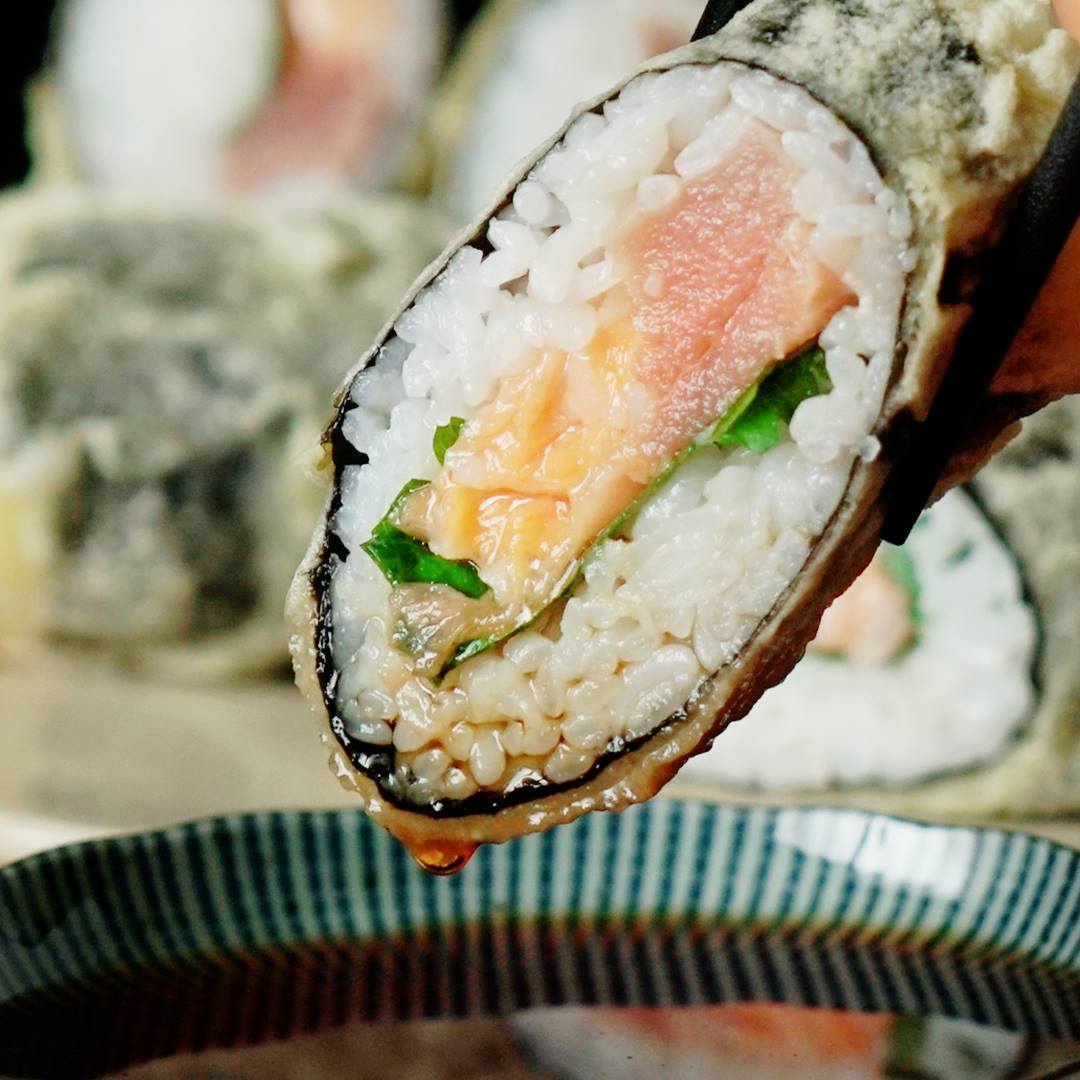
Making sushi literally couldn't get any easier. Taste for Yourself: https://taste.md/2Lif7B2?: Tastemade Japan
Posted by Tastemade on Sunday, June 3, 2018
Your mama made you, the least you can do is make her this.Taste for Yourself: taste.md/2FFMDhc
Posted by Tastemade on Monday, June 4, 2018

These churros will have you begging for s'more.Taste for Yourself: https://taste.md/2MpBc5t
Posted by Tastemade on Monday, August 20, 2018

Push it good, p-push it REAL GOOD.Get what you need to make this: https://taste.md/2orVVaF
Posted by Tastemade on Sunday, September 2, 2018
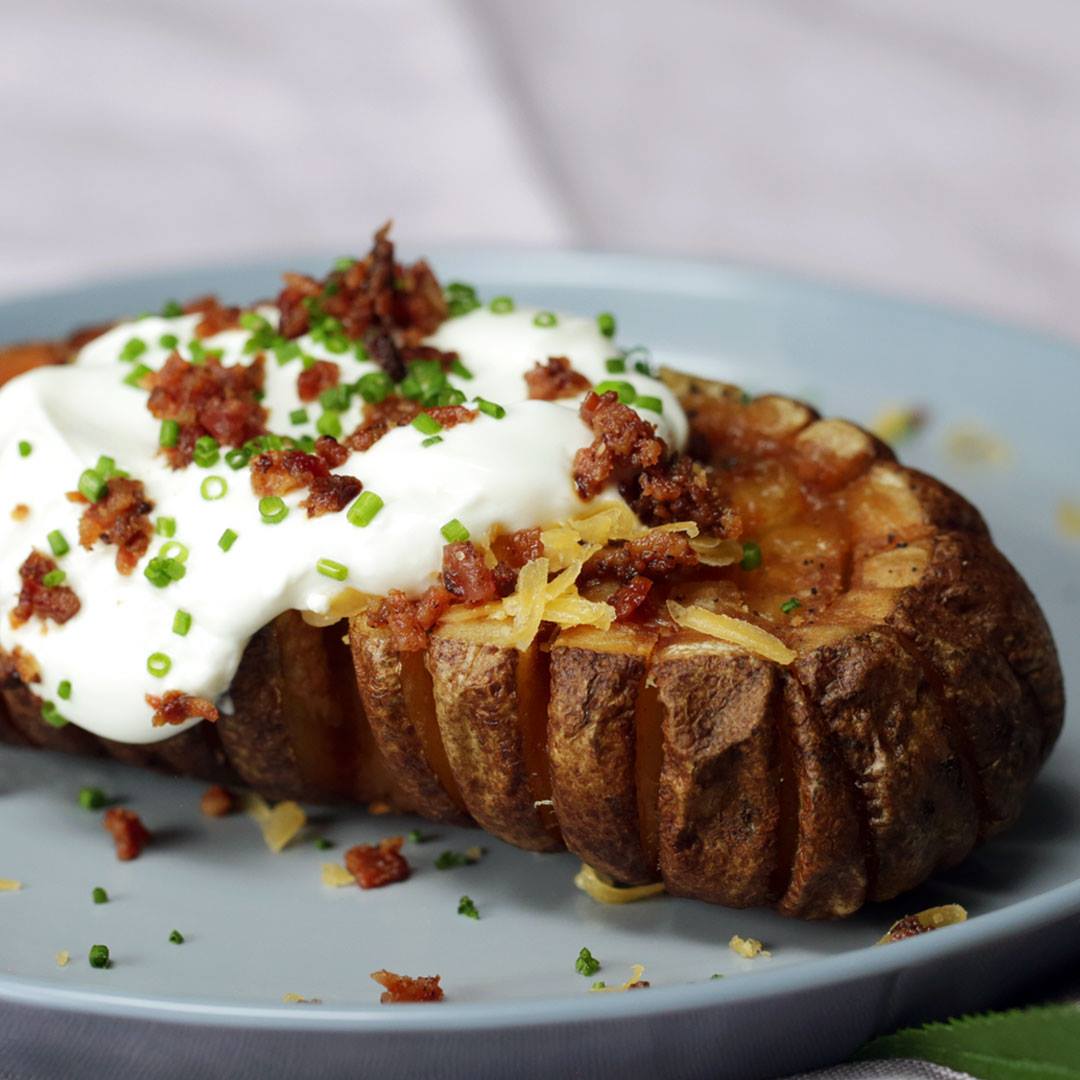
Easy Stuffed Blooming Potatoes
Flowers may bloom in Spring, but these 'tatoes bloom year around. Lucky you.Get what you need to make these: https://taste.md/2N7NAXH
Posted by Tastemade on Friday, August 31, 2018
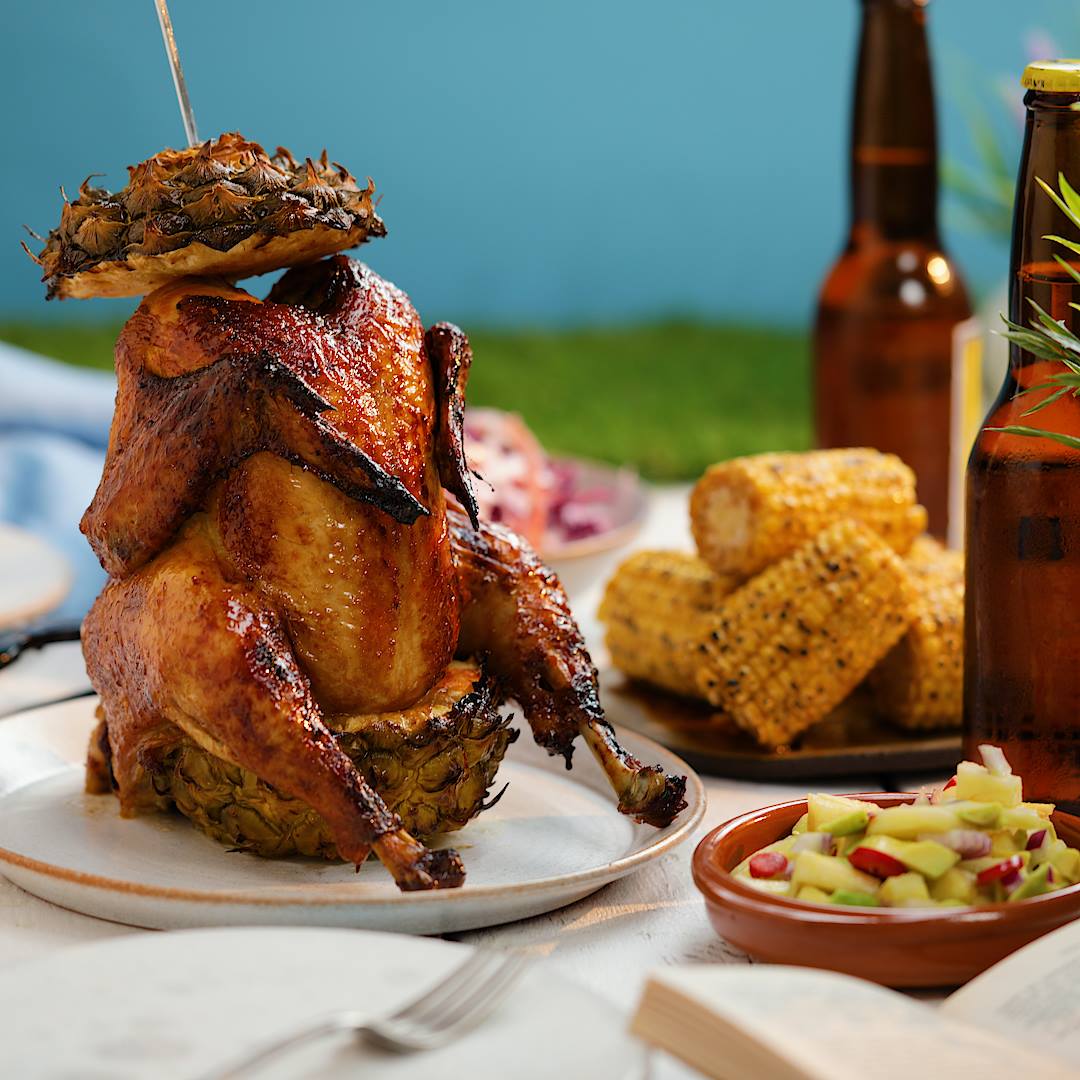
What have we done to this poor [crispy, juicy, delicious] chicken?!Taste for Yourself: https://taste.md/2vxhTwI
Posted by Tastemade on Sunday, August 12, 2018
What's creamy, dreamy, and now on the go?Taste for Yourself: https://taste.md/2OCQ2D4?: Tastemade Brasil
Posted by Tastemade on Thursday, August 2, 2018

Mushrooms are magical in more than one way. ?✨Taste for Yourself: https://taste.md/2LSsqfl?: The Scran Line
Posted by Tastemade on Wednesday, August 1, 2018